
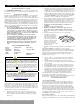
Installation Guide

6. Continue to install planks and push them into place. Place the tongue of the
board into the grooves of installed boards and press into the adhesive. As you
continue working across the floor try to maintain a six-inch minimum space
between end joints. Randomly install different lengths to avoid a patterned
appearance.
NOTE: Never strike a rubber mallet or hammer directly on the flooring to
engage the tongue-and-groove. This practice can damage the flooring and/or
the finish.
7. Remove the adhesive from the surface of the installed flooring as you work
– this will help to save time. A damp rag with water or mineral spirits will
remove adhesive. Frequently change towels to avoid leaving a haze on the
flooring surface. DO NOT use water to remove Urethane adhesives from the
finish.
8. As you approach the end wall it may be necessary to cut the width of the
last row – be sure to allow for the expansion space along the end wall. Once
the final cuts are made set planks into place.
9. After the floor is complete remove the straight edge and glue down the first
two boards.
10. Restrict foot traffic for a minimum of 6-8 hours and wait 24 hours before
permitting moving of furniture onto the floor.
11. Clean any wet adhesive from the flooring with a lightly dampened clean
cloth. If the adhesive has dried, use mineral spirits on a clean cloth. For
Urethane adhesive use the recommended urethane adhesive remover.
12. If specified in the adhesive instructions roll and cross roll floor with a 100-
150 lbs. (45-70 kg) roller at the end of the installation to ensure proper
transfer of adhesive.
When installing unfinished wood flooring, wait a minimum of 72 hours
before sanding.
NAIL OR STAPLE DOWN INSTALLATION GUIDELINES
Additional Tools and Material Needed:
Drill Tapping Block Compressor
Air Hose In-line Air Regulator Pneumatic Nailer/
Stapler
15 lb. Roofers Felt
Before you begin using the following instructions, please refer to the Pre-
Installation Job Prep information above.
NOTE: Our products are not warranted against squeaking, popping or
crackling when using staple-down or nail-down installation methods. Some
squeaking, popping or crackling is normal and possible when using staple-
down or nail-down installation methods. These symptoms may be aggravated
in arid areas or during dry conditions.
SET UP AND USE OF PNEUMATIC STAPLERS AND NAILERS
Minor occasional noises within the flooring are inherent to all staple/ nail-
down installations and can change as environmental changes occur. This is not
a manufacturing defect and is therefore not covered under our warranties (see
warranty brochure for complete warranty coverage). You can help reduce
squeaking, popping, and crackling by being sure that the subfloor is
structurally sound, does not have any loose decking or joists, and is swept
clean prior to installation. You should also be sure that your stapler or nailer is
setting the fastener properly, not damaging the planks, and that you are using
the correct nailing schedule.
For products greater than 5” in width, it is recommended to use a combination
glue down assist when using mechanical fasteners. Apply a urethane based
adhesive to the subfloor prior to installing the planks. Follow the standard
fastener schedule. *This installation method doesn’t require the use of a
traditional vapor retarder, which enables the glue to adhere to the subfloor
rather than the paper.
When used improperly, staples or cleats can damage wood flooring. If the
tool is not adjusted properly the staples/ cleats may not be positioned at the
proper angle and cause blistering, peaking, squeaking, or crackling of the
floor. Some models may require the use of an adapter to adjust for proper
thickness. Test the tool on a piece of scrap material first - set the stapler/ nailer
flush on the tongue side of the plank and install a staple/ cleat. Should the
staple/ cleat penetrate too deeply reduce the air pressure; if the staple/ cleat is
not deep enough then increase the air pressure using an in-line regulator. The
crown of the staple/ cleat should sit flush within the nail pocket to prevent
damage to the flooring and to reduce squeaking. The flooring manufacturer is
not responsible for damage caused by the mechanical fasteners.
IMPORTANT NOTE: Only use manufacturer's recommended staples or
cleats.
3/8” PRODUCTS
For products less than 5” the minimum length staple/ cleat is 1”
For products 5” or wider the minimum length staple/cleat is 1 ¼”
18 to 20 gauge staple, narrow 3/8” or less crown
20 gauge L shaped cleat
½” PRODUCTS
Minimum length fastener is 1 ¼” staple/cleat
18 gauge staple or cleat
Fastener Schedule – All Products
Staples - 1”- 2” from ends and 3”-4” thereafter
Cleats – 1” – 2” from ends and 4” thereafter
Glue Assist - For products greater than 5” in width, it is recommended to use
a combination glue down assist when using mechanical fasteners. Apply a
urethane based wood flooring adhesive to the subfloor prior to installing the
planks. Follow the standard fastener schedule. *This installation method
doesn’t require the use of a traditional vapor retarder, which enables the glue
to adhere to the subfloor rather than the paper.
Read and follow the manufacturer's instructions for complete set-up and
operation of equipment.
Getting Started
1. After the subfloor has been properly cleaned and prepped cover the
subfloor with 15lb. asphalt felt paper. This material will help to keep the floor
clean and help to retard moisture from below (there is no complete moisture
barrier system for staple or nail-down applications).
2. Select a starter wall. An outside wall is best: it's most likely to be straight
and square with the room. Measure out from this wall, at each end, the overall
width of the plank (board width + tongue + the space needed (3/8” or ½”) for
expansion).
3. Snap a chalk line from these points, parallel to that wall.
4. Install the first row of starter planks along the chalk line/straightedge and
secure into position with the tongue facing away from the starter wall (toward
you). Drill pilot holes through the face of the plank every 6” (in the dark
grain); approximately 1” from the back edge of the board and secure planks
with 1” finishing nails. Countersink nails and fill with appropriate colored
wood filler – remove excess filler from surface.
5. Blind nail at a 45° angle through the tongue 1”-2” from the end joints and
every 6” in between along the length of the starter boards (Predrill holes to
make this easier). Depending on the width of the flooring it may be necessary
to do this for the first few rows prior to using a pneumatic stapler/ nailer.
NOTE: Proper alignment is critical. Misaligned starter rows can cause side
and end gaps to appear in proceeding rows of flooring.
Installing the Floor
6. Continue to install the flooring making sure to nail/staple 1”-2” from the
ends and every (3”– 4” staples) or (4”Cleats) thereafter. Make certain the tool
is adjusted properly to ensure that the fastener is at the proper angle and is
flush within the nail pocket. As you continue working across the floor try to
maintain a six-inch minimum space between end joints. Randomly install
different lengths to avoid a patterned appearance.
7. If needed use a tapping block to help engage the boards together until the
tongue-and-groove is flush and tight and no gaps are present between adjacent
planks. NOTE: Never use a rubber mallet or hammer directly on the flooring
to engage the tongue-and-groove. This can damage the flooring and/or finish.
8. As you approach the end wall it may be necessary to cut the width of the
last row – be sure to allow for the expansion along the end wall. Once the
final cuts are made set planks into place.
9. The last few rows will need to be fastened by hand. To fasten the final
planks into place, you must either manually blind nail and/or face-nail through
the surface on the final planks. Drill pilot holes at a 45-degree angle to the
For reference purposes only if printed or downloaded.