
User manual

16
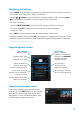
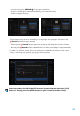
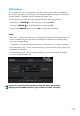
Accessing your recordings
· Press the LIST button on your remote; or
· Press MENU and select “Recordings”
Both methods take you to the “Recordings” tab
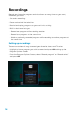
· In this screen you can see all of your recordings, when they were recorded and
what channel they were recorded from
· Using these headings, you can choose how you would like to sort your
recordings by highlighting “Title”, “Channel” or “Date Recorded” and pressing OK
· Series recordings are grouped together in folders – highlight the folder and press
OK to expand and see each individual recording
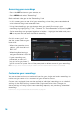
On this screen, you’ll also
see the space used on your
hard drive:
· When the green bar turns
yellow, your hard drive is
80% full
· When the yellow bar turns
red, your hard drive is 95% full
· If your recordings are
protected, an alert will
pop up to let you know if
you’ve run out of space. You will be prompted to delete some of your recordings
Note: Storage can be increased using an eSATA connected external drive. Contact us for details.
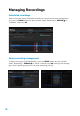
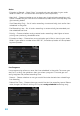
Customize your recordings
You can customize the start and end times for your single and series recordings to
make sure you never miss a moment of your favourite shows.
Custom start and end times can be applied to individual recordings or as a default
setting via the PVR Settings screen under Single and Series tabs. Changes to
these settings will only impact new recording requests, not previously scheduled
recordings.
Learn how to set your default start and end times on page 19.