
XG-C430X/C335X/C330X Operation-Manual GB
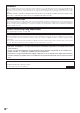
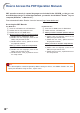
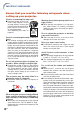
Table Of Contents
- Introduction
- Quick Start
- Setup
- Connections
- Basic Operation
- Turning the Projector On/Off
- Image Projection
- Using the Adjustment Feet
- Correcting Trapezoidal Distortion
- Adjusting the Lens
- Switching the INPUT Mode
- Adjusting the Volume
- Displaying the Black Screen and Turning Off the Sound Temporarily
- Displaying an Enlarged Portion of an Image
- Freezing an Image
- Displaying and Setting the Break Timer
- Switching the Eco/Quiet Mode
- Selecting the Picture Mode
- Resize Mode
- Using the Remote Control as the Wireless Computer Mouse
- Useful Features
- Menu Items
- Using the Menu Screen
- Picture Adjustment (“Picture” menu)
- Computer Image Adjustment (“Fine Sync” menu)
- Using the “Options1” Menu
- Checking the Lamp Life Status
- Setting the Resize Mode
- Adjusting the Image Position
- Keystone Correction
- Setting On-screen Display
- Selecting a Startup and Background Image
- Eco/Quiet Mode Setting
- Auto Power Off Function
- Setting the System Sound
- Selecting the Menu Screen Position
- System Lock Function
- Keylock Function
- Direct Power On Function
- Helpful Functions Set during Installation (“Options2” menu)
- Setting a Password
- If You Forget Your Password
- Speaker Setting
- Audio Output Type Setting
- Reversing/Inverting Projected Images
- Fan Mode Setting
- Monitor Output
- LAN/RS232C
- DHCP Client Setting
- Selecting the Transmission Speed (RS-232C)
- TCP/IP Setting
- Confirming the Network Information for the Projector
- Returning to the Default Settings
- Selecting the On-screen Display Language
- Appendix

-8
Ensure that you read the following safeguards when
setting up your projector.
Caution concerning the lamp unit
■ Potential hazard of glass par-
ticles if lamp ruptures. In case
of lamp rupture, contact your
nearest Sharp Authorized Pro-
jector Dealer or Service Cen-
ter for replacement.
See “Replacing the Lamp” on
page 60.
Caution concerning the setup of the pro-
jector
■ For minimal servicing and to maintain high
image quality, SHARP recommends that this
projector be installed in an area free from hu-
midity, dust and cigarette smoke. When the
projector is subjected to these environments,
the vents and lens must be cleaned more
often. As long as the projector is regularly
cleaned, use in these environments will not
reduce the overall operation life of the unit.
Internal cleaning should only be performed
by a Sharp Authorized Projector Dealer or
Service Center.
Do not set up the projector in places ex-
posed to direct sunlight or bright light.
■ Position the screen so that it is not in direct
sunlight or room light. Light falling directly on
the screen washes out the colors, making
viewing difficult. Close the curtains and dim
the lights when setting up the screen in a
sunny or bright room.
The projector may be safely tilted to a
maximum angle of 9 degrees.
■ Placement should be within ±9 degrees of
horizontal.
When using the projector in high-altitude
areas such as mountains (at altitudes of
approximately 1,500 meters (4,900 feet)
or more)
■ When you use the projector in high-altitude
areas with thin air, set “Fan Mode” to “High”.
Neglecting this can affect the longevity of the
optical system.
Warning about placing the projector in a
high position
■ When placing the projector in a high posi-
tion, make certain it is carefully secured to
avoid personal injury caused by the projec-
tor falling down.
Do not subject the projector to hard im-
pact and/or vibration.
■ Ta ke care with the lens so as not to hit or
damage the surface of the lens.
Rest your eyes occasionally.
■ Continuously watching the screen for long
hours will cause eye strain. Take regular
breaks to rest your eyes.
Avoid locations with extremes of tem-
perature.
■ The operating temperature of the projector
is from 41°F to 95°F (+5°C to +35°C).
■ The storage temperature of the projector is
from –4°F to 140°F (–20°C to +60°C).
Do not block the intake and exhaust
vents.
■ Allow at least 7
7
/8 inches (20 cm) of space
between the exhaust vent and the nearest
wall or obstruction.
■ Ensure that the intake vent and the exhaust
vent are not obstructed.
■ If the cooling fan becomes obstructed, a pro-
tection circuit will automatically put the pro-
jector into standby mode to prevent overheat
damage. This does not indicate a malfunc-
tion (see pages 58 and 59). Remove the pro-
jector power cord from the wall outlet and wait
at least 10 minutes. Place the projector where
the intake and exhaust vents are not blocked,
plug the power cord back in and turn on the
projector. This will return the projector to the
normal operating condition.
CAUTION
PRECAUCIÓN
PRÉCAUTION
IMPORTANT SAFEGUARDS