
User manual


PaperCut - Sharp OSA Manual 2014-12-24
Copyright © 2009-2014 PaperCut Software International Pty. Ltd., All Rights Reserved. 16 of 38
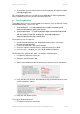
4. Press OK/Apply to save the changes. All printing to this queue will now be
held until released by a user.
The photocopier device must also be enabled as a “Print Release Station”:
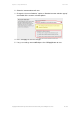
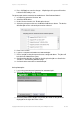
1. In PaperCut, select the “Devices” tab.
2. Select the MFD device.
3. Under “Device function” tick “Enable print release”.
4. Select the print queue that was enabled for hold/release above. The device
will allow jobs on the selected queues to be released.
5. Press “OK” to save.
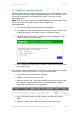
6. Login to a computer workstation as ‘testusersimple’.
7. Print a few jobs to the print queue that was configured above. The jobs will
be held in the hold/release queue.
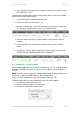
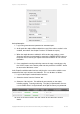
8. Confirmed that the jobs are held, by checking that the jobs are listed in the
“Printers -> Jobs Pending Release” page.
9. Confirm that the username is ‘testusersimple’.
At the photocopier:
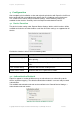
1. Log in using username and password as ‘testusersimple’.
2. The list of held print jobs is displayed.
3. Select the job to release by pressing on the job. Details of the job will be
displayed on the right side of the screen.