
Operation Manual


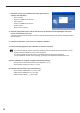


Table Of Contents
- Introduction
- Installing/Launching
- Setting Up a Server
- Launching
- Creating/Editing Programs
- The main Program Editor window
- Creating programs
- ● Valid content files
- ● Positioning content (Layout)
- ● Setting the background/frames 1-4
- ● Setting the scroll message
- ● Setting audio and music
- ● Setting the PIP window
- ● Saving a program
- ● Opening a program
- ● Checking a program
- ● Deleting a program
- ● Displaying program properties
- ● Importing/exporting a program
- Setting Information for logging in to the management PC
- Uploading/Downloading Programs, Content and Scroll Messages
- Deleting Programs, Content and Scroll Messages on the Server
- RSS Editor
- Conditional Content
- Creating/Editing Timetables
- Creating/Editing Schedules
- Logging In
- Panel Management
- Distributing
- Management
- User Management
- Viewer Update
- Schedule Reception/Program Display
- Key/Mouse Monitoring

15
PULL type distribution
Each viewer PC retrieves distribution data from the management PC at regular intervals using the HTTP
protocol.ThisdistributiontypeallowsaviewerPCinsideafirewalltoretrievedistributiondatawithouthavingto
changethefirewallsettings.
Installing SHARP Digital Signage Software Pro WEB Server Version
• Youmustloginasanadministratorbeforebeginningtheinstallationprocess.
• YouneedalicensecodetoinstalltheServerVersionandViewerVersion.
• If there is already a version of the SHARP Digital Signage Software Network Version or Digital Signage
SoftwareProinstalledonthePC,besuretouninstallitfirst.
1. Start your PC
2. Close down all applications.
3. Launch the SHARP Digital Signage Software setup program (setup.exe).
•Double-clickthesetup.exefiletolaunchthesetupprogram.
•Ifasecuritywarningsaying‘Thepublishercouldnotbeverified.’isdisplayedduringtheinstallation,click
[Run].
When the [User Account Control] dialog box appears, click
[Allow] (for Windows Vista) or [Yes] (for Windows 7).
4. In the [Welcome to the Install Shield wizard...] window,
click [Next].
5. Software license agreement will appear.
Read the entire software license agreement.
6. If you agree to the terms of the agreement, select the “I accept the terms of the license agreement”
option button, and click [Next].