
Specifications


Stages in milling and drilling
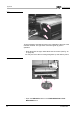
ProtoMat 95s/II 61
› The milling depth should now be set. To do this, click on
UNIVERSAL
CUTTER 0.2 MM
in the
TOOLS
combo box (top left in
the screen).
The plotter head travels to the zero position. The auxiliary clamp
fetches the universal milling cutter from the tool magazine and takes it
to the transfer station where it is handed over automatically.
› Use the traverse buttons in
BoardMaster
to move to a vacant point
on the base material but without moving across the project.
› Set the step size to 5-10 mm in the Step size box.
› Use the
AUTO-MOTOR ON/OFF
button to switch off the
motor and the
AUTO-MOTOR ON/OFF
button to switch the
motor back on, lower the head by clicking on and move with
the traverse buttons.
Set the milling depth. See also the section „Working depth limiter“ on
page 64.
The milling data can now be selected by clicking on . The
selected data is shown lighter.
› Use the
AUTO-MOTOR ON/OFF
button to switch the motor off
and the
AUTO-MOTOR ON/OFF
button to switch the motor back on.
Use the
START
button to start the machining.
› Then move to the Pause position and turn the material if you are
machining a double-sided board.
› Select the
MILLINGTOP
milling phase and machine as described
above.
› If required, select the
CUTTING
mill phase and machine with a
contour cutter.
› Move to the PAUSE position, remove the board and proceed as
described in the section „Cleaning the PCB“ on page 59.
Danger! The hood must always be closed whenever there is any
movement during a tool change.
The tool magazine is moved by compressed air. This increases the
risk of fingers being crushed.