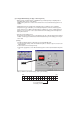
Thank you for purchasing the LCD Control Terminal ZM-300 series. Please read the instruction manual carefully, and operate the product with full understanding of its functions and operation methods. For the details of each LCD Control Terminal functions or the panel editing methods, please refer to the instruction manual for the screen edit software. Note To make image data for ZM-300 series, use ZM-71S ver.2.0.0.0 or a newer version. (When using ZM-373TA/371TL/373TL, ZM-383S/383SA, use version 2.1.0.
Note We have created this instruction manual carefully, but in case you have some doubts or comments on this manual, please contact the affiliated store where you bought this product or directly to our company. It is forbidden to copy the content materials of this book, neither partially nor fully. Please understand that the content of this manual may be altered for amelioration without any notifications.
Safety Precautions Read this user’s manual and attached documents carefully before installation, operation, maintenance and checking in order to use the machine correctly. Understand all of the machine knowledge, safety information, and cautions before starting to use. In this user’s manual, safety precautions are ranked into "danger" and "caution" as follows. Danger : Wrong handling may possibly lead to death or heavy injury. Caution : Wrong handling may possibly lead to medium or light injury.
3) Use Danger Don’t touch the terminal while the power is being supplied or you may have on electric shock. Assemble the emergency stop circuit and interlock circuit outside of the ZM-300. Otherwise breakdown or accident damage of the machine may be caused by the trouble of the ZM-300. 4) Maintenance Danger ZM-300 is equipped with a lithium battery. Lithium batteries cantain combustible material such as lithium or organic solvent.
Handling Precautions (1) Precautions for installation locations and environment Do not install the ZM-300 in the following conditions: Exposure to corrosive gas, flammable gas, solvent, grinding liquid vapor location. Dust, salt, iron powder location. Direct sunlight. (2) Installation Secure operability, ease of maintenance, durability in harsh installation environment. Maintain surrounding temperature within the specified operation temperature. Provide enough space for ventilation.
(5) Coin type lithium battery (See page. 1-23 through 1-25) When using the calendar function or SRAM memory (for battery backup of sampling data or other data), make sure to set the battery. SRAM memory data or the contents of the calendar are not restored if the battery power is not supplied. A lithium battery has its expiration date. Expiration date is usually five years (at ambient temperature of 25 C). If the battery is used at high temperatures, however, the battery power may be lowered sooner.
Contents Safety Precautions Handling Precautions Chapter 1 Hardware Specifications 1. Outline ............................................................................................................................. 1-1 2. Model Name and Peripheral Equipment ......................................................................... 1-2 Model name of LCD Control Terminal ......................................................................................... 1-2 Peripheral Equipment ................
12. Modular Jack (MJ1/MJ2)................................................................................................1-29 Modular Jack 1 (MJ1)/2 (MJ2) ................................................................................................... 1-29 ZM-71SE Setting........................................................................................................................ 1-30 Transferring Screen Data......................................................................................
2. Function Switches ......................................................................................................... 2-30 Types ......................................................................................................................................... 2-30 [SYSTEM] Switch....................................................................................................................... 2-30 3. Errors Displayed on the ZM-300 Series ...............................................
7. PLC2Way.......................................................................................................................3-31 PLC2Way ................................................................................................................................... 3-31 Limitations on Connection at the MJ Port .................................................................................. 3-32 PLCs Compatible with PLC2Way Connection at MJ Port ....................................................
2. MITSUBISHI PLC............................................................................................................ 5-8 Available PLCs............................................................................................................................. 5-8 Communication Setting.............................................................................................................. 5-11 A Series Link, QnA Series Link: Switch Setting .....................................................
9. FUJI PLC .......................................................................................................................5-60 Available PLCs........................................................................................................................... 5-60 Communication Setting.............................................................................................................. 5-60 MICREX-F Series, FLEX-PC Series: Switch Setting ...............................................
17. SAMSUNG PLC .......................................................................................................... 5-102 Available PLCs......................................................................................................................... 5-102 Communication Setting............................................................................................................ 5-102 Available Memory ........................................................................................
26. SAIA PLC.....................................................................................................................5-128 Available PLCs......................................................................................................................... 5-128 Communication Setting............................................................................................................ 5-128 S-BUS Configuration................................................................................
Hardware Specifications 1. Outline 2. Model Name and Peripheral Equipment 3. System Composition 4. Specifications 5. Dimensions and Panel Cut-out 6. Names and Functions of Components 7. Mounting Procedure 8. Power Supply Cable Connection 9. Coin-type Lithium Battery 10. DIP Switch Setting 11. Serial Connector (CN1) 12. Modular Jack (MJ1/MJ2) 13. 10BASE-T (LAN) 14. CF Card (CF) 15. Printer Connection (PRINTER) 16. Terminal Converter (ZM-1TC) 17. Expansion I/O Module (ZM-322ME) 18.
1. Outline 1. 1-1 Outline Note To make screen data for the ZM-300 series, use ZM-71SE, Ver.2.0.0.0 or higher.(When using ZM-373TA/371TL/373TL, ZM-383S/383SA, use version 2.1.0.0 or a newer version.) The ZM-300 series inherits and heightens the features of the ZM-42 to 82 series as described below. 1. 32K-color Display 32,768-color display makes colorful expression possible. Bitmap files are clearly displayed in brilliant colors. 2.
1-2 2. 2. Model Name and Peripheral Equipment Model Name and Peripheral Equipment Model name of LCD Control Terminal * Compliant with UL/CSA, CE Specifications Series Model name ZM-350 Series ZM-352D 7.7 type STN color, 640 480 dots, standard, DC power supply, Analogue touch panel* ZM-360 ZM-362S 8.4 type TFT color, 800 600 dots, standard, DC power supply, Analogue touch panel* Series ZM-362SA 8.4 type TFT color, 800 600 dots, high-performance, DC power supply, Analogue touch panel* ZM-371T 10.
2. Model Name and Peripheral Equipment 1-3 1 Peripheral Equipment The following options are available for using the ZM-300 series more effectively Model name Use ZM-301EU Video input sound output module Option module ZM-302EU RGB input sound output module ZM-303EU RGB output sound output module ZM-304EU Sound output module ZM-80NU Network module ZM-80NU2 The module to connect ZM-300 to Ethernet.
1-4 2. Model Name and Peripheral Equipment ZM-30*EU (option module) This option module can only be mounted on the ZM-300 (high-performance) model. ZM-301EU → Video input + sound output module Video images can be displayed on ZM-300 (high-performance) directly. WAV files can be played at an external speaker. ZM-302EU→ RGB input + sound output module Screen images displayed on a CRT display can be shown on ZM-300 (high-performance). WAV files can be played at an external speaker.
2. Model Name and Peripheral Equipment 1-5 ZM-CARD SOFT (memory card editor) Application software for editing data stored on a memory card. (Windows95/98/NT4.0/Me/2000/XP compatible) G P P ZM-1 ZM-1MD2 (ACPU/QnACPU/FXCPU dual port interface) Add-on connector with two ports, specifically designed for the connector on the MITSUBISHI’s ACPU/QnACPU/FXCPU programmer. Operability can be improved when directly connecting the ZM-300 series to the ACPU/QnACPU/FXCPU programmer.
1-6 2. Model Name and Peripheral Equipment ZM-80BC (barcode reader connection cable) 3 m Used for connection between the ZM-300 series and a barcode reader. ZM-80MC (multi-link 2 master cable) 3 m Used for Multi-Link 2 connection between the ZM-300 master station and the ZM-300 slave station. ZM-300CC (MJ-to-D-sub conversion cable) 0.3 m Used for connection between the ZM-300 series and a PLC via PLC2Way. ZM-361GS/371GS/381GS (protective sheet) This sheet protects the operation panel surface.
3. System Composition 3. 1-7 1 System Composition Hardware Specifications The following illustration shows possible system configurations using the ZM-300 series.
1-8 4. Specifications 4.
4. Specifications 1-9 1 Display Specifications ZM-352D ZM-362S/SA ZM-37*TL STN color LCD Display Device Effective Display Area ZM-37*T/TA 8.4-inch Colors 128 colors +16-color blinks 32,768 colors +16-color blinks Resolution W × H (dots) 640 × 480 800 × 600 640 × 480 Dot Pitch W × H (mm) 0.246 × 0.246 0.213 × 0.213 0.33 × 0.33 200 350 220 25 : 1 250 : 1 +40, −30 ±50 Contrast Ratio Angle of Vertical Visibility (°) Angle of Horizontal Visibility (°) ZM-38*S/SA TFT color LCD 7.
1-10 4.
4. Specifications 1-11 1 Drawing Environment Specifications Drawing Method Exclusive drawing software Drawing Tool Name of exclusive drawing software: Personal computer: OS: Capacity of hard disk required: Display: ZM-71SE (Ver. 2.00 and later) * Pentium II 450 MHz or above recommended Windows95/98/Me/NT Ver. 4.0/2000/XP Free space of approx. 460 Mbyte or more (For minimum installation: approx.
1-12 4. Specifications Function Performance Specifications Item Specifications Screens Max. 1024 Screen Memory Flash memory: Appox.
5. Dimensions and Panel Cut-out 5. 1 Hardware Specifications Dimensions and Panel Cut-out ZM-350/360 Series External View and Dimensions (Unit: mm) • Side View • Front View 66.1 233 SYSTEM F1 F3 F4 F5 F6 POWER F7 6.6 • Bottom View 220 LAN CN6 Battery replacement. CN5 MEMORY 220 CF MJ2 CN1 • Panel Cut-out Dimensions 220.5 +0.5 -0 +0.5 PRINTER MJ1 165.5 -0 24VDC - + 24.3 165 See operating or maintenance instruction for type of battery to be used.
1-14 5. Dimensions and Panel Cut-out ZM-370 Series External View and Dimensions (Unit: mm) • Side View • Front View 72 303.8 8 SYSTEM F1 F3 F4 F5 F6 F7 POWER • Rear View • Bottom View 288.0 CN6 CN5 215.2 MEMORY 288.0 See operating or maintenance instruction for type of battery to be used. CF Battery replacement. CN1 MJ1 MJ2 PRINTER • Panel Cut-out Dimensions 289 +0.5 -0 216.2 +0.5 -0 LAN 35.2 100-240VAC L N 231 215.
5. Dimensions and Panel Cut-out 1-15 1 ZM-380 Series External View and Dimensions (Unit: mm) • Front View 72 326.4 259.6 245.2 8 F1 F2 F3 F4 SYSTEM POWER • Rear View • Bottom View 312 CN6 CN5 MEMORY 312 CF Battery replacement. MJ1 MJ2 PRINTER • Panel Cut-out Dimensions 313 +0.5 -0 246.2 CN1 63.8 LAN +0.5 -0 245.2 See operating or maintenance instruction for type of battery to be used.
1-16 6. Names and Functions of Components 6. Names and Functions of Components ZM-350/360 Series 1 3 13 11 12 LAN CN6 SYSTEM See operating or maintenance instruction for type of battery to be used. F1 F2 8 Battery replacement. CN5 MEMORY F3 F4 CF F5 4 24VDC - + F6 POWER PRINTER MJ1 F7 CN1 MJ2 14 10 2 7 5 15 6 9 ZM-370 Series 1 3 11 12 13 CN6 CN5 SYSTEM MEMORY F1 F2 F3 See operating or maintenance instruction for type of battery to be used.
6. Names and Functions of Components 1-17 1 ZM-380 Series 1 11 12 13 CN5 MEMORY See operating or maintenance instruction for type of battery to be used. CF Battery replacement. 4 3 LAN CN1 MJ1 MJ2 PRINTER 100-240VAC L N F1 F2 F3 F4 F5 F6 F7 SYSTEM POWER 2 14 10 5 6 7 8 15 9 1. Display This is the display unit. 2. Power Lamp (POWER) Illuminates (green) when the power is supplied to the ZM-300 series. 3.
1-18 6. Names and Functions of Components 10. Mounting holes Used for inserting fixtures when securing the ZM-300 series to the mounting panel. 11. Communication interface unit connector (CN5) This is the connector where the network module (ZM-80NU/80NU2) for Ethernet, FL-net is mounted. 12. Option unit connector (CN6).....................ZM-300 (high-performance) only This is the connector where the option unit (EU-xx) for video, sound, RGB IN or RGB OUT is mounted. 13.
7. Mounting Procedure 7. 1-19 1 Mounting Procedure 1. Cut out the mounting panel (max. thick: 5 mm) to match the dimensions shown below. Mounting panel Panel cut-out hole • Panel cut-out dimensions +0.5 −0 220.5 +0.5 289 −0 ZM-350/360 EM +0.5 216.2 −0 SYST F1 289 −+00.5 165.5 −+00.5 (Unit: mm) 313 −+ 0.5 0 F2 F3 F5 F6 F7 ZM-370 ZM-380 246.2 −+00.5 216.2 −+00.5 F4 ER POW 2.
1-20 7. Mounting Procedure Mounting Margin About marginal space for connecting to the serial connector (CN1), see the figures below. ZM-350/360 series 220 LAN CN6 165 See operating or maintenance instruction for type of battery to be used. 100 Battery replacement. CN5 MEMORY CF PRINTER MJ2 MJ1 MJ2 MJ1 CN1 60 40 CN1 24.3 24VDC - + ZM-370 series 288.0 CN6 CN5 215.2 MEMORY 100 See operating or maintenance instruction for type of battery to be used. CF Battery replacement.
8. Power Supply Cable Connection 8. 1-21 DANGER Electric shock hazard Shut the power off before connecting the power supply cable. Power Supply Cable Connection • Connect the power supply cable to the terminal on the backside of the unit. - ZM-350/360 - ZM-370/380 CN6 LAN CN6 CN5 MEMORY CN5 MEMORY See operating or maintenance instruction for type of battery to be used. CF 24VDC - + CF Battery replacement.
1-22 8. Power Supply Cable Connection • Keep cables of 100 VAC and 24 VDC sufficiently away from high-voltage, large-current carrying cables. • Be sure to attach the terminal cover to the terminal block. - For ZM-350/360: Attach the terminal cover (supplied) to the terminal block. - For ZM-370/380: When closing the terminal cover, hold one end of the cover as shown below. Terminal cover Press either end.
9. Coin-type Lithium Battery 9. 1-23 1 CAUTION Be sure to set the battery when using the calendar function or the SRAM cassette. Without a battery, the contents in the SRAM or calendar data will not be retained. Battery Mounting Procedure DANGER Electric shock hazard Steps 2 to 5 must be performed while the power is not supplied to the ZM-300 unit. 1. A coin-type lithium battery is attached to the battery holder without connection in the backside of the unit before delivery. 2. Turn the unit off.
1-24 9.
9. Coin-type Lithium Battery 1-25 1 Battery Replacement Procedure Replacement batteries are available from Sharp Corporation. Type ZM-300 BT Contents • Coin-type lithium primary cell (Sanyo) 1 pce • Cautions sticker 1 pce 1. Replace the battery “ZM-300BT” within three minutes after the ZM-300 unit is turned off. If it is not possible to replace within three minutes, use the ZM-71SE editor (cable: ZM-80C) or a CF card and make a backup copy of data in the SRAM cassette.
1-26 10. DIP Switch Setting 10. DIP Switch Setting DIP Switch (DIPSW) Setting Set the terminating resistance for RS-422/485 connection with the DIP switch. When setting the DIP switch, turn the power off.
10. DIP Switch Setting 1-27 CF Auto Load (DIPSW1) 1 A screen data file saved on a CF card can be auto-loaded as described below. Hardware Specifications 1. Transfer screen data from the computer to a CF card. (Refer to the ZM-71SE Instruction Manual for more information.) 2. Set DIPSW1 in the ON position, and insert the CF card that contains the screen data file. 3. Turn the ZM-300 unit on. The screen data is automatically loaded into the FLASH memory of the unit.
1-28 11. Serial Connector (CN1) 11. Serial Connector (CN1) Serial Connector for PLC Connection 1. To communicate with the PLC (RS-232C, RS-422/485), connect the cable to the serial connector (CN1) at the bottom of the ZM-300. - For ZM-350/360: - For ZM-370/380: Bottom View Bottom View 2. The serial connector pins correspond to signals as given below. CN1 (D-sub 25-pin, female) Pin No.
12. Modular Jack (MJ1/MJ2) 1-29 12. Modular Jack (MJ1/MJ2) 1. This is a modular connector used for connection for screen data transfer, barcode reader, ZM-1REC or serial extension I/O (ZM-322ME). - For ZM-350/360: - For ZM-370/380: Bottom View Bottom View 2. Pins of modular jacks 1 and 2 correspond to signals as given below. MJ1/2 12345678 Pin No.
1-30 12. Modular Jack (MJ1/MJ2) ZM-71SE Setting 1. The use of modular jacks 1 and 2 can be set on the ZM-71SE editor. 2. Select [Modular] from the [System Setting] menu. The [Modular Jack] dialog is displayed. Select the use of modular jacks 1 and 2 from the following options. Modular Jack 1 Modular Jack 2 [Editor Port]*1 [Memory Card] [Not used] *2 [Barcode]*3 [Barcode]*3 [External-I/O]*4 [External-I/O]*4 [Multi-Link]*5 [Multi-Link]*5 [Temp. CTRL/PLC2Way]*6 [Temp.
12. Modular Jack (MJ1/MJ2) 1-31 1 3. Do not select [Multi-link] and [PLC2Way] for [Modular Jack 1/2] at the same time. • Combination of MJ1 and MJ2 Functions : Usable from system program Ver. 1.
1-32 12. Modular Jack (MJ1/MJ2) Transferring Screen Data • Use modular jack 1 (MJ1) when transferring screen data. • When [Editor Port] is selected for [Modular Jack 1] on the ZM-71SE editor, it is possible to transfer data in the RUN mode because the RUN/STOP mode (on the Main Menu screen) can be automatically selected. Also RUN/STOP mode is automatically selected for on-line editing and simulation.
13. 10BASE-T (LAN) 1-33 1 13. 10BASE-T (LAN) 10BASE-T Connector • Use this connector for Ethernet connection. - For ZM-360 (high-performance): - For ZM-370/380 (high-performance) Side View CAUTION Bottom View MJ1/2 and LAN connector are 8-pin modular jacks. Check the name plate and insert the connector in the correct position. • The LAN (10BASE-T) pins correspond to signals as given below. LAN 12345678 Pin No.
1-34 13. 10BASE-T (LAN) Notes on Wiring CAUTION When using the LAN port, keep the LAN cable away from the power supply cable as much as possible. HUB UTP cable Straight or cross cable (For more information, refer the HUB specifications.
14. CF Card (CF) 1-35 1 14. CF Card (CF) CF cards in compliance with CompactFlashTM can be used. The following card is recommended. Manufacturer Type Capacity TDK TC032HS 32 MB Kodak KPCN-32 32 MB SanDisk SDCFB-64-505 64 MB PCCF-H128MS 128 MB I-O Data Device PCCF-xxxMS (xxx: 16, 32, 48, 64, 96, 128, 192) 16 to 192 MB Mounting and Dismounting the CF Card 1. The CF card interface is provided on the side of the unit. - For ZM-350/360: - For ZM-370/380: Side View Side View 2.
1-36 14. CF Card (CF) Notes on Handling the CF Card 1. Do not insert or remove the CF card during access. Doing so may destroy data on the CF card. The CF card can be inserted or removed safely when the Main Menu screen is displayed. However, if the [Card Menu] switch is pressed on the Main Menu screen and the CF card operation screen is displayed, it is not possible to insert or remove the CF card. Before mounting or removing the CF card, be sure to check that the CF card is not being accessed. 2.
15. Printer Connection (PRINTER) 1-37 When the ZM-300 series is connected to a printer, a screen hard copy, data sheet or sampling data can be printed. To connect a printer with parallel interface, insert the cable into the printer connector (PRINTER); to connect a printer with serial interface, insert the cable into a modular jack (MJ1/MJ2). CAUTION Be sure to turn the printer off when the ZM-300 unit is turned off. Printer Connector (PRINTER) • This is the printer connector for parallel interface.
1-38 15. Printer Connection (PRINTER) Connecting Cable • To connect the ZM-300 series to a printer, use Sharp Corporation’ printer cable “ZM-300PC” 2.5 m for 20-pin parallel interface.
16. Terminal Converter (ZM-1TC) 1-39 1 Use the terminal converter ZM-1TC when connecting the ZM-300/ZM-42 to 82 series and PC by the RS-422/485 terminal block. Size 25 65 34.7 Installation DC24V 1. Make sure that the power of ZM-300 /ZM-42 to 82 series is OFF. 2. Install the ZM-1TC to the serial connector (CN1) of the ZM-300/ZM42 to 82 series. 3. Settle the ZM-1TC by the module mounting screw.
1-40 16. Terminal Converter (ZM-1TC) Connection Connecting the RS-422 communicating cable Choose 4-line or 2-line system by the ZM-1TC DIP switch (SW1) Connect the cable if SG exists. Connect the shield line to FG. End resistance is set by the dip switch located on the back side of ZM-300/ ZM-42 to 82 body. Be sure to put the attached cover to ZM-1TC when the connection is terminated.
17. Expansion I/O Module (ZM-322ME) 1-41 ZM-322ME is an expansion I/O module, with 16 input pins and 16 output pins, that can be externally equipped with the models in the table below through a modular jack. Using ZM-322ME, you can save the power by wiring the sensor actuator around the ZM-series display to the PLC through the display itself. You can set an I/O address from the PLC with the screen editing software, ZM-71SE.
1-42 17. Expansion I/O Module (ZM-322ME) Installation/connection method Connect MJ1 or MJ2 Exclusive cable (accessory) Mounting screw (2 screws) ZM-322ME ZM-300 series, ZM-42/43/52/72/82 series I/O terminal block Mounting screw (2 screws) 1. Installation method Fix four corners of the ZM-322ME on the mounting panel with the four mounting screws (screw size : M3 recommended) • Dimensions of ZM-322ME (Unit : mm) 2.
17. Expansion I/O Module (ZM-322ME) 1-43 1 Wiring Hardware Specifications In wiring ZM-322ME (I/O terminal block), the terminal screw, the terminal block arrangement, and the input/output circuit are as follows: 1. Terminal screw Terminal screw Screw size of I/O terminal M3 block Torque 0.3 Clamp terminal 0.5 (N m) Max. 6.2 (mm) 2. Terminal block arrangement I/O unit terminal block should arranged as below. Load Load Load Connect referring to the above figure. 3.
1-44 17. Expansion I/O Module (ZM-322ME) • Output circuit Load Load Internal circuit 12 to 24 VDC Load Load 12 to 24 VDC Item Outputs COM points Output type Rated voltage Max. load current Output delay time Residual voltage Leak current in OFF time Insulation type Specifications 16 2(independent by 8 points) Transistor, Sink output (minus common system) 12 to 24 VDC 50 mA OFF ON : Max. 1ms or less ON OFF : Max. 1ms or less 1.7 V Max.0.
17. Expansion I/O Module (ZM-322ME) 1-45 1 ZM-71SE setting Specify the following settings in port and memory on screen edit software ZM-71SE. 2. Memory setting Specify the addresses of both [DIO Input Mem.] and [DIO Output Mem.]. • The input memory corresponds to [IN 0 to 15], and the [DIO Output Mem.]corresponds to [OUT 0 to 15].(Refer to page 1-43 "Terminal block arrangement".) Note Use ZM-71SE, Ver.2.0.0.0 or higher. (When using ZM-373TA/371TL/373TL, ZM-383S/383SA, use version 2.1.0.
1-46 18. Card Recorder (ZM-1REC) 18. Card Recorder (ZM-1REC) Used for the backup of the panel data or recording the memory manager function and the data longing function. 94 92 25 LED condition display Modular connector Memory card connector AC adapter connector Memory Card connector SRAM and flash memory card are used as described in the chart below. (JEIDA Ver4.
19. Cable for transporting the panel (ZM-80C) 1-47 ZM-80C is the cable that transports panel data between ZM-300/ZM-42 to 82 series as well as ZM-41/70 series and the personal computers. When using, you need to have a Windows screen edit software ZM-71SE. The convertible adapter ADP25-9 and ADP25-M are attached to ZM-80C. Examples of the using cable and convertible adapter.
1-48 20. 2 Port Adapter (ZM-1MD2) 20. 2 Port Adapter (ZM-1MD2) By mounting to the GPP port of Mitsubishi PC, ZM-1MD2 acts as an module that connects and communicates between GPP (programming tool) and ZM-300/ZM-42 to 82 series. Since it is possible to connect without the link module of the Mitsubishi PC calculator, the cost saving of the hardware machines became possible.
20. 2 Port Adapter (ZM-1MD2) 1-49 1 When connecting 2 units together MITSUBISHI A Series PC Q Series Connecting cable (Mitsubishi made : optional) SYSTEM F 1 F 2 F 3 F 4 F 5 F 6 This ZM becomes a bit faster GD -M DD G P P F 7 POWER RUN ZM Series Connect the connector which is found on the back side directly to the CPU port. GD 12 3 Slide switch Use when select the connection model.
1-50 20. 2 Port Adapter (ZM-1MD2) 4) When a power supply is switched on where a console is connected to the ZM-1MD2, a console will become a communication time-out before completing initialization of the ZM-1MD2. When it connects again or reset operation of a console is performed once it, removes the cable of a console, it will return to a normal state. (Normal operation of this machine is carried out after 15 seconds progress from the time of a power supply injection.) 4.
20. 2 Port Adapter (ZM-1MD2) 1-51 1 Size drawing of ZM-1MD2 4.1 100 24.1 4.1 Hardware Specifications GPP 74 1 ON Devise mounting screw 1 12.7 1 38.1 8.
1-52 21. Expansion Memory (ZM-300EM) 21. Expansion Memory (ZM-300EM) The expansion memory, ZM-300EM, is an extension board to add 8MB to the screen data memory of the ZM-300 series.
21. Expansion Memory (ZM-300EM) 1-53 3. Put the slits of ZM-300EM with the projected parts of the display, and fix ZM-300EM into the rear side of the display by pressing the connector part. 1 Press the connector part. MEMORY MEMORY CN6 CN6 Put the slits (hole) of ZM-300EM on the projected parts. MEMORY CN6 Top 4. Insert the removed cover until you hear clicking sound. 5. Make sure ZM-300EM is appropriately installed in the [Main Menu] screen of the display.
1-54 21. Expansion Memory (ZM-300EM) ZM-71SE setting 1. Select [Unit Setting(S)] from the [System Setting (A)] menu. The [Unit Setting] dialog appears. 2. Click the switch menu of [Expansion Memory], and set the [SIZE] to 8M. Note Use ZM-71SE, Ver.2.0.0.0 or higher. (When using ZM-373TA/371TL/373TL, ZM-383S/383SA, use version 2.1.0.0 or a newer version.) Specifications Item Specifications Memory type FLASH memory Memory size 8Mbytes Use Screen data size is expanded Power supply 3.
22. Expansion Memory (ZM-300SM) 1-55 The expansion memory, ZM-300SM, is an extension board to add 512KB to the SRAM backup memory of the ZM-300 series.
1-56 22. Expansion Memory (ZM-300SM) Installation method Install ZM-300SM to the connector for expansion memory (MEMORY) on the rear side of the ZM-300 series in the following procedure. ZM-350/360 series ZM-370/380 series CN6 LAN CN6 CN5 MEMORY CN5 MEMORY CF MEMORY CF 24VDC - + PRINTER MJ1 CN1 MJ2 100-240VAC L N LAN CN1 MJ1 MJ2 PRINTER [Rear side] [Rear side] 1. Turn off the power. 2. Adjust the direction of the display, and pull out the cover, pressing the in the figure.
22. Expansion Memory (ZM-300SM) 1-57 1 Uninstall 1. Turn off the power. 2 2. Remove the MEMORY cover on the rear side of the display. 3. Remove ZM-300SM. When removing it, use the ratchet of the cover. ratchet MEMORY 1. 1) Insert the cover between the board and the display. CN6 Top 2) Pull up the cover, and remove the board. 4. Insert the removed cover until you hear clicking sound. Note If you remove ZM-300SM, the backup data disappears. ZM-71SE setting Select [SRAM/Clock Setting...
1-58 22. Expansion Memory (ZM-300SM) Specifications Item Specifications Memory type SRAM Memory size 512 Kbytes Use For data backup Power supply 3.
LCD Control Terminal Operations 1. Operation of ZM-300 Main Menu Initial Screen 1. Main Menu Screen 2. I/O Test 3. Card Menu Screen 4. Ethernet 5. SRAM/Clock 6. Extension Program Information 7. Extended Function Setting 2. Function Switches Types [SYSTEM] Switch 3. Errors Displayed on the ZM-300 Series 1. Communication Error 2. Check 3. Warning 4. SYSTEM ERROR 5.
1. Operation of ZM-300 Main Menu 1. 2-1 Operation of ZM-300 Main Menu 2 When the power of LCD Control Terminal is turned on for the first time, the Main Menu screen shown below on the left is displayed. Initial screen displayed when power is turned on for the first time Main Menu screen after transferring screen data Main Menu ZM-371TA System Information SYSTEM PROG. VER. 1.000 Screen Data Information Size : 5783552 Connection : Multi-Link Signal Level : RS232C PLC Stat. No.
2-2 1. Operation of ZM-300 Main Menu • Auto-uploading screen data from the CF card to the ZM-300 unit 1) Transfer screen data from the computer to a CF card. 2) Turn the ZM-300 unit off. Set the DIPSW1 on the ZM-300 unit to the ON position, and insert the CF card. 3) Turn the ZM-300 unit on. The screen data is automatically uploaded from the CF card to the ZM-300 unit. 1. Main Menu Screen • To bring up the Main Menu screen in the RUN mode, press the [SYSTEM] switch and the [F1] switch.
1. Operation of ZM-300 Main Menu Font data versions, country/local/font ZM-300 series Main Menu ZM-371TA System Information System program version Screen memory * Displayed when [Multi Link] or [Multi Link 2] is selected for [Connection] on the [Comm. Parameter] dialog Port name used for data transfer Connection : Multi-Link Signal Level : RS232C PLC Stat. No. : 0 PLC model and file comment set for the screen data file Ethernet Sets the IP address. (See page 2-23.
2-4 1. Operation of ZM-300 Main Menu 2. I/O Test When the [I/O Test] switch on the Main Menu screen is pressed, the following “I/O Test” screen appears. This screen is used to check that there is no problem with the ZM-300 interfaces and touch switch operation. Moves back to the Main Menu screen. (See page 2-2.) Performs a printer interface check. (See page 2-8.) Moves to the “Touch Switch” screen. (See page 2-9.) I/O Test Main Menu SYS F-1 Ext.
1. Operation of ZM-300 Main Menu 2-1. 2-5 Self-loop Test This is a signal test for communications through the CN1, MJ1 or MJ2 connector. Perform this test if the communication is not successful when transferring screen data through MJ1, connecting the PLC using CN1, or selecting multi-link 2, PLC2Way or PLC for MJ1/2, or connecting the ZM-1REC or ZM-322ME. Turn the [CN1] and [RS232C] switches on. Communication Port CN1 RS232C MJ1 RS485 MJ2 • SD/RD Test Check the signals [SD] and [RD]. 1.
2-6 1. Operation of ZM-300 Main Menu CN1: RS-485 Signal Test Turn the [CN1] and [RS485] switches on. Communication Port CN1 RS232C MJ1 RS485 MJ2 • SD/RD Test Check the signals [SD] and [RD]. 1. Install a jumper between pins 12 and 24 and between pins 13 and 25 of CN1 on the backside of the ZM-300 unit. 2. Press the [Self-Loop Test] switch. When the [OK] lamp lights up, the test is successfully completed.
1. Operation of ZM-300 Main Menu 2-7 MJ1/2: RS-232C Signal Test Turn the [MJ1] (or [MJ2]) and [RS232C] switches on. 2 Communication Port CN1 RS232C MJ1 RS485 • RS-232C Self-loop Test Check the signals [SD] and [RD]. Connect the data transfer cable (ZM-80C) to CN1 for the test. ADP25-9 ZM-80C CN1 MJ1/2 1. Set the adaptor ADP25-9 (attached to ZM-80C) to the cable ZM-80C. Connect the modular jack side of the cable to MJ1 (or MJ2) and the ADP25-9 side to CN1. 2. Press the [Self-Loop Test] switch.
2-8 2-2. 1. Operation of ZM-300 Main Menu Print Check Check that the ZM-300 series transmits the signals to the printer correctly. 1. Connect the ZM-300 series to the printer. 2. Press the [Printer Check] switch. The test is successful when a test page is printed out without problem. I/O Test Main Menu SYS F-1 Ext. I/O Check Printer Check Switch Check F-2 F-3 Example: !"#$%&@ !"#$%&@ !"#$%&@ !"#$%&@ !"#$%&@ !"#$%&@ !"#$%&@ 2-3.
1. Operation of ZM-300 Main Menu 2-4. 2-9 Touch Switch Test If a touch switch does not activate at all or if an operation is performed without pressing any touch switch, check that the touch switches on the ZM-300 panel are working properly. 2 1. Press the [Switch Check] switch. Grids appear on the screen as shown below. Y: SYS F-1 Printer Check Switch Check F-2 Return F-3 Erase 2. Press a position on the panel, and check that the pressed position turns white.
2-10 1. Operation of ZM-300 Main Menu Touch Switch Adjustment If a position different from the pressed position turns white on the touch switch test screen, follow the steps described below to adjust the touch switch position. 1. Hold down the [SYSTEM] switch and press the [F2] switch on the touch switch test screen. The “Touch Switch Adjustment” screen appears. X: SYSTEM Y: 3 4 Touch Switch Adjustment Fix F2 Reset Return Return Erase Touch the flickering corner.
1. Operation of ZM-300 Main Menu 3. 2-11 Card Menu Screen When the [Card Menu] switch on the Main Menu screen is pressed, the following “Card Menu” screen appears. This screen is used to transfer screen data between the ZM-300 series and a CF card or a memory card. 2 Moves back to the Main Menu screen or the initial screen. 1. Return CREC Menu Data Selection Transfer Menu 2. Screen Data Display Card 3. SRAM Display Card Display Card 1.
2-12 1. Operation of ZM-300 Main Menu 3-1. CREC Menu Screen When the [CREC Menu] switch on the “Card Menu” screen is pressed, the following “CREC Menu” screen appears. This screen is used to transfer screen data between the ZM-300 series and a memory card. The procedure for transferring data is described below. CREC Menu Return Port Selection Modular Jack MJ1 Transfer Data Selection Display Card Display Card Display Card Screen Data Font Data Start I/F Driver Sys. Program Cancel 1.
1. Operation of ZM-300 Main Menu 2-13 3. Memory Card Information Press the [Modular Jack MJ1 (MJ2)] switch. The memory card information contained in the inserted memory card is indicated. Switches in the “Data Selection” field and “Transfer” field become active. CREC Menu Port Selection Return Memory-Card Information Sys. Program Version Font Date Version I/F Driver Version Screen PLC Type Screen Comment Close : : -.--: : -.--- / -.--- / -.--: YOKOGAWA FA : 1.
2-14 1. Operation of ZM-300 Main Menu 5. Starting Data Transfer Press the [Start] switch. Data transfer is started. During data transfer, the [Start] switch changes into [Busy] and flashes. When data is transferred, the following message is displayed. CREC Menu CREC Menu Return Close Memory-Card Information Sys. Program : Version : -.--Font Date : Version : -.--- / -.--- / -.--I/F Driver : YOKOGAWA FA Version : 1.
1. Operation of ZM-300 Main Menu 3-2. 2-15 Transferring Screen Data from a CF Card CF Card Folder Configuration 2 Folders in the CF card are configured as shown below. *1 Folder Name AAAAAAAA DSP DSP0000.BIN CARD MCMHEAD.BIN MCMxxxx.BIN SRAM SRM0000.BIN MEMO MEMxxxx.BIN RECIPE RECxxxx.CSV SAMPLE SMPxxxx.BIN SMPxxxx.CSV HDxxxx.JPG HDxxxx.BIN BBBBBBBB FFFFFFFF *1 These are access folders set by the ZM-71SE editor. Any folder name within eight 1-byte characters can be given.
2-16 1. Operation of ZM-300 Main Menu Transferring Screen Data from a CF Card The procedure of transferring data between the ZM-300 series and a CF card is described below. 1. Mounting the CF Card Insert the CF card into the CF card connector at the side of the ZM-300 unit. * Do not remove or insert the CF card in the later steps. 2. Data selection Select [Screen Data]. When the lamp is red, it is selected. 3. Transfer selection Select [Display <-- Card], [Display --> Card] or [Display <--> Card].
1. Operation of ZM-300 Main Menu 2-17 2. Check the folder name, free space, and CF card file information. If the correct folder is selected, move to step 4. • Folder Name Indicates the name of the currently selected folder. The access folder that is set for screen data defaults. If there is no screen data, “DAT0000” defaults. • CF Card File Information Indicates the information of the currently selected folder. 3. To change to another folder, press the [Select Folder] switch.
2-18 1. Operation of ZM-300 Main Menu 4. Press the [Select Data] switch. The [Data Selection] window is displayed and the [Select Data] switch changes to [Start]. Card Transfer Card Transfer CF Card File Infomation DSP0000.BIN Access 2002-03-20 10:58:56 Sys. Program : ZM-37*/38* Version : 1.010 Font Date : ENGLISH Version : 1.300 / 1.010 / 1.000 I/F Driver : GENERAL Version : 1.240 Screen PLC Type : GENERAL Screen Comment : CF Card File Infomation Folder Name: AAAAAAAA Rest Size: 29437KB DSP0000.
1. Operation of ZM-300 Main Menu 2-19 When [Display --> Card] is Selected: 1. When [Display --> Card] is selected, the “Card Transfer” screen is displayed. Flashes during communication with the CF card. CF Card File Infomation Access DSP0000.BIN 2002-03-20 Sys. Program Version Font Date Version I/F Driver Version Screen PLC Type Screen Comment : ZM-37*/38* : 1.010 : ENGLISH : 1.300 / 1.010 / 1.000 : GENERAL : 1.
2-20 1. Operation of ZM-300 Main Menu When [Display <--> Card] is Selected: 1. When [Display <--> Card] is selected, the“Card Transfer” screen is displayed. Screen data used for comparison is that in the DSP folder under the folder having the same name as the access folder that is set by the ZM-71SE editor. Flashes during communication with the CF card. Card Transfer CF Card File Infomation Access DSP0000.BIN 2002-03-20 Sys.
1. Operation of ZM-300 Main Menu 3-3. 2-21 Saving Backup Copies of SRAM In this section, the procedure for saving backup copies of the SRAM memory or ZM-300SM (SRAM cassette) for battery replacement is explained. 2 1. Press the [SRAM] switch on the “Card Menu” screen. When the lamp is red, it is selected.
2-22 1. Operation of ZM-300 Main Menu • When [Display <-- Card] is selected, the following screen is displayed. Flashes during communication with the CF card. Indicates the name of the currently selected file. SRAM Transfer CF Card File Infomation Access SRM0000.BIN2002-04-01 12:51:26 Folder Name:CCCCCCCC Rest Size: 29954KB Indicates the name of the currently selected folder. Indicates the free space in the CF card. Select Folder Display Card Start Used for checking or renaming folder names.
1. Operation of ZM-300 Main Menu 3-4. 2-23 Messages during Data Transfer If an error occurs during data transfer, the message window shown on the right is displayed. Data discrepant 2 OK Messages Contents Work normally finished. The specified operation has been concluded normally. ZM-1REC not connecting CREC is not connecting when selecting a modular jack. ZM-1REC Communication Error A communication error occurred between ZM-300 and ZM-1REC when selecting a modular jack.
2-24 4. 1. Operation of ZM-300 Main Menu Ethernet The “Ethernet” screen is displayed by pressing the [IP Address (English)] switch on the initial screen when transferring screen data via Ethernet for the first time, or by pressing the [Ethernet] switch on the Main Menu screen when transferring screen data to the ZM-300 series. This screen is used for setting the IP address (a number that identifies the ZM-300 series on the network) that is indispensable for Ethernet communications.
1. Operation of ZM-300 Main Menu 2-25 Not Use Network Table When the network table is not set or is not used Not Use Network Table It is not used when the gate way or the sub-mask is zero. IP Address: 0 0 0 0 Gate Way: 0 0 0 0 0 0 0 0 Sub-mask: Port No. <- -> 10000 : The cursor moves only in these sections for settings. 1. Set the IP address. (If necessary, set the default gateway and subnet mask.) 2. Press the [Setting Finished] switch. The IP address is determined. 3.
2-26 1. Operation of ZM-300 Main Menu Connection with ZM-80NU/80NU2 on ZM-300 IP address, gateway and sub-mask settings Moves back to the Main Menu screen. Ethernet Return Selects [10BASE-T] or [AUI]. It is not used when the gate way or the sub-mask is zero. IP Address: 0 0 0 Gate Way: 0 0 0 0 Sub-mask: 0 0 0 0 Port No.
1. Operation of ZM-300 Main Menu 5. 2-27 SRAM/Clock • To use the built-in clock of the ZM-300 series or to use the SRAM memory or cassette, it is necessary to select [SRAM/Clock Setting] from the [System Setting] menu and make the SRAM/clock setting. For the setting procedure, refer to the ZM-71SE Instruction Manual. Main Menu ZM-371TA System Information SYSTEM PROG. VER. 1.
2-28 1. Operation of ZM-300 Main Menu Date and Time Setting 1. Move the cursor using the [←] / [→] switch, and change the value by pressing the [+] / [−] switch. 2. When the desired date and time are set, press the [Set] switch to determine the setting. 3. The calendar data is updated as set. Initializing SRAM When the SRAM memory or cassette is initialized, the data contained is cleared. Double-check before initializing the SRAM memory or cassette. 1.
1. Operation of ZM-300 Main Menu 7. 2-29 Extended Function Setting When the [Editor: MJ1] switch on the Main Menu screen is pressed, the following “Extended Function Setting” screen appears. Set the baud rate to be used when transferring screen data between the ZM-300 series and a modem. * The function switches and switches on the Main Menu screen are not valid for 15 seconds after the [Setting Finished] switch is pressed.
2-30 2. 2. Function Switches Function Switches Types • There are eight function switches provided. [SYSTEM], [F1], [F2], [F3], [F4], [F5], [F6], [F7] [SYSTEM] Switch The [SYSTEM] switch works in “alternate” operations. When this switch is pressed once, the switch menu is displayed at the side of the function switches [F1] to [F5], and each function switch corresponds to the menu item displayed in the switch menu.
2. Function Switches 2-31 User-defined Function Switches [F1] to [F7] • User-defined function switches [F1] to [F7] do not work in the STOP mode. • When the ZM-300 series is in the RUN mode and the switch menu by the [SYSTEM] switch is not displayed, the function switches can be defined by the user.
2-32 3. Errors Displayed on the ZM-300 Series 3. Errors Displayed on the ZM-300 Series There are five kinds of error messages displayed on the ZM series: 1. Communication Error 2. Check 3. Warning 4. SYSTEM ERROR 5. Touch switch is active 1. Communication Error Communication Error Time-Out Screen No. : Received Code No. : Communication Error Time-Out Retry Error Message Time-Out Parity Framing Overrun Check Code * When you go to [Comm.
3. Errors Displayed on the ZM-300 Series Error Message Contents 2-33 Solution An error code was sent to the link unit by the CPU of the PLC. Examine the CPU error code and solve the problem. Break The PLC’s SD (TXD) remains at the low level. Examine the connection between the PLC’s SD (TXD) and the ZM-300’s RD (RXD). Invalid memory (applicable to MITSUBISHI CPU) You specified an address that exceeds the memory range of the PLC that you are linked to.
2-34 3. Errors Displayed on the ZM-300 Series Error Messages for Network Communication • Ethernet Error Message Ethernet Error: XXXX Contents Solution The Ethernet status is saved at system memory address $s518 and a code other than “0” (normal) is received. XXXX: Error No. For the contents and solution to each error number, refer to “Chapter 4 Network Communications/Error Display.
3. Errors Displayed on the ZM-300 Series 2. 2-35 Check Error Message Contents Solution There is no setting for the received screen. At the start of communications, the ZM-300 series regards the value in the read area “n + 2” as the screen number. Check that this value is an existing screen number on the PLC. Data has some error. Error : XX (XX : XXX) There is an error in the created screen data. “Error : XX (XX : XXX)” indicates the edited screen and the contents of the error.
2-36 4. 3. Errors Displayed on the ZM-300 Series SYSTEM ERROR When a system error is detected, the following error screen is displayed.
Serial Communications 1. 1 : 1 Connection 2. 1 : n Connection (Multi-drop) 3. n : 1 Connection (Multi-link 2) 4. n : 1 Connection (Multi-link) 5. Universal Serial Communications 6. ZM-Link 7.
1. 1 : 1 Connection 1. 3-1 1 : 1 Connection 1 : 1 Connection • One set of the ZM-300 series is connected to one PLC (1 : 1 connection). ZM-300 series PLC Serial Communications SYSTEM F1 F2 F3 F4 CN1 F5 F6 F7 POWER RS-232C or RS-422 (RS-485) • The host link unit of the PLC or the CPU port is used and the ZM-300 series (master station) establishes communications according to the protocol of the PLC.
3-2 1. 1 : 1 Connection Wiring Electric shock hazard Shut the power off before connecting cables. DANGER Prepare the communication cable with the PLC on your side. Refer to the following information for the cable. For more information on the connection to respective PLCs, refer to “Chapter 5 Connection to PLCs.” RS-232C Connection • Connect the shielded cable either to the ZM-300 series or PLC side. This connection diagram shows the case where the shielded cable is connected on the ZM-300 series side.
1. 1 : 1 Connection 3-3 RS-422/485 Connection • Connect twist-pair cables between +SD/−SD and +RD/−RD. • If the PLC has the terminal for signal ground (SG), be sure to connect a wire. • Connect the shielded cable either to the ZM-300 series or PLC side. This connection diagram shows the case where the shielded cable is connected on the ZM-300 series side. When connecting the shielded cable to the ZM-300 series side, connect it to pin 1 of the connector or the connector case cover.
3-4 1. 1 : 1 Connection PLC Selection Select the PLC that is connected. • Setting Position [System Setting] → [PLC Type] → [Select PLC Type] dialog Communication Parameter Setting The communication parameter setting is essential for successful communications between the ZM-300 series ↔ PLC. Check the communication parameter setting on the PLC before making the setting on LCD Control Terminal. • Setting Position [System Setting] → [Comm. Parameter] → [Comm.
1. 1 : 1 Connection 3-5 - [Start Time] Set a time delay in seconds in starting communications on the ZM-300 series to avoid a delay in PLC processing that may occur when the ZM-300 series and the PLC are turned on at the same time. - Choose the action to be taken against communication errors. [Comm. Error Handling] Set error handling routine in the case that a communication error between the ZM-300 series and the PLC occurs.
3-6 1. 1 : 1 Connection System Memory [Read Area]/[Write Area] of the system memory must be secured for communications between the ZM-300 series and the PLC. • Setting Position [System Setting] → [Comm. Parameter] → [Comm. Parameter] dialog • Setting Items [Read Area] (3 words or more)* - This is the area where commands from the PLC are received for screen display changes. Consecutive three words from the specified memory address are used as “read area.
1. 1 : 1 Connection 3-7 • SCRN_No. (n + 2) Screen number command 15 14 13 12 11 10 09 08 07 06 05 04 03 02 01 00 0 0 0 Screen number System reserved (setting [0]) Use example: To specify a screen number from the PLC: When “D0” is set for [Read Area], the screen number is written in “D2” of the PLC. 3 Problem example: Serial Communications The screen display does not change when a screen number is specified from the PLC.
3-8 1. 1 : 1 Connection [Write Area] (3 words)* This is an area where the screen status is written. Consecutive three words from the specified memory address are used as “write area.” * When you have converted ZM-30 data to the ZM-300 series data, the number of required memory addresses vary. Refer to the ZM-30 User’s Manual.
2. 1 : n Connection (Multi-drop) 2. 3-9 1 : n Connection (Multi-drop) 3 1 : n Connection ZM-300 series SYSTEM F1 F2 F3 F4 F5 F6 F7 POWER Maximum length (ZM-300 series to the terminating PLC) = 500 m RS-422/RS-485 connection CN1 PLC1 PLC2 (n = 1~to32) 32) PLCn (n=1 PLC3 Wiring (RS-422/485) For connecting information, refer to the instruction manual for the PLC. Example: The following example shows how one ZM-300 series is connected to three PLCs made by MITSUBISHI.
3-10 2. 1 : n Connection (Multi-drop) ZM-71SE Setting The following settings must be made on the ZM-71SE editor. Only the points different from those described in “1 : 1 Connection/ZM-71SE Setting” (page 3-3) are explained here. PLC Selection Select the PLC that is connected. Check that the PLC to be connected is ready for 1 : n connection. Refer to the Appendix.
3. n : 1 Connection (Multi-link 2) 3. 3-11 n : 1 Connection (Multi-link 2) 3 Multi-link 2 • An original network is created where the ZM-300 series (Local Port 1) that is directly connected to the PLC is the master station, and other three ZM-300 series are slave stations. Only the master station makes communications directly with the PLC, and the slave stations make communications with the PLC via the master station.
3-12 3. n : 1 Connection (Multi-link 2) • The ZM-300 and ZM-42 to 82 series can be used together. The ZM-42 to 82 series can be the master station. (However, when ZM-42/43 is the master station, the slave station must be ZM-42/43. Also, depending on the hardware version of the ZM-42 to 82 series, multi-link 2 connection may not be supported. Refer to the ZM-42 to 82 User’s Manual.
3.
3-14 3. n : 1 Connection (Multi-link 2) 2.
3. n : 1 Connection (Multi-link 2) [Send Delay Time] (0 to 255) (Unit: ×1 msec) Set a time delay in sending the response to the PLC after receipt of data from the PLC. Normally use the default setting (0). 3-15 PLC ZM Send delay time “t” [Total]♦ (2 to 4) Set the total number of the ZM-300 series included in the multi-link 2 connection. Supplemental Information: [Retrials] in the [Detail] tab window of the [Comm.
3-16 4. n : 1 Connection (Multi-link) 4. n : 1 Connection (Multi-link) Multi-link • One PLC is connected to multiple ZM-300 series. (Maximum connectable ZM series: 32) ZM-300 series No. 1 POWER ZM-300 series No. 2 ZM-300 series No. “n” (n = 1 to 32) SYSTEM SYSTEM SYSTEM SYSTEM F1 F1 F1 F1 F2 F2 F2 F2 F3 F3 F3 F3 F4 F4 F4 F4 F5 F5 F5 F5 F6 F6 F6 F7 F7 F7 POWER CN1 ZM-300 series No.
4. n : 1 Connection (Multi-link) 3-17 Wiring Connection with Link Unit Use the RS-485 2-wire connection. (It is recommended that terminal converter “ZM-1TC” be used.) • The communication port of Sharp's PLCs is not capable of multilinked connection.
3-18 4. n : 1 Connection (Multi-link) When connecting directly to the CPU of the MITSUBISHI QnA series: ZM-1MD2 GD port ZM-300+ZM-1TC ZM-300+ZM-1TC ZM-300+ZM-1TC Signal Name Signal Name Signal Name Pin No. Signal Name FG FG FG 1 +SD +SD +SD 2 −SD −SD −SD 3 +TxD +RD +RD +RD 4 +DSR −RD −RD −RD 5 +DTR SG SG SG 7 SG 15 −RxD RD terminating resistance (ON) RD terminating resistance (OFF) RD terminating resistance (OFF) * Use shielded twist-pair cables.
4. n : 1 Connection (Multi-link) 3-19 [Total] (2 to 32) Set the total number of the ZM-300 series included in the connection. Supplemental Information: [Retrials] in the [Detail] tab window of the [Comm. Parameter] dialog is the number of retrials that the ZM-300 series sends an inquiry to the PLC. * For [Send Delay Time], [Total] and [Retry Cycle], the same values must be set on all the ZM-300 series that are connected in the same communication line.
3-20 5. 5. Universal Serial Communications Universal Serial Communications Universal Serial Communications • A general purpose computer or an ASCII unit of the PLC (master station) controls the ZM-300 series (slave station) using dedicated commands.
6. ZM-Link 6. 3-21 ZM-Link ZM-Link Dedicated commands Read disc SYSTEM Write F1 F2 F3 F4 F5 RESET F6 F7 POWER ZM-300 series PC PLC • Use the MJ port of the ZM-300 series for connection with a general-purpose computer. For connection with the PLC using a temperature controller or the PLC2Way function, use the other MJ port and use CN1 for communications with the PLC. Data of the PLC or temperature controller can be collected through communications with the ZM-300 series.
3-22 6. ZM-Link Wiring Cable Use exclusive cable (order product) for connection with a computer. The shielded frame ground of must be connected to the ZM-300 series. Exclusive cable * Notes on Use of exclusive cable. There are six wires in the exclusive cable as shown on the right. The wires to be used are determined depending on the connecting method. For the wires not used, be sure to properly insulate with tape, etc.
6. ZM-Link 3-23 RS-485 (ZM-300 series: maximum 31 sets) Computer RS-232C → RS485 conversion a Terminal block Terminal block Terminal block }* }* b Exclusive cable }* MJ2/1 ZM-300 Local Port 2 MJ2/1 ZM-300 Local Port 31 CN1 CN1 CN1 PLC PLC PLC * 0.5 m recommended (1.0 m maximum) Wiring example of above (a) and (b) a RS-485 Terminal Terminal Signal Name Signal Name Signal Name FG FG FG + + + − − − SG SG SG ZM-300 Modular jack, 8-pin Signal Name b Pin No.
3-24 6. ZM-Link ZM-71SE Setting The ZM-71SE settings required for ZM-Link are explained. ZM-Link Setting 1. Click [System Setting] → [ZM-Link Setting]. 2. The [ZM-Link Setting] dialog is displayed. 3. Check [ Use MJ port as ZM-Link] and make the setting for communications between the ZM-300 series and the computer. [Refer to Modular] Select the modular jack to be used.
6. ZM-Link 3-25 Protocol Read (with sum check and CR/LF) Read Command 3 Command * 1 Response (Normal communication) 2 2 2 18 S ZM-300 A Memory data T local C X No. K 0 1 2 1 1 1 Bytes Memory E S C L data T U X M R F n 4 2 2 Serial Communications S ZM-300 Number Read target E S C L Read of words T U T local memory command to read X M R F X No. setting 4 1 2 1 1 Bytes (When an error occurs) S ZM-300 N E S C L T local A T U X No.
3-26 6. ZM-Link Write (with sum check and CR/LF) Write Command Command * S ZM-300 Number Write target Memory Write of words T local memory data command to write X No. setting 0 1 2 2 2 18 Memory E S C L T U data X M R F n 4 1 4 2 1 1 Bytes Response (Normal communication) S ZM-300 A E S C L T local C T U X No. K X M R F 1 2 2 1 2 1 1 Bytes (When an error occurs) S ZM-300 N E S C L T local A T U X No.
6. ZM-Link 3-27 Data Items for Protocols • Transmission control code: 1 byte Signal Name Code (Hexadecimal) STX 02H Contents Start of transmission block ETX 03H End of transmission block CR 0DH Carriage return LF 0AH Line feed 3 • Command: 2 bytes Available commands are shown below.
3-28 6. ZM-Link - Type Code (Hexadecimal) Type ZM-300 internal memory ASCII $u (user memory) 00H 3030 $s (system memory) 01H 3031 $L (non-volatile word memory) 02H 3032 $LD (non-volatile double-word memory) 03H 3033 PLC memory Depends on the PLC to be used. Set the type number indicated for “Available Memory” of respective PLCs on the this manual. PLC2 memory Depends on the PLC to be connected to the PLC2 function.
6. ZM-Link 3-29 Sum Check Code (SUM): 2 bytes Data is added up (SUM), and the lower one byte (8 bits) of the sum is converted into the 2-digit ASCII code (hexadecimal). A sum check code is shown below. Example: Transmission mode: without CR/LF, with sum check Command: 20 (data read) Address: 10 words from $u1000 (03E8H) When reading, a sum check will be performed as shown below.
3-30 6. ZM-Link 1-byte Character Code List Upper 0 Lower 1 2 3 4 5 6 7 0 SP 0 @ P ’ p 1 ! 1 A Q a q 2 " 2 B R b r 3 # 3 C S c s 4 $ 4 D T d t 5 % 5 E U e u 6 & 6 F V f v 7 ’ 7 G W g w 8 ( 8 H X h x 9 ) 9 I Y i y : J Z j z [ k { l | A B + ; K C , < L = M ] m } ~ D E .
7. PLC2Way 7. 3-31 PLC2Way PLC2Way RS-232C RS-422/RS-485 SYSTEM F1 ZM-300 series F2 CN1 F3 F4 F5 F6 F7 POWER MJ2/1 PLC (SHARP) RS-232C RS-422/RS-485 (2-wire connection) FA C TO RY ACE PROGRAMMER PLC (YOKOGAWA) • Connect one PLC to the CN1 connector, and the second PLC to the MJ port. • With the PLC2Way function, it is possible to communicate with PLCs without special program in the same way as 1 : 1 connection.
3-32 7. PLC2Way • Data transfer between PLCs The PLC memory data can be transferred to another PLC in blocks using a macro command. Connection at the CN1 connector is described in “1. 1 : 1 Connection” to “4. n : 1 Connection (Multi-link).” Hereunder the PLC connection at the MJ port and settings required for PLC2Way connection are described. Limitations on Connection at the MJ Port There are some limitations on the connection at the MJ port. 1.
7. PLC2Way 3-33 Wiring Two kinds of cables are available for PLC2Way connection at the MJ port. Cable connections are explained. Connecting method 1 (using ZM-300CC) • This combination of cables (ZM-300CC + 1 : 1 connection cable) can be used either for RS-232C or RS-485 (RS-422) 2-wire connection. SYSTEM F1 ZM-300 series F2 F3 F4 F5 F6 F7 POWER MJ2/1 ZM-300CC 1 : 1 connection cable (RS-232C, RS-485/RS-422) run • With RS-485 (2-wire connection), a maximum of 31 PLCs can be connected.
3-34 7. PLC2Way • Connection example with MITSUBISHI A1SJ71UC24-R4 (1 set) ZM-300 series Modular jack, 8-pin FG PLC +SD/RD (Black) 1 SDA −SD/RD (Green) 2 SDB 5 RDA SG (Red) RDB SG * Use the shielded cable.
7. PLC2Way 3-35 ZM-71SE Setting – System Setting PLC model selection and parameter setting to be made on the ZM-71SE editor for the PLC2Way connection at the MJ port are explained. Temp. CTRL/PLC2Way Setting Select the PLC model and make the parameter setting as described below. 2. Check [Use Temp. Control Network/PLC2Way Communication]. 3. Select the MJ port. Click the [Refer to Modular] button. The [Modular Jack] dialog is displayed. Select [Temp.
3-36 7. PLC2Way 4. Select the PLC model to be connected at the MJ port. Click the [Setting] button. The [Type Setting] dialog is displayed. Select [PLC2Way]. The PLC manufacturer names who support PLC2Way communication are displayed. Click [+]. The available model names of the selected manufacturer are displayed. Select the PLC model name and click [OK]. The message communication “Communication parameters are reset. OK?” is displayed. Click [Yes]. 5.
7. PLC2Way 3-37 [Return Time] (×10 sec) When the PLC in the PLC2Way communication is turned off, data read from the PLC is temporarily prohibited. An inquiry for restoration is sent each time the specified return time has elapsed. The following options may be set depending on the PLC model. - MITSUBISHI: A series Link [Trans. Mode] (Trans. Mode 1/Trans. Mode 4) Trans. Mode 1: Without CR/LF Trans. Mode 4: With CR/LF 3 Serial Communications - OMRON: SYSMAC C, SYSMAC CV, SYSMAC CS1 [Trans. Mode] (Trans.
3-38 7. PLC2Way Setting the PLC Memory Connected at the MJ Port 1. Open the [Memory Input] dialog for the part where the PLC memory connected at the MJ port should be allocated. 2. For the PLC memory connected at the MJ port, select [PLC2 Memory] for [Type] and specify the memory address. 3. Set the port number of the PLC. ZM-71SE Setting When the temperature control network/PLC2Way table is used: The following operations are available when the temperature control network/PLC2Way table is used. 1.
7. PLC2Way 3-39 Temperature Control Network/PLC2Way Table 1. Starting Click [System Setting] → [Temp. CTRL/PLC2Way Setting] → [Temp. CTRL/PLC2Way Network Table]. ([Temp. CTRL/PLC2Way Network Table] becomes active only when the setting in the [Temp. Control/PLC2way Comm. Setting] dialog has been completed as described in the previous section.) 3 The [Temp. Network/PLC2Way Table Edit] window is opened. There are 32 tables of temperature control network/PLC2Way table No. 0 to 31.
3-40 7. PLC2Way Enter the desired comment and click [OK]. The entered comment is displayed at the top right corner. 4. Setting data in the table Click on a line in the table. The selected line turns blue. Click. Double-clicking brings up the default setting for the PLC2 memory, data type, etc. (1) Click. (2) Click. (3) Double-click. When (1) is clicked, the [Memory Input] dialog is displayed. Set the memory address to be read from the PLC connected at the MJ port.
7. PLC2Way 3-41 When the data code in the target memory address is BCD: The code (numerical data format) for the PLC2 memory is fixed as mentioned above. (Refer to page 3-37.) Normally the ZM-300 series handles numerical data as “DEC with signs.” For numerical data to be handled on the PLC connected to the MJ port, select [Word] or [Double Word] for [Data Type]; for data to be handled as bits, select [Bit].
3-42 7. PLC2Way Data Sampling in the PLC2 Memory To perform data sampling in the PLC2 memory, the following settings are required. • Temperature control network/PLC2Way table editing • Buffering area setting • Memory card setting (when [SRAM] or [CF Card] is selected for [Store Target] in the [Buffering Area Setting] dialog) • Trend sampling or data sampling setting (setting for displaying data stored in the specified buffer) 1. Buffering area setting Click [System Setting] → [Buffering Area Setting].
7. PLC2Way 3-43 • Calculating the buffering area capacity When [Internal Buffer] is selected for [Store Target] in the [Buffering Area Setting], the maximum available capacity is 32K words. When [Temp Control Net/PLC2] is selected for [Sampling Method], the required capacity can be calculated as shown below.
3-44 7. PLC2Way 3. Trend sampling or data sampling setting To show data stored in the specified buffer number, trend sampling or data sampling must be set. Click the [Trend Sampling] or [Data Sampling] icon and make the setting. For more information, refer to the ZM-71SE Instruction Manual (Function). Trend sampling Data sampling Data Transfer from the PLC2 Memory Data in the PLC2 memory can be transferred to the PLC memory, ZM-300 internal memory or a memory card at one time.
7. PLC2Way 3-45 2. Memory card setting The memory card setting should be made when the memory card is used as the source or target memory for a macro command. 1) Click [System Setting] → [Memory Card Setting]. The [Memory Card] dialog is opened. 3 2) Select [Data File] for [Type]. Check [Use Temp. Control Net/PLC2Way]. Indirect Memory Designation It is possible to have access to the PLC2 memory using the indirect memory designation as a macro command.
3-46 7. PLC2Way User Log Read for YOKOGAWA’s PLC The user log set with YOKOGAWA’s PLC “FA-M3/FA-M3R” connected at the MJ port can be read using the macro command TEMP_CTL. Macro [TEMP_CTL] This macro command controls the operation set in the memory addresses starting from the one specified for F0 for the number of words specified for F1.
7. PLC2Way 3-47 Processing Cycle The processing cycle on the ZM-300 series with the PLC2Way function is explained. Fig. a.
3-48 7. PLC2Way Notes on Screen Data Transfer Temperature Control/PLC2 Program When using the temperature control network/PLC2Way communications, it is necessary to transfer the temperature control/PLC2 program to the ZM-300 series. When the temperature control network/PLC2Way setting has been made, the program is automatically transferred to the ZM-300 series together with screen data. When [ Temp.
7. PLC2Way 3-49 System Memory The status of the PLC connected at the MJ port for PLC2Way communications is output to the system memory ($s) of the ZM-300 series. The memory addresses ($s730 to 763) of the PLC connected at the MJ port are explained. 3 List Address Contents • • • $s730 Temperature controller/PLC2Way Station No. 00 status 731 Temperature controller/PLC2Way Station No. 01 status 732 Temperature controller/PLC2Way Station No. 02 status 733 Temperature controller/PLC2Way Station No.
3-50 7. PLC2Way Details • $s730-761 The following status code for the PLC connected at the MJ port is stored. Code 0000H Contents Normal FFFFH Timeout 8001H Check code error 8002H Data error 800BH Error code received from the PLC connected at the MJ port Errors other than the above are stored as shown below.
7. PLC2Way 3-51 • $s762 Periodical reading that is set in the [Temp. CTRL/PLC2Way Table Setting] dialog can be suspended. - [0]: Periodical reading is performed. - [Other than “0”]: Periodical reading is suspended. If periodical reading of the temperature control network/PLC2Way table is performed while the PLC2 memory is being accessed using a macro command, the macro execution will be delayed (Fig. a). To avoid this, periodical reading can be suspended using memory address $s762 (Fig. b).
3-52 7. PLC2Way Please use this page freely.
Network Communications 1. Ethernet 2.
1. Ethernet 1. 4-1 Ethernet Ethernet • Transferring data in memory Data in memory can be transferred to the ZM-300 series on the Ethernet or to the PLCs linked to the ZM-300 series as a host by using macro commands (EREAD/EWRITE). Ethernet SYSTEM SYSTEM F1 F1 F2 F2 F3 F3 F4 F4 F5 Network Communications <ZM-300> F5 F6 F6 F7 F7 POWER POWER RS-232C RS-485 <PLC> • Communications between the server and the ZM-300 series - “HKEtn10.
4-2 1. Ethernet - Screen data can be transferred from the ZM-71SE editor on the server to the ZM-300 series. Server ZM-71SE Ethernet SYSTEM SYSTEM F1 F1 F2 F2 F3 F3 F4 F4 F5 F5 F6 F6 F7 Ethernet-ready PLC F7 POWER POWER RS-232C RS-485 • Communications between the Ethernet-ready PLC and the ZM-300 series - The ZM-300 series can communicate with the PLC on the Ethernet.
1. Ethernet 4-3 Notes on Ethernet Communications For ZM-300 (high-performance): • To use Ethernet communications on ZM-300 (high-performance), use the 10BASE-T connector (LAN) provided on the unit. It is not possible to use Ethernet or FL-net (OPCN-2) communications by attaching the network module ZM-80NU/80NU2 to ZM-300 (high-performance) at the same time. When ZM-80NU/80NU2 is mounted, the 10BASE-T connector (LAN) provided on the unit cannot be used.
4-4 1. Ethernet Nomenclature and Functions of ZM-80NU/80NU2 1 2 3 ADR - LOW - HI FUSE 0V 10B-T RX TX LNK CI 6 AUI 4 +12V 5 1. LED Indicates the status of the communication. Name Contents On Off RX Data receive status Currently receiving Not receiving TX Data send status Currently sending Not sending LNK Link status (for 10BASE-T only) Normal Error Cl Collision Data collision Normal 2.
1. Ethernet 4-5 Wiring 10BASE-T Connection • Cable connection diagram HUB UTP cable Straight or cross cable (For more information, refer the HUB specifications.
4-6 1. Ethernet AUI Connection • 10BASE5 The following devices are required for 10BASE5 connection: - Coaxial cable for 10BASE5 - AUI cable - N-type connector - N-type terminator - Transceiver - Power supply for the transceiver: 12 VDC 1 segment (max. 500 m, max. 100 nodes) Minimum node interval 2.5 m AUI cable (max 50 m) PLC Ethernet unit ZM-80NU Node Repeater ZM-300 To extend the length or increase the number of nodes, use repeaters.
1. Ethernet 4-7 • Transceiver 1 segment (max. 185 m, max. 30 nodes) AUI cable (max. 50 m) Minimum node interval 0.5 m ZM-80NU2 PLC PLC Ethernet unit*1 Ethernet unit Repeater ZM-300 To extend the segment distance or increase the number of nodes, use repeaters. T-type connector Terminator Maximum segments: 5 Maximum network distance: 925 m Maximum network nodes: 100 sets Transceiver*2 Node*1 Node Use the transceiver equipped with the SQE TEST function.
4-8 1. Ethernet Transferring Screen Data This section describes the procedure for transferring screen data from the ZM-71SE editor on the server to ZM via Ethernet. For the procedure using the ZM-80C cable, refer to the Manual. Prerequisites When screen data is to be transferred for the first time via Ethernet or when the ZM-300 series has been replaced due to trouble, the server cannot transfer screen data because the network table has not been transferred to the ZM-300 series.
1. Ethernet 4-9 Transferring Screen Data from ZM-71SE Editor 1. Click the [Transfer] icon. The [Transfer] dialog is displayed. 4 3. Press the [Detail Setting] switch. The [IP Address Setting] dialog is displayed. 4. Enter the IP address of the ZM-300 series to which the screen data is to be transferred. When a list is shown, select the IP address of the ZM-300 series, and click the [<<] switch. The host name and the IP address are automatically entered. Click [OK]. Network Communications 2.
4-10 1. Ethernet 5. Check the IP address, and click [PC->]. IP address for transfer target 6. Data transfer is started. ZM-71SE Setting (PLC Type/Communication Parameter) To enable Ethernet communications on the ZM-300 series, the following setting is required on the ZM-71SE editor. • PLC type setting • Communication parameter setting • Network table editing In this section, the PLC type setting and communication parameter setting are explained.
1. Ethernet 4-11 The contents of the system setting vary depending on the method selected. Check the connecting method and make the setting on the ZM-71SE editor. (A) Connecting to the PLC through RS-232C or RS-485 interface 1. PLC type setting Select [System Setting] → [PLC Type] and select the PLC to be used. 2. Communication parameter setting Select [System Setting] → [Comm. Parameter]. Attach a check mark ( ) to [Use Ethernet]. 4 Network Communications 3.
4-12 1. Ethernet 2. Communication parameter setting • Select [System Setting] → [Comm. Parameter]. Set the PLC to the ZM-300 series which is connected. When the network table is not set: Network table No. 0 is displayed. It is not possible to select an option for [Connect To]. Select [System Setting] → [Network Table Setting] → [Ethernet]. The [Edit Network Table] window is displayed. Set the network table, and then go back to the communication parameter setting.
1. Ethernet 4-13 • When communicating with multiple PLCs (same model) on the Ethernet, select [1 : n] for [Connection] on the [Detail] tab window. 4 [Memory Input] [Edit Network Table] Network Communications Set the port number (network table number) of the PLC in the [Memory Input] dialog for each part. For more information on the network table, refer to page 4-14.
4-14 1. Ethernet ZM-71SE Setting (Network Table Editing) To enable Ethernet communications on the ZM-300 series, the following network table setting is required on the ZM-71SE editor. Network Table • The ZM-300 series, PLCs and PCs on the Ethernet must be registered on the network table. In the case of the network illustrated below, the nodes with (∗) should be registered on the network table.
1. Ethernet 4-15 Starting and Closing • Starting Select [System Setting] → [Network Table Setting] → [Ethernet]. The network table edit window is displayed. [Close] button 4 Menu and Icons Each menu item corresponds to the icons as shown below. • [File] menu - Import Network Table Imports a network table saved as a file “∗.ntb.” - Export Network Table Exports a network table as a file “∗.ntb.
4-16 1. Ethernet - Cancel Monitor Registration Click this menu when canceling monitor registration. • [View] menu The items with a check mark are shown on the network table editing window. 1 2 1 3 3 2 Editing the Network Table Double-click the number. The [Set Network Table No. *] dialog is displayed. [Host Name] Set the name for the ZM-300 series, etc. to be used on the Ethernet. [IP Address] Set the IP address. * When registering Ethernet-ready PLC, set the same IP address as that of the PLC.
1. Ethernet 4-17 IP Address This is an address that is used for recognizing each node on the Ethernet and should be unique. The IP address is 32-bit data which consists of the network address and the host address and can be classified into A to C depending on the network size.
4-18 1. Ethernet Subnet Mask A subnet mask is used for dividing one network address into multiple networks (subnet). The subnet is assigned by specifying a part of the host address in the IP address as a subnet address. Class B Subnet mask 10 Host address (16) Network address (14) 255. 11111111 255. 11111111 Network address 255.
1. Ethernet 4-19 ZM-71SE Setting (Macro) This section explains the macro commands (SEND/EREAD/EWRITE) used for the Ethernet. For more information on macro commands, refer to the ZM-71SE Instruction Manual (Function). Macro Command [EREAD] Words from the F1 memory in the ZM-300 series of the network table number specified for F3 are read into the F0 memory. F2 designates the number of words to be read.
4-20 1. Ethernet [EWRITE] Words from the F2 memory are written into the F0 memory in the ZM-300 series of the network table number specified for F1. F3 designates the number of words to be written. Usable Devices Internal Memory PLC Memory Memory Card Constant Indirect Designation Doubleword IP Address F0 F1 F2 F3 EWRITE: Write to memory EWRITE F0 F1 = F2 C: F3 Example: Macro command at the ZM-300 (A) The macro command for ZM-300 (A) to write data in ZM-300 (A) to PLC (B) is shown below.
1. Ethernet 4-21 [SEND] Words from the F0 memory are transferred to the server of the network table number specified for F2. F1 designates the number of words to be transferred.
4-22 1. Ethernet System Memory The Ethernet status is output to the system memory ($s) of the ZM-300 series. This section explains the memory addresses ($s514 to 619) where the Ethernet status is output. For other memory addresses, refer to the ZM-71SE Instruction Manual (Function).
1.
4-24 1.
1. Ethernet 4-25 Addresses • $s514, 515 These addresses are related to macro commands [SEND], [EREAD] and [EWRITE]. $s514: Sets the executing status of the macro. In the case of “0,” the next step of the macro is executed without waiting for the completion of the command when a command request is given to the Ethernet. In the case of other than “0,” the wait status continues until the command completes, and then the next step of the macro is executed. $s515: Stores the result of macro execution.
4-26 1. Ethernet Ethernet Access Functions (HKEtn10.DLL) To enable Ethernet communications between the server and the ZM-300 series, it is necessary to create an application based on HKEtn10.dll (for UDP/IP) provided by us, using Visual C++, Visual Basic, etc. Sample Folder The “Sample” folder for Ethernet communications is included in the ZM-71SE CD-ROM. The [Ethernet] folder contains sample programs created using Visual C++, and the [VBA] folder contains those created using VBA.
1. Ethernet 4-27 • Notes on use of the sample programs The data type to be set when creating a program varies depending on whether Visual C++ or Visual Basic is used. For the data type and range, refer to the following tables.
4-28 1.
1. Ethernet 4-29 Read Read Words from PLC Memory int HKEtn_ReadPlcMemory(WORD *dp,unsigned short Wordcnt,int DeviceType,DWORD addr,char *lpAddr, int DFlag=1) This function is retained until PLC data is transferred from the ZM-300 series. • Parameters *dp addr *lpAddr DFlag • Return values Success Failure Error details Contents Word Count No. 1 1 No. 2 1 • • • • • • No. n 1 4 Word count to be read (max. 2000 words) Address of the device to be read (Refer to “Chapter 5 Connection to PLCs.
4-30 1. Ethernet Read Double-words from PLC Memory int HKEtn_ReadPlcMemory2(DWORD *dp,unsigned short Wordcnt,int DeviceType,DWORD addr,char *lpAddr, int DFlag=1) This function is retained until PLC data is transferred from the ZM-300 series. • Parameters *dp Target pointer of the data to be read Contents Word Count No. 1 2 No. 2 2 • • • • • • No. n 2 Wordcnt Word count to be read (max. 1000 words) DeviceType Address of the device to be read (Refer to “Chapter 5 Connection to PLCs.
1. Ethernet 4-31 Read Words from Internal Memory int HKEtn_ReadInternalMemory(WORD *dp,unsigned short Wordcnt,int DeviceType,DWORD addr,char *lpAddr,int DFlag=1) This function is retained until data is transferred from the ZM-300 series. • Parameters *dp DFlag • Return values Success Failure Error details Contents Word Count No. 1 1 No. 2 1 • • • • • • No. n 1 Word count to be transferred (max.
4-32 1. Ethernet Read Words from Memory Card Memory int HKEtn_ReadCardMemory(WORD *dp,unsigned short Wordcnt,int FileNo,int RecordNo,DWORD addr,char *lpAddr,int DFlag=1) This function is retained until data is transferred from the ZM-300 series. • Parameters *dp Wordcnt FileNo RecordNo addr *lpAddr DFlag • Return values Success Failure Error details Target block pointer Contents Word Count No. 1 1 No. 2 1 • • • • • • No. n 1 Word count to be transferred (max.
1. Ethernet 4-33 Read Bits from PLC Memory int HKEtn_ReadPlcBitMemory(int *lpOnFlag,int DeviceType,DWORD addr,int BitNo,char *lpAddr) This function is retained until PLC data is transferred from the ZM-300 series. • Parameters *IpOnFlag DeviceType addr *lpAddr • Return values Success Failure Error details TRUE FALSE Get using HKEtn_GetLastError ().
4-34 1. Ethernet Read Bits from Memory Card Memory int HKEtn_ReadCardBitMemory(int *lpOnFlag,int FileNo,int RecordNo,DWORD addr,int BitNo,char *lpAddr) This function is retained until data is transferred from the ZM-300 series. • Parameters *IpOnFlag FileNo RecordNo addr BitNo *lpAddr • Return values Success Failure Error details Returns the bit status.
1. Ethernet 4-35 Write Write Words to PLC Memory int HKEtn_WritePlcMemory(WORD *sp,unsigned short Wordcnt,int DeviceType,DWORD addr,char *lpAddr, int DFlag=1) This function is retained until write completion is received from the ZM-300 series. (It is reset on receipt of write completion to the PLC memory.) • Parameters *sp addr *lpAddr DFlag • Return values Success Failure Error details Contents Word Count No. 1 1 No. 2 1 • • • • • • No. n 1 Word count to be transferred (max.
4-36 1. Ethernet Write Double-words to PLC Memory int HKEtn_WritePlcMemory2(DWORD *sp,unsigned short Wordcnt,int DeviceType,DWORD addr,char *lpAddr, int DFlag=1) This function is retained until write completion is received from the ZM-300 series. (It is reset on receipt of write completion to the PLC memory.) • Parameters *sp Wordcnt DeviceType addr *lpAddr DFlag • Return values Success Failure Error details Target block pointer Contents Word Count No. 1 2 No. 2 2 • • • • • • No.
1. Ethernet 4-37 Write Words to Internal Memory int HKEtn_WriteInternalMemory(WORD *sp,unsigned short Wordcnt,int DeviceType,DWORD addr,chr *lpAddr,int DFlag=1) This function is retained until write completion is received from the ZM-300 series. (It is reset on receipt of write completion to the internal memory.) • Parameters *sp DFlag • Return values Success Failure Error details Contents Word Count No. 1 1 No. 2 1 • • • • • • No. n 1 Word count to be transferred (max.
4-38 1. Ethernet Write Words to Memory Card Memory int HKEtn_WriteCardMemory(WORD *sp,unsigned short Wordcnt,int FileNo,int RecordNo,DWORD addr,char *lpAddr,int DFlag=1) This function is retained until write completion is received from the ZM-300 series. (It is reset on receipt of write completion to the memory card memory.) • Parameters *sp Wordcnt FileNo RecordNo addr *lpAddr DFlag • Return values Success Failure Error details Target block pointer Contents Word Count No. 1 1 No.
1. Ethernet 4-39 Write Bits to PLC Memory int HKEtn_WritePlcBitMemory(int DeviceType,DWORD addr,int BitNo,int OnFlag,char *lpAddr) This function is retained until write completion is received from the ZM-300 series. (It is reset on receipt of write completion to the PLC memory.) • Parameters DeviceType addr OnFlag *lpAddr • Return values Success Failure Error details TRUE FALSE Get using HKEtn_GetLastError ().
4-40 1. Ethernet Write Bits to Internal Memory int HKEtn_WriteInternalBitMemory(int DeviceType,DWORD addr,int BitNo,int OnFlag,char *lpAddr) This function is retained until write completion is received from the ZM-300 series. (It is reset on receipt of write completion to the internal memory.
1. Ethernet 4-41 Others Functions Initialization Function int HKEtn_Init(unsigned short Port=10000,int Retry=3,int RecvTime=2,int RecvTime2=10) Creates a socket. Set 10000 or above. Number of send retrials Receive timeout Receive timeout 2 • Return values Success Failure Error details TRUE FALSE Get using HKEtn_GetLastError (). Receive Wait from ZM-300 int HKEtn_Recvfrom(BYTE *dp,short *lpCnt) This function is retained internally until data is received from the ZM-300 series.
4-42 1. Ethernet Request Connection Information int HKEtn_GetInf(struct inf *lpinf,char *lpAddr) • Parameters *Ipinf *lpAddr • Return values Success Failure Error details All “0” IP address shown as a string of characters separated by dots Example: “192.168.XXX.XXX” TRUE FALSE Get using HKEtn_GetLastError (). Close processing int HKEtn_Close() Execute this function when ending HKEtn10.dll.
1. Ethernet 4-43 Get Error Contents int HKEtn_GetLastError() • Error codes and solutions Code Contents Solution Undefined command (receive timeout) Check the command. −2 Undefined IP address Check the IP address. −3 Target station busy Reduce the frequency of communications. −4 Illegal packet bytes Check response processing at the target station. −5 Packet bytes exceed the maximum number. Reduce the send packet size. −6 Local mode error Check that the target station is in the RUN mode.
4-44 1. Ethernet Server Communication Procedure Data Request from ZM-300 to Server (1) Execute the receive wait thread using “int HKEtn_RecvFrom()” on the application of the server. (2) Send the command from the ZM-300 series to the server using macro command SEND. (3) The server analyzes the command and takes the appropriate action. Server (1) (2) SEND 2 Transaction No.
1. Ethernet 4-45 Error Display Error messages displayed on the ZM-300 series and those stored in the system memory are explained. Communication Errors The Ethernet status is stored in system memory address $s518 of the ZM-300 series during Ethernet communications. The communication error occurs when a code other than “0” (normal) is stored in system memory address $s518. • In the RUN mode Ethernet Error:XXXX Screen No. : Received Code No.
4-46 1. Ethernet • System memory: $s518 No. 0 Contents Solution Normal 200 Failed in send request Check cable connection and network table setting of the target station. 201 Send error Check that the setting on the target station is consistent with the network table setting. 202 Internal port error The communication unit is in the older version or is faulty. 204 TCP connection over The number of connections reaches the maximum, and no more connection is possible.
1. Ethernet 4-47 Errors during Macro Command Execution The execution result of macro commands SEND/EREAD/EWRITE is stored in system memory address $s515. • System memory address: $s515 (response to the request) Code 0 200 - 2000 Contents Solution Normal Refer to “Communication Errors.” −30 Timeout Check if an error is occurring to the target ZM-300. −31 The number of words being sent exceeds the limit. Check the number of words that can be sent in macro editing.
4-48 2. 2. FL-net FL-net FL-net • FL-net is an open FA network that FA Open Systems Promotion Forum (JOP) of the Manufacturing Science and Technology Center, an affiliated organization of the Ministry of Economy, Trade and Industry, has standardized. It is possible to connect FA controllers and computers, such as programmable controllers (PLCs) or NC controllers (CNCs), of different manufacturers as shown below for control and monitoring.
Connection to PLCs 1. SHARP PLC* 2. MITSUBISHI PLC* 3. OMRON PLC* 4. HITACHI PLC 5. MATSUSHITA PLC 6. YOKOGAWA PLC* 7. YASKAWA PLC 8. Toyopuc PLC 9. FUJI PLC* 10. KOYO PLC 11. Allen-Bradley PLC 12. GE Fanuc PLC 13. TOSHIBA PLC 14. TOSHIBA MACHINE PLC 15. SIEMENS PLC 16. SHINKO PLC 17. SAMSUNG PLC 18. KEYENCE PLC 19. LG PLC 20. FANUC PLC 21. FATEK AUTOMATION PLC 22. IDEC PLC 23. MODICON PLC 24. YAMATAKE PLC 25. TAIAN PLC 26. SAIA PLC 27. MOELLER PLC 28. Telemecanique PLC 29.
1. SHARP PLC 1.
5-2 1.
1.
5-4 1. SHARP PLC Available Memory The available memory setting range varies depending on the PLC model. Be sure to set within the range available with the PLC to be used. Use [TYPE] when assigning the indirect memory for macro programs. Memory TYPE X9XXX (register) 0 XXXXX (relay) 1 EXXXX (self diagnosis) 2 bXXXX (timer counter) 3 Fn (file register) 7 *1 File Register Setting on ZM-71SE Editor Enter “file number” + “: (colon)” + address in order.
1. SHARP PLC 5-5 Wiring Indicate the connection of ZM-300 and each module. CN1 is used alternately with RS-422. RS-232C • Connection with JW-70CUH/100CUH, JW-70CU/100CU, JW-22CU ZM-300 (CN1) JW-22CU JW-70CU/100CU JW-70CUH/100CUH (Communication Port) Signal name Pin No. Signal name Pin No. FG 1 FG 1 SD 2 RXD 3 RD 3 TXD 2 RS 4 SG 7 CS 5 SG 7 Short Terminal 14 • Connection with Z-311J/312J Signal name Pin No.
5-6 1. SHARP PLC RS-422 • Connection with JW-10CM, ZW-10CM, and JW-21CM ZW-10CM JW-10CM JW-21CM ZM-300 (CN1) Signal name No. Signal name +SD 12 L3 -SD 13 L4 +RD 24 L1 -RD 25 L2 FG 1 SHIELD * Use twist shielded cables GND Grounding • Connection with JW-70CUH/100CUH, JW-70CU/100CU, and JW-22CU ZM-300 (CN1) JW-22CU JW-70CU/100CU JW-70CUH/100CUH (Communication Port) Signal name No. Signal name No.
1. SHARP PLC 5-7 • Connection with JW-32CUH/H1/M1, JW-33CUH/H1/H2/H3, and Z-512J ZM-300 (CN1) JW-32CUH/H1/M1 JW-33CUH/H1/H2/H3 Z-512J PG/COMM1 Port PG/COMM2 Port Signal name No. Signal name +SD 12 RD (+) 9 -SD 13 RD (-) 10 No. +RD 24 SD (+) 3 -RD 25 SD (-) 11 FG 1 FG 1 * Use twist shielded cables • Connection with JW-1324K/1342K, JW-1424K/1442K, and JW-1624K/1642K [In case of connecting to the communication port] ZM-300 (CN1) No.
5-8 2. MITSUBISHI PLC 2.
2.
5-10 2.
2. MITSUBISHI PLC 5-11 Communication Setting The recommended communication parameter settings of the PLC and the ZM-300 series is as follows: A Series Link Item Setting on PLC ZM-300 Comm. Parameter Setting Baud rate 19200 bps 19200 bps Port 0 for both stations ×10, ×1 0 Parity Even Even RS-232C MODE1 Trans. Mode 1 RS-422 MODE5 Trans.
5-12 2. MITSUBISHI PLC QnH (A) Series CPU, QnH(Q) Series CPU Communication parameters for the ZM-300 series except the baud rate are automatically set. * The maximum baud rate available with the ZM-300 series is 115200 bps. Select the appropriate baud rate depending on the used PLC and environment. FX Series CPU, FX2N Series CPU, FX1S Series CPU Communication parameters for the ZM-300 series are automatically set. FX Series Link (A Protocol) Item Setting on PLC ZM-300 Comm.
2. MITSUBISHI PLC 5-13 A Series Link, QnA Series Link: Switch Setting The following is an example that shows the settings for both rotary DIP switches and DIP switches on the PLC.
5-14 2.
2. MITSUBISHI PLC 5-15 Available Memory The available memory setting range varies depending on the PLC model. Be sure to set within the range available with the PLC to be used. Use [TYPE] when assigning the indirect memory for macro programs.
5-16 2. MITSUBISHI PLC FX Series, FX1S Series Memory D (data register) TYPE Remarks 0 TN (timer/current value) 1 CN (counter/current value) 2 32CN (counter 32 bits) 3 M (internal relay) 4 S (state) 5 X (input relay) 6 Y (output relay) 7 TS (timer/contact) 8 CS (counter/contact) 9 DX (data register) 10 *1 Read only *2 *1 For numerical data format where double-words can be used (Num. Data Display, Graph, Sampling), data is processed as double-words.
2. MITSUBISHI PLC 5-17 FX Series (A Protocol) Memory D (data register) TYPE Remarks 0 TN (timer/current value) 1 CN (counter/current value) 2 *1 *2 32CN (counter 32 bits) 3 M (internal relay) 4 S (state) 5 X (input relay) 6 Y (output relay) 7 TS (timer/contact) 8 CS (counter/contact) 9 Read only 5 Connection to PLCs *1 CN200 to CN255 equals 32CN (32-bit counter). *2 For numerical data format where double-words can be used (Num.
5-18 2. MITSUBISHI PLC Wiring Wiring diagrams with the PLC are shown below. RS-232C Wiring Diagram 1 ZM-300 (CN1) D-sub25pin(Male: 25-pin (male) ) D-sub PLC D-sub9pin(Male: 9-pin (male) ) D-sub FG 1 SD 2 CD 1 RD 3 RD 2 RS 4 SD 3 CS 5 SG 5 SG 7 DR 6 RS 7 CS 8 * Use shielded twist-pair cables.
2. MITSUBISHI PLC 5-19 Wiring Diagram 3 ZM-300 (CN1) D-sub25pin(Male: 25-pin (male) ) D-sub PLC D-sub9pin(Female: 9-pin (female) ) D-sub FG 1 SD 2 RD 2 RD 3 SD 3 RS 4 SG 5 CS 5 SG 7 * Use shielded twist-pair cables. Wiring Diagram 4 5 ZM-300 (CN1) D-sub25pin(Male: 25-pin (male) ) D-sub PLC 1 SD 2 SD 2 RD 3 RD 3 RS 4 SG 7 CS 5 SG 7 * Use shielded twist-pair cables.
5-20 2. MITSUBISHI PLC Wiring Diagram 6 ZM-300 (CN1) D-sub 25pin(Male: 25-pin (male) ) D-sub PLC FG 1 SG 7 RDA 2 +SD 12 SDA 3 -SD 13 DSRA 4 +RD 24 DTRA 5 -RD 25 SG 7 RDB 15 SDB 16 DSRB 17 DTRB 18 D-sub 25-pin (male) ) D-sub 25pin(Male: 20 * Use shielded twist-pair cables.
2. MITSUBISHI PLC 5-21 According to our noise tests, the attachment of a ferrite core improves noise voltage by 650 to 900 V and aids in preventing communication errors. • When connecting to the A/QnA series CPU directly, attach a ferrite core to the communication cable between the ZM-300 series and A/QnA series CPU to avoid noise problems. Ferrite core ZM-300 series A/QnA series CPU • Ferrite cores are order product.
5-22 2. MITSUBISHI PLC A Link + Net10 • When the ZM-300 series is connected to the standard type link unit on the CPU that is connected to the data link system or network system, the ZM-300 series can have access to CPUs on NET II (/B) and NET/10. In this case, select “A Link + Net10” for [PLC Type] on the ZM-71SE editor.
2. MITSUBISHI PLC 5-23 • To have access to the PLC in the other network on NET/10, specify the network number in the OPEN macro for the screen on the ZM-71SE editor. This macro command should be [OUT_ENQ] of system call [SYS]. It is not possible to have access to the CPU on the different network from the same screen.
5-24 2. MITSUBISHI PLC ZM-1MD2 (Dual Port Interface) ZM-1MD2 is the add-on connector with two ports, specifically designed for the connector on MITSUBISHI’s A series, QnA series or FX series CPU programmer. MITSUBISHI A/QnA/FX series CPU A6GPP, A7PHP, computer, etc. G P P When connecting to the CPU of MITSUBISHI A/QnA series: Insert the connector on the backside into the CPU port directly or use the Exclusive cable (*) for connection.
2. MITSUBISHI PLC 5-25 Ladder Transfer Function Up until now it was necessary to debug the data by removing and mounting two cables repeatedly as shown below when the ZM-300 series is directly connected to MITSUBISHI’s QnHCPU equipped with only one RS-232C port.
5-26 2. MITSUBISHI PLC Connection • Use exclusive cable when connecting the ZM-300 series (CN1) to the PLC (RS-232C port). • Use Sharps’ ZM-80C cable when connecting the computer (PLC programming software) and the ZM-300 series (MJ1/2).
2. MITSUBISHI PLC 5-27 Settings and Communications 1. PLC type setting Select [PLC Type] from the [System Setting] menu. Select [MITSUBISHI: QnH (Q) series CPU] in the [Select PLC Type] dialog. 2. PLC programming software port setting Select [Modular Jack] from the [System Setting] menu. Select [Ladder Tool] for [Modular Jack 1] or [Modular Jack 2] in the [Modular Jack] dialog.
5-28 2. MITSUBISHI PLC 3. PLC programming software communication setting For communication specifications between the PLC programming software and the PLC, the communication parameter settings for the ZM-300 series and the PLC can be used. Select [Comm. Parameter] from the [System Setting] menu and check the settings in the [Comm. Parameter] dialog. • Baud rate setting There will be no problem if the setting for [Baud Rate] in the [Comm.
3. OMRON PLC 3.
5-30 3.
3. OMRON PLC 5-31 Communication Setting The recommended communication parameter settings of the PLC and the ZM-300 series is as follows: Item Setting on PLC ZM-300 Comm.
5-32 3. OMRON PLC Available Memory The available memory setting range varies depending on the PLC model. Be sure to set within the range available with the PLC to be used. Use [TYPE] when assigning the indirect memory for macro programs.
3. OMRON PLC *1 When using EMn (extended data memory), specify the bank number (CV: 0 to 7, CS1: 0 to C). The assigned memory is indicated when editing the screen as shown on the right. 5-33 Example: EM0 : 30000 Address Colon Bank number Wiring Wiring diagrams with the PLC are shown below.
5-34 3. OMRON PLC Wiring Diagram 3 ZM-300 (CN1) D-sub 25pin(Male: 25-pin (male) ) D-sub PLC D-sub25pin(Male: 25-pin (male)) D-sub FG 1 SD 2 SD 2 RD 3 RD 3 RS 4 RS 4 CS 5 CS 5 SG 7 SG 7 * Use shielded twist-pair cables. RS-422 Wiring Diagram 4 ZM-300 (CN1) D-sub25pin(Male: 25-pin (male) ) D-sub PLC D-sub9pin(Male: 9-pin (male)) D-sub FG 1 SG 7 RDB 1 +SD 12 SG 3 -SD 13 SDB 5 +RD 24 RDA 6 -RD 25 SDA 9 * Use shielded twist-pair cables.
3. OMRON PLC 5-35 Wiring Diagram 6 ZM-300 (CN1) D-sub25pin(Male: 25-pin (male) ) D-sub PLC D-sub9pin(Male: 9-pin (male)) D-sub FG 1 SG 7 SG 9 +SD 12 RDB 8 -SD 13 RDA 6 +RD 24 SDB 2 -RD 25 SDA 1 RS 4 CS 5 * Use shielded twist-pair cables. 5 Wiring Diagram 7 PLC D-sub9pin(Male: 9-pin (male)) D-sub FG 1 +SD 12 RDB 8 -SD 13 RDA 6 +RD 24 SDB 2 -RD 25 SDA 1 * Use shielded twist-pair cables.
5-36 3. OMRON PLC SYSMAC CS1 DNA When connecting the ZM-300 series to CS1 on a network (Controller Link), the ZM-300 series can also access another CS1 on the network. CS1 (2-2) CS1 (1-2) CS1 (1-3) (2-1) Network No. 1 CS1 (1-1) Network No. 2 CS1 (2-3) CS1 (2-4) SYSTEM F1 F2 F3 F4 F5 F6 F7 POWER ZM-300 series ZM-71SE Setting • Select [System Setting] → [Comm. Parameter] → [Detail] tab, and select [1 : n] for [Connection]. • Select [System Setting] → [Network Table Setting] → [PLC].
4. HITACHI PLC 4.
5-38 4. HITACHI PLC Communication Setting The recommended communication parameter settings of the PLC and the ZM-300 series is as follows: COMM-2H Item Setting on PLC ZM-300 Comm.
4. HITACHI PLC 5-39 HIDIC-H: Switch Setting Baud rate: MODE switch: 19200 bps To connect to both RS-232C and RS-422, set MODE switch to 9.
5-40 4.
4. HITACHI PLC 5-41 Wiring Wiring diagrams with the PLC are shown below. RS-232C Wiring Diagram 1 ZM-300 (CN1) D-sub25pin(Male: 25-pin (male) ) D-sub PLC D-sub15pin(Male: 15-pin (male)) D-sub FG 1 SD 2 SD 2 RD 3 RD 3 CS 5 RS 4 SG 7 CS 5 DR 7 PHL 8 SG 9 PV12 14 Connection to PLCs * Use shielded twist-pair cables.
5-42 4. HITACHI PLC Wiring Diagram 3 ZM-300 (CN1) PLC D-sub25pin(Male: 25-pin (male) ) D-sub D-sub 9-pin (female)) D-sub 9pin(Female: FG 1 CD 1 SD 2 RD 2 RD 3 SD 3 RS 4 ER 4 CS 5 SG 5 SG 7 DR 6 RS 7 CS 8 * Use shielded twist-pair cables. RS-422 Wiring Diagram 4 ZM-300 (CN1) D-sub25pin(Male: 25-pin (male) ) D-sub FG 1 PLC +SD 12 TxDP −SD 13 TxDN +RD 24 RxDP −RD 25 RxDN * Use shielded twist-pair cables.
5. MATSUSHITA PLC 5.
5-44 5. MATSUSHITA PLC MEWNET: Link Unit Switch Setting Switch Setting 1 ON 2 OFF Contents Same as that set on ZM-300 (normally 19200 bps) 3 OFF 4 OFF Data length: 7 bits 5 ON With parity 6 ON Even 7 OFF Stop bit 1 8 OFF CS, CD invalid Available Memory The available memory setting range varies depending on the PLC model. Be sure to set within the range available with the PLC to be used. Use [TYPE] when assigning the indirect memory for macro programs.
5. MATSUSHITA PLC 5-45 Wiring Wiring diagrams with the PLC are shown below.
5-46 5. MATSUSHITA PLC RS-422 Wiring Diagram 4 ZM-300 (CN1) D-sub25pin(Male: 25-pin (male) ) D-sub FG 1 PLC +SD 12 + −SD 13 − +RD 24 −RD 25 * Use shielded twist-pair cables.
6. YOKOGAWA PLC 6.
5-48 6. YOKOGAWA PLC Communication Setting The recommended communication parameter settings of the PLC and the ZM-300 series is as follows: FA500 Item Setting on PLC ZM-300 Comm. Parameter Setting Baud rate 19200 bps 19200 bps Port 1 1 Parity Even Even Data length 7 7 Stop bit 1 1 Provided (fixed) − Terminal character None (fixed) − Protection function None (fixed) − Item Setting on PLC ZM-300 Comm.
6. YOKOGAWA PLC 5-49 Available Memory The available memory setting range varies depending on the PLC model. Be sure to set within the range available with the PLC to be used. Use [TYPE] when assigning the indirect memory for macro programs.
5-50 6. YOKOGAWA PLC Wiring Wiring diagrams with the PLC are shown below. RS-232C Wiring Diagram 1 ZM-300 (CN1) D-sub25pin(Male: 25-pin (male) ) D-sub PLC FG 1 SD 2 SD 2 RD 3 RD 3 RS 4 RS 4 CS 5 CS 5 SG 7 DR 6 SG 7 ER 20 D-sub25pin(Male: 25-pin (male) ) D-sub * Use shielded twist-pair cables.
6. YOKOGAWA PLC 5-51 RS-422 Wiring Diagram 3 ZM-300 (CN1) D-sub25pin(Male: 25-pin (male) ) D-sub FG 1 PLC SG 7 RDB +SD 12 RDA −SD 13 SDB +RD 24 SDA −RD 25 SG * Use shielded twist-pair cables.
5-52 7. YASKAWA PLC 7.
7. YASKAWA PLC 5-53 CP9200SH/MP900 Item Setting on PLC ZM-300 Comm.
5-54 7. YASKAWA PLC Wiring Wiring diagrams with the PLC are shown below. RS-232C Wiring Diagram 1 ZM-300 (CN1) D-sub25pin(Male: 25-pin (male) ) D-sub PLC FG 1 SD 2 TXD 2 RD 3 RXD 3 RS 4 RTS 4 CS 5 CTS 5 SG 7 DSR 6 SGND 7 DTR 9 D-sub9pin(Male: 9-pin (male)) D-sub * Use shielded twist-pair cables.
7. YASKAWA PLC 5-55 Wiring Diagram 3 ZM-300 (CN1) D-sub25pin(Male: 25-pin (male) ) D-sub CP217IF(CN1) 217IF(CN1/2) FG 1 SD 2 SD 2 RD 3 RD 3 RS 4 RS 4 CS 5 CS 5 SG 7 DR 6 SG 7 CD 9 D-sub9pin(Male: 9-pin (male)) D-sub * Use shielded twist-pair cables. Wiring Diagram 4 5 ZM-300 (CN1) CP217IF (CN2) FG 1 SD 2 SD 2 RD 3 RD 3 RS 4 RS 4 CS 5 CS 5 SG 7 DSR 6 SG 7 CD 8 D-sub25pin(Male: 25-pin (male)) D-sub * Use shielded twist-pair cables.
5-56 7. YASKAWA PLC Wiring Diagram 6 ZM-300 (CN1) D-sub25pin(Male: 25-pin (male) ) D-sub PLC FG 1 SG 7 TXD+ 2 +SD 12 RXD+ 3 −SD 13 RXDRT 4 +RD 24 RXD− 6 −RD 25 SG 7 TXRD 8 TXD− 9 D-sub9pin(Male: 9-pin (male)) D-sub * Use shielded twist-pair cables. Wiring Diagram 7 ZM-300 (CN1) D-sub25pin(Male: 25-pin (male) ) D-sub CP217IF (CN3) FG 1 +SD 12 RX− 1 −SD 13 RX+ 2 +RD 24 TX− 6 −RD 25 TX+ 7 MR-8 (male)) MR-8(Male: * Use shielded twist-pair cables.
8. Toyopuc PLC 8. 5-57 Toyopuc PLC Available PLCs Select PLC Type PLC Unit/Port L2/PC2 series PC3J TOYOPUC Connection CMP-LINK RS-422 [Wiring Diagram 1] Communication Setting 5 The recommended communication parameter settings of the PLC and the ZM-300 series is as follows: Setting on PLC ZM-300 Comm. Parameter Setting 19200 bps 19200 bps Port 0 0 Parity Transmission code Even Even Data length 7 (ASCII) 7 Stop bit 2 2 Set [Trans. Mode] in the [Detail] tab window of the [Comm.
5-58 8. Toyopuc PLC Available Memory The available memory setting range varies depending on the PLC model. Be sure to set within the range available with the PLC to be used. Use [TYPE] when assigning the indirect memory for macro programs.
8. Toyopuc PLC 5-59 Wiring Wiring diagrams with the PLC are shown below. RS-422 Wiring Diagram 1 ZM-300 (CN1) D-sub25pin(Male: 25-pin (male) ) D-sub 1 PLC SG 7 + +SD 12 − −SD 13 0V +RD 24 −RD 25 * Use shielded twist-pair cables.
5-60 9. 9.
9. FUJI PLC 5-61 FLEX-PC CPU Port Connect to the CPU port. Communication parameters for the ZM-300 series are automatically set. FLEX-PC COM (T) (NJ Computer Link) Toyota Version Item Setting on PLC ZM-300 Comm.
5-62 9. FUJI PLC Available Memory The available memory setting range varies depending on the PLC model. Be sure to set within the range available with the PLC to be used. Use [TYPE] when assigning the indirect memory for macro programs.
9.
5-64 9. FUJI PLC Wiring Wiring diagrams with the PLC are shown below. RS-232C Wiring Diagram 1 ZM-300 (CN1) D-sub25pin(Male: 25-pin (male) ) D-sub PLC FG 1 SD 2 SD 2 RD 3 RD 3 RS 4 RS 4 CS 5 CS 5 SG 7 DR 6 SG 7 CD 8 D-sub25pin(Male: 25-pin (male)) D-sub * Use shielded twist-pair cables.
9. FUJI PLC 5-65 RS-485 Wiring Diagram 3 ZM-300 (CN1) D-sub25pin(Male: 25-pin (male) ) D-sub FG 1 PLC SG 7 SDA +SD 12 SDB −SD 13 RDA +RD 24 RDB −RD 25 SG * Use shielded twist-pair cables. 5 RS-422 ZM-300 (CN1) D-sub25pin(Male: 25-pin (male) ) D-sub FG 1 PLC SG 7 + +SD 12 − −SD 13 SG +RD 24 −RD 25 * Use shielded twist-pair cables.
5-66 10. KOYO PLC 10.
10.
5-68 10. KOYO PLC Available Memory The available memory setting range varies depending on the PLC model. Be sure to set within the range available with the PLC to be used. Use [TYPE] when assigning the indirect memory for macro programs.
10.
5-70 10. KOYO PLC G-01DM On-line/Off-line switch: Short plug 1: Short plug 2: On-line open RS-232C . . . . ENABLE RS-422. . . . . . DISENABLE SW1 DIP switch: No Setting 1 ON Contents 2 OFF 3 OFF 4 OFF 5 OFF 6 OFF 7 OFF 8 OFF 1: N 9 OFF Slave Unit No.
10. KOYO PLC 5-71 Wiring Wiring diagrams with the PLC are shown below. RS-232C Wiring Diagram 1 ZM-300 (CN1) D-sub25pin(Male: 25-pin (male) ) D-sub PLC FG 1 SD 2 SD 2 RD 3 RD 3 RS 4 RS 4 CS 5 CS 5 SG 7 SG 7 D-sub25pin(Male: 25-pin (male)) D-sub Wiring Diagram 2 ZM-300 (CN1) D-sub25pin(Male: 25-pin (male) ) D-sub PLC FG 1 SD 2 TXD 2 RD 3 RXD 3 RS 4 RTS 4 CS 5 CTS 5 SG 7 0V 7 D-sub15pin(Male: 15-pin (male)) D-sub * Use shielded twist-pair cables.
5-72 10. KOYO PLC RS-422 Wiring Diagram 3 ZM-300 (CN1) D-sub25pin(Male: 25-pin (male) ) D-sub PLC FG 1 SG 7 0V 7 +SD 12 +RTS 10 −SD 13 −RTS 11 +RD 24 +CTS 12 −RD 25 −CTS 13 +OUT 14 −OUT 15 −IN 16 +IN 17 −IN 24 +IN 25 D-sub25pin(Male: 25-pin (male)) D-sub * Use shielded twist-pair cables.
10. KOYO PLC 5-73 Wiring Diagram 6 ZM-300 (CN1) D-sub25pin(Male: 25-pin (male) ) D-sub PLC *1 FG 1 SG 7 RXD− 6 +SD 12 0V 7 −SD 13 TXD+ 9 +RD 24 TXD− 10 −RD 25 RTS+ 11 RTS− 12 RXD+ 13 CTS+ 14 CTS− 15 D-sub15pin(Male: 15-pin (male)) D-sub * Use shielded twist-pair cables.
5-74 11. Allen-Bradley PLC 11.
11. Allen-Bradley PLC 5-75 Communication Setting The recommended communication parameter settings of the PLC and the ZM-300 series is as follows: PLC-5 series Setting on PLC ZM-300 Comm.
5-76 11. Allen-Bradley PLC Available Memory The available memory setting range varies depending on the PLC model. Be sure to set within the range available with the PLC to be used. Use [TYPE] when assigning the indirect memory for macro programs. PLC-5 Series Memory TYPE N (integer) 0 B (bit) 1 T.ACC (timer/current value) 2 T.PRE (timer/set value) 3 C.ACC (counter/current value) 4 C.
11. Allen-Bradley PLC 5-77 SLC500 Series, Micro Logix 1000 Memory TYPE (integer) 0 B (bit) 1 T.ACC (timer/current value) 2 T.PRE (timer/set value) 3 C.ACC (counter/current value) 4 C.PRE (counter/set value) 5 I (input) 6 O (output) 7 S (status) 8 T (timer/control) 9 C (counter/control) 10 R (control) 11 R.LEN (control/data length) 12 R.
5-78 11. Allen-Bradley PLC PLC-5 Series: Switch Setting 1785-KE SW1 (Protocol) No Setting 1 ON Contents 2 OFF 3 OFF 4 ON 5 OFF Handshaking signal ignored 6 ON Execution of diagnosis command BCC, even, no Duplicated message unacceptable SW2 (Port) Set the port number of 1785-KE. (This port should not be duplicated in the network.
11. Allen-Bradley PLC 5-79 1770-KF2 SW1 (Protocol) No Setting 1 ON Contents 2 OFF Protocol 3 ON Duplicated message unacceptable 4 OFF Handshaking signal ignored 5 OFF Protocol Protocol SW2, SW3, SW4 (Port) Set the port number of 1770-KF2. (This port should not be duplicated in the network.) SW5 (Network link communication speed) Adjust to the settings of the network you are using. Switch Setting 2 ON ON Contents 57.
5-80 11. Allen-Bradley PLC SLC500 Series, Micro Logix 100: Transmission Parameter Setting CPU Port Channel 0 Set up the parameters for CPU port channel 0 using the software specifically designed for this purpose.
11. Allen-Bradley PLC 5-81 Wiring Wiring diagrams with the PLC are shown below.
5-82 11. Allen-Bradley PLC Wiring Diagram 3 ZM-300 (CN1) PLC D-sub25pin(Male: 25-pin (male) ) D-sub D-sub 9-pin (female)) D-sub 9pin(Female: FG 1 DCD 1 SD 2 RXD 2 RD 3 TXD 3 RS 4 DTR 4 CS 5 COM 5 SG 7 DSR 6 RTS 7 CTS 8 * Use shielded twist-pair cables.
11.
5-84 12. GE Fanuc PLC 12. GE Fanuc PLC Available PLCs Select PLC Type PLC Unit/Port Connection 90 series Series 90-30 Programmable coprocessor (PCM) RS-232C RS-485 [Wiring Diagram 1] [Wiring Diagram 2] 90 series (SNP-X) Series 90 micro Series 90-30 CPU port RS-485 [Wiring Diagram 3] Communication Setting The recommended communication parameter settings of the PLC and the ZM-300 series is as follows: 90 Series Item Setting on PLC ZM-300 Comm.
12. GE Fanuc PLC 5-85 Available Memory The available memory setting range varies depending on the PLC model. Be sure to set within the range available with the PLC to be used. Use [TYPE] when assigning the indirect memory for macro programs.
5-86 12. GE Fanuc PLC Wiring Wiring diagrams with the PLC are shown below. RS-232C Wiring Diagram 1 ZM-300 (CN1) D-sub25pin(Male: 25-pin (male) ) D-sub PLC FG 1 SD 2 SD 2 RD 3 RD 3 RS 4 RS 4 CS 5 CS 5 SG 7 GND 7 D-sub25pin(Male: 25-pin (male) ) D-sub * Use shielded twist-pair cables.
12. GE Fanuc PLC 5-87 Wiring Diagram 3 ZM-300 (CN1) D-sub25pin(Male: 25-pin (male) ) D-sub PLC FG 1 SG 7 RTS(A) 6 +SD 12 0V 7 −SD 13 CTS(B’) 8 +RD 24 RT 9 −RD 25 RD(A’) 10 RD(B’) 11 SD(A) 12 SD(B) 13 RTS(B) 14 CTS(A’) 15 D-sub15pin(Male: 15-pin (male) ) D-sub Connection to PLCs * Use shielded twist-pair cables.
5-88 13. TOSHIBA PLC 13. TOSHIBA PLC Available PLCs Select PLC Type PLC T series Unit/Port T series Connection Computer link port on CPU RS-422 [Wiring Diagram 1] Communication Setting The recommended communication parameter settings of the PLC and the ZM-300 series is as follows: Item Setting on PLC ZM-300 Comm.
13. TOSHIBA PLC 5-89 Available Memory The available memory setting range varies depending on the PLC model. Be sure to set within the range available with the PLC to be used. Use [TYPE] when assigning the indirect memory for macro programs.
5-90 14. TOSHIBA MACHINE PLC 14. TOSHIBA MACHINE PLC Available PLCs Select PLC Type PLC Unit/Port Connection Port on the CPU unit TC200 TC200 TCCMW TCCMO RS-232C [Wiring Diagram 1] − TCmini Communication Setting The recommended communication parameter settings of the PLC and the ZM-300 series is as follows: Item Setting on PLC ZM-300 Comm. Parameter Setting Baud rate 9600 bps 9600 bps Port 1 1 Available Memory The available memory setting range varies depending on the PLC model.
14. TOSHIBA MACHINE PLC 5-91 Wiring Wiring diagrams with the PLC are shown below. RS-232C Wiring Diagram 1 ZM-300 (CN1) D-sub25pin(Male: 25-pin (male) ) D-sub PLC FG 1 SD 2 TXD 2 RD 3 RXD 3 RS 4 DTR 4 CS 5 GND 5 SG 7 DSR 6 CTS 7 RTS 8 D-sub9pin(Female: 9-pin (female) ) D-sub Connection to PLCs * Use shielded twist-pair cables.
5-92 15. SIEMENS PLC 15.
15. SIEMENS PLC 5-93 S5, S5 ZM-41/70 (S5-115U, S5-135U, S5-155U, S7-300, S7-400) Item Setting on PLC Baud rate 9600 bps 9600 bps Parity − Even (fixed) Data length − 8 (fixed) Stop bit − 1 (fixed) Transmission code ZM-300 Comm. Parameter Setting S5 PG port Communication parameters are automatically set. 5 S7-200PPI Setting on PLC ZM-300 Comm.
5-94 15. SIEMENS PLC TI500/505, TI500/505 ZM-41/70 Item Setting on PLC ZM-300 Comm. Parameter Setting Baud rate 19200 bps 19200 bps − None (fixed) Data length − 8 (fixed) Stop bit − 1 (fixed) Parity Transmission code Available Memory The available memory setting range varies depending on the PLC model. Be sure to set within the range available with the PLC to be used. Use [TYPE] when assigning the indirect memory for macro programs.
15. SIEMENS PLC 5-95 S5 PG port Memory TYPE Remarks DB (data register) 0 Use memory address DB3 and later. I (input relay) 1 IW as word device Q (output relay) 2 QW as word device F (flag/internal relay) 3 FW as word device T (timer/current value) 4 C (counter/current value) 5 AS (absolute address) 6 The assigned memory is indicated when editing the screen as shown on the right.
5-96 15.
15. SIEMENS PLC 5-97 Wiring Wiring diagrams with the PLC are shown below. RS-232C Wiring Diagram 1 ZM-300 (CN1) D-sub25pin(Male: 25-pin (male) ) D-sub PLC FG 1 SD 2 TXD 2 RD 3 RXD 3 RS 4 GND 7 CS 5 SG 7 D-sub 25-pin (male) D-sub 25pin(Male: ) 5 Connection to PLCs * Use shielded twist-pair cables.
5-98 15. SIEMENS PLC Wiring Diagram 4 ZM-300 (CN1) PLC D-sub25pin(Male: 25-pin (male) ) D-sub D-sub 9-pin (female)) D-sub 9pin(Female: FG 1 DCD 1 SD 2 RXD 2 RD 3 TXD 3 RS 4 DTR 4 CS 5 SG 5 SG 7 DSR 6 RTS 7 CTS 8 * Use shielded twist-pair cables.
15. SIEMENS PLC 5-99 Wiring Diagram 7 ZM-300 (CN1) D-sub25pin(Male: 25-pin (male) ) D-sub PLC FG 1 SG 7 SG 5 +SD 12 +TxD/RxD 3 −SD 13 −TxD/RxD 8 +RD 24 −RD 25 D-sub 9-pin (male) D-sub 9pin(Male: ) * Use shielded twist-pair cables.
5-100 16. SHINKO PLC 16. SHINKO PLC Available PLCs Select PLC Type PLC Unit/Port SELMART SELMART-100 and later Version O1M2-UCI-6 Connection RS-232C [Wiring Diagram 1] Communication Setting The recommended communication parameter settings of the PLC and the ZM-300 series is as follows: Item Setting on PLC ZM-300 Comm.
16. SHINKO PLC 5-101 Wiring Wiring diagrams with the PLC are shown below. RS-232C Wiring Diagram 1 ZM-300 (CN1) D-sub25pin(Male: 25-pin (male) ) D-sub PLC FG 1 SD 2 SD 2 RD 3 RD 3 RS 4 RS 4 CS 5 CS 5 SG 7 SG 7 D-sub 25-pin (male) D-sub 25pin(Male: ) Connection to PLCs * Use shielded twist-pair cables.
5-102 17. SAMSUNG PLC 17. SAMSUNG PLC Available PLCs Select PLC Type PLC Connection SPC series SPC series RS-232C RS-422/485 [Wiring Diagram 1] [Wiring Diagram 2] Communication Setting The recommended communication parameter settings of the PLC and the ZM-300 series is as follows: Item Setting on PLC Baud rate 9600 bps ZM-300 Comm.
17. SAMSUNG PLC 5-103 Wiring Wiring diagrams with the PLC are shown below. RS-232C Wiring Diagram 1 ZM-300 (CN1) D-sub25pin(Male: 25-pin (male) ) D-sub PLC FG 1 SD 2 TXD 2 RD 3 RXD 3 RS 4 GND 5 CS 5 SG 7 D-sub 9-pin (male) D-sub 9pin(Male: ) 5 Connection to PLCs * Use shielded twist-pair cables.
5-104 18. KEYENCE PLC 18.
18. KEYENCE PLC 5-105 Communication Setting The recommended communication parameter settings of the PLC and the ZM-300 series is as follows: KZ Series Link Item Setting on PLC ZM-300 Comm.
5-106 18. KEYENCE PLC KZ/KV Series CPU / KV-700 CPU Communication parameters for the ZM-300 series are automatically set. KZ24/300 CPU Item Setting on PLC Port 0 0 Baud rate 38400 bps 38400 bps*1 Even − Data length 8 − Stop bit 1 − − − Parity Transmission code ZM-300 Comm. Parameter Setting Terminating resistance *1 Maximum baud rate available is 38400 bps. If a higher baud rate is selected, communications are performed at 9600 bps. KV10/24 CPU Item Setting on PLC ZM-300 Comm.
18.
5-108 18. KEYENCE PLC Wiring Wiring diagrams with the PLC are shown below. RS-232C Wiring Diagram 1 ZM-300 (CN1) D-sub25pin(Male: 25-pin (male) ) D-sub PLC FG 1 SD 2 SD 2 RD 3 RD 3 RS 4 RS 4 CS 5 CS 5 SG 7 SG 7 D-sub25pin(Male: 25-pin (male)) D-sub * Use shielded twist-pair cables. Wiring Diagram 2 ZM-300 (CN1) D-sub25pin(Male: 25-pin (male) ) D-sub FG 1 PLC SD 2 SD RD 3 RD RS 4 SG CS 5 SG 7 * Use shielded twist-pair cables.
18. KEYENCE PLC 5-109 Wiring Diagram 4 ZM-300 (CN1) D-sub25pin(Male: 25-pin (male) ) D-sub PLC FG 1 SD 2 SD 2 RD 3 RD 3 RS 4 RS 4 CS 5 CS 5 SG 7 DR 6 SG 7 CD 8 D-sub 25-pin (male) D-sub 25pin(Male: ) * Use shielded twist-pair cables. Wiring Diagram 5 5 ZM-300 (CN1) PLC FG 1 SD 2 3 RD RD 3 4 SG RS 4 5 SD CS 5 SG 7 Modular jack, 6-pin 123456 * Use shielded twist-pair cables.
5-110 19. LG PLC 19.
19. LG PLC 5-111 MASTER-KxxxS Item Setting on PLC ZM-300 Comm. Parameter Setting Baud rate 38400 bps 38400 bps None (fixed) − Data length 8 (fixed) − Stop bit 1 (fixed) − Parity Transmission code MASTER-KxxxS CNET / GLOFA CNET Item Setting on PLC ZM-300 Comm. Parameter Setting Baud rate 38400 bps 38400 bps Parity Not provided Not provided Data length 8 8 Stop bit 1 1 Transmission code The available memory setting range varies depending on the PLC model.
5-112 19.
19. LG PLC 5-113 GLOFA CNET Memory M TYPE (internal memory) 0 Remarks MW as word device Q (output) 1 QW as word device I (input) 2 IW as word device Wiring Wiring diagrams with the PLC are shown below. RS-232C 5 Wiring Diagram 1 ZM-300 (CN1) PLC FG 1 SD 2 RXD 2 RD 3 TXD 3 SG 7 GND 5 D-sub9pin(Male: 9-pin (male)) D-sub * Use shielded twist-pair cables.
5-114 19. LG PLC Wiring Diagram 4 ZM-300 (CN1) PLC D-sub25pin(Male: 25-pin (male) ) D-sub D-sub25pin(Male: 25-pin (male)) D-sub FG 1 CD 1 SD 2 RXD 2 RD 3 TXD 3 RS 4 DTR 4 CS 5 GND 5 SG 7 DSR 6 RTS 7 CTS 8 * Use shielded twist-pair cables. RS-422 Wiring Diagram 5 ZM-300 (CN1) D-sub25pin(Male: 25-pin (male) ) D-sub PLC FG 1 +SD 12 SD+ 10 −SD 13 SD− 11 +RD 24 −RD 25 D-sub25pin(Male: 25-pin (male)) D-sub * Use shielded twist-pair cables.
20. FANUC PLC 5-115 20. FANUC PLC Available PLCs Select PLC Type PLC Unit/Port Power Mate-Model H/D Power Mate Power Mate i Model H/D Connection Port on the CPU unit (JD14) RS-422 [Wiring Diagram 2] JD42 RS-232C [Wiring Diagram 1] JD40 RS-422 [Wiring Diagram 3] 5 Communication Setting Item Setting on PLC ZM-300 Comm.
5-116 20. FANUC PLC Wiring Wiring diagrams with the PLC are shown below. RS-232C Wiring Diagram 1 ZM-300 (CN1) D-sub25pin(Male: 25-pin (male) ) D-sub PLC FG 1 SD 2 RDB 9 RD 3 SDB 17 RS 4 0V 18 CS 5 SG 7 JD42 *1 * Use shielded twist-pair cables. *1 Half-pitch 20-pin RS-422 Wiring Diagram 2 ZM-300 (CN1) D-sub25pin(Male: 25-pin (male) ) D-sub PLC FG 1 SG 7 RDB 1 +SD 12 RDA 2 −SD 13 SDB 3 +RD 24 SDA 4 −RD 25 0V 11 JD14 * Use shielded twist-pair cables.
20. FANUC PLC 5-117 Wiring Diagram 3 ZM-300 (CN1) D-sub25pin(Male: 25-pin (male) ) D-sub PLC FG 1 SG 7 RXD 1 +SD 12 *RXD 2 −SD 13 TXD 3 +RD 24 *TXD 4 −RD 25 RTS 5 *RTS 6 CTS 7 *CTS 8 0V 12 JD40 *1 Half-pitch 20-pin 5 Connection to PLCs * Use shielded twist-pair cables.
5-118 21. FATEK AUTOMATION PLC 21. FATEK AUTOMATION PLC Available PLCs Select PLC Type PLC Unit/Port Connection RS-232 FACON FB series FACON FB series FB-DTBR RS-422 [Wiring Diagram 1] [Wiring Diagram 2] [Wiring Diagram 3] Communication Setting The recommended communication parameter settings of the PLC and the ZM-300 series is as follows: Item Setting on PLC ZM-300 Comm.
21. FATEK AUTOMATION PLC 5-119 Wiring Wiring diagrams with the PLC are shown below. RS-232C Wiring Diagram 1 ZM-300 (CN1) D-sub25pin(Male: 25-pin (male) ) D-sub PLC D-sub 15-pin (male)) D-sub 15pin(Male: 1 SD 2 RXD1 1 RD 3 TXD1 2 RS 4 RTS1 3 CS 5 CTS1 4 SG 7 SG 6 * Use shielded twist-pair cables.
5-120 22. IDEC PLC 22. IDEC PLC Available PLCs Select PLC Type PLC MICRO3 Unit/Port MICRO3 Connection RS-232C IDEC cable “FC2A-KC1” or IDEC cable “FC2A-KC2”*+ [Wiring Diagram 1] Loader port * When using RS-232C cable “FC2A-KC2” made by IDEC, connect the cable shown in [Wiring Diagram 3] to the D-sub 9-pin side of the FC2A-KC2 cable for communications with the ZM-300 series.
22. IDEC PLC 5-121 Wiring Wiring diagrams with the PLC are shown below. RS-232C Wiring Diagram 1 ZM-300 (CN1) PLC D-sub25pin(Male: 25-pin (male)) D-sub D-sub9pin(Male: 9-pin (male) ) D-sub 1 CD 1 SD 2 SD 2 RD 3 RD 3 RS 4 ER 4 CS 5 GND 5 SG 7 DR 6 RS 7 CS 8 * Use shielded twist-pair cables.
5-122 23. MODICON PLC 23. MODICON PLC Available PLCs Select PLC Type PLC Modbus RTU Unit/Port Modbus RTU Connection Modbus RS-232C [Wiring Diagram 1] Communication Setting The recommended communication parameter settings of the PLC and the ZM-300 series is as follows: Item Setting on PLC ZM-300 Comm.
23. MODICON PLC 5-123 Wiring Wiring diagrams with the PLC are shown below. RS-232C Wiring Diagram 1 ZM-300 (CN1) D-sub25pin(Male: 25-pin (male) ) D-sub PLC D-sub 9-pin (male)) D-sub 9pin(Male: 1 SD 2 RX 2 RD 3 TX 3 RS 4 DTR 4 CS 5 GND 5 SG 7 DSR 6 RTS 7 CTS 8 * Use shielded twist-pair cables.
5-124 24. YAMATAKE PLC 24. YAMATAKE PLC Available PLCs Select PLC Type PLC MX series Unit/Port MX200/MX50 ASCII connector Connection RS-232C [Wiring Diagram 1] Communication Setting The recommended communication parameter settings of the PLC and the ZM-300 series is as follows: Item Setting on PLC ZM-300 Comm.
24. YAMATAKE PLC 5-125 Wiring Wiring diagrams with the PLC are shown below. RS-232C Wiring Diagram 1 ZM-300 (CN1) D-sub25pin(Male: 25-pin (male) ) D-sub PLC D-sub25pin(Male: 25-pin (male)) D-sub 1 SD 2 SD 2 RD 3 RD 3 RS 4 RS 4 CS 5 CS 5 SG 7 SG 7 * Use shielded twist-pair cables.
5-126 25. TAIAN PLC 25. TAIAN PLC Available PLCs Select PLC Type PLC TP02 Unit/Port TP02 Connection Communication Port (T/R+, T/R−) RS-422 [Wiring Diagram 1] MMI Port (9pin) (4-5 Short Computer Link Mode) RS-422 [Wiring Diagram 2] Communication Setting The recommended communication parameter settings of the PLC and the ZM-300 series is as follows: Item Setting on PLC ZM-300 Comm.
25. TAIAN PLC 5-127 Wiring Wiring diagrams with the PLC are shown below. RS-422 Wiring Diagram 1 ZM-300 (CN1) D-sub25pin(Male: 25-pin (male) ) D-sub 1 SG 7 PLC +SD 12 T/R+ −SD 13 T/R− +RD 24 SHLD −RD 25 5 * Use shielded twist-pair cables. Wiring Diagram 2 ZM-300 (CN1) D-sub25pin(Male: 25-pin (male) ) D-sub PLC FG 1 SG 7 RX+ 2 +SD 12 TX+ 3 −SD 13 PG/COM 4 +RD 24 GND 5 −RD 25 RX− 7 TX− 8 D-sub9pin(Male: 9-pin (male)) D-sub * Use shielded twist-pair cables.
5-128 26. SAIA PLC 26. SAIA PLC Available PLCs Select PLC Type PLC PCD Unit/Port PCD1 Connection PGU port RS-232C [Wiring Diagram 1] PCD7.F120 RS-232C [Wiring Diagram 2] PCD4.F110 RS-485 [Wiring Diagram 3] Communication Setting The recommended communication parameter settings of the PLC and the ZM-300 series is as follows: Item Setting on PLC ZM-300 Comm.
26. SAIA PLC 5-129 Wiring Wiring diagrams with the PLC are shown below. RS-232C Wiring Diagram 1 ZM-300 (CN1) D-sub 25-pin (male) PLC FG 1 SD 2 RX 2 RD 3 TX 3 SG 7 GND 5 PGU port 5 * Use shielded twist-pair cables. Connection to PLCs Wiring Diagram 2 ZM-300 (CN1) D-sub 25-pin (male) PLC FG 1 PCD7.F120 SD 2 TX 11 RD 3 RX 12 SG 7 GND 10 * Use shielded twist-pair cables.
5-130 27. MOELLER PLC 27. MOELLER PLC Available PLCs Select PLC Type PLC PS4 Connection PS4-201-MM1 (PRG port) RS-232C [Wiring Diagram 1] + ZB4-303-KB1 Cable made by MOELLER Communication Setting The recommended communication parameter settings of the PLC and the ZM-300 series is as follows: Item Setting on PLC ZM-300 Comm.
27. MOELLER PLC 5-131 Wiring Wiring diagrams with the PLC are shown below. RS-232C Wiring Diagram 1 ZM-300 (CN1) D-sub 25-pin (male) PLC FG 1 SD 2 2 TX RD 3 3 RX SG 7 5 SG D-sub 9-pin (male) 5 * Use shielded twist-pair cables.
5-132 28. Telemecanique PLC 28. Telemecanique PLC Available PLCs Select PLC Type PLC TSX Micro Connection TSX Micro RS-485 [Wiring Diagram 1] Communication Setting The recommended communication parameter settings of the PLC and the ZM-300 series is as follows: Item Setting on PLC ZM-300 Comm.
28. Telemecanique PLC 5-133 Wiring Wiring diagrams with the PLC are shown below. RS-485 Wiring Diagram 1 ZM-300 (CN1) D-sub 25-pin (male) PLC FG 1 +SD 12 D+ 1 −SD 13 D− 2 +RD 24 −RD 25 MiniDIN 9-pin (male) 5 * Use shielded twist-pair cables.
5-134 29. Automationdirect PLC 29.
29. Automationdirect PLC 5-135 Available Memory The available memory setting range varies depending on the PLC model. Be sure to set within the range available with the PLC to be used. Use [TYPE] when assigning the indirect memory for macro programs.
5-136 29. Automationdirect PLC Wiring Diagram 2 ZM-300 (CN1) D-sub 25-pin (male) PLC FG 1 SD 2 SG 1 RD 3 RxD 3 RS 4 TxD 4 CS 5 SG 7 Modular connector 6-pin 654321 * Use shielded twist-pair cables. Wiring Diagram 3 ZM-300 (CN1) D-sub 25-pin (male) PLC *1 D-sub 15-pin (male) FG 1 SD 2 TXD 2 RD 3 RXD 3 RS 4 RTS 4 CS 5 CTS 5 SG 7 0V 7 * Use shielded twist-pair cables.
29. Automationdirect PLC 5-137 RS-422 Wiring Diagram 5 ZM-300 (CN1) D-sub 25-pin (male) PLC FG 1 SG 7 SG 7 +SD 12 RXD+ 9 −SD 13 RXD− 10 +RD 24 CTS1+ 11 −RD 25 TXD1+ 14 TXD1− 16 RTS1+ 18 RTS1− 19 CTS1+ 23 D-sub 25-pin (male) * Use shielded twist-pair cables. ZM-300 (CN1) D-sub 25-pin (male) PLC FG 1 SG 7 SG 7 +SD 12 TXD3+ 12 −SD 13 TXD3− 13 +RD 24 RXD3+ 24 −RD 25 RXD3− 25 D-sub 25-pin (male) * Use shielded twist-pair cables.
5-138 29. Automationdirect PLC Please use this page freely.