
Operation Manual


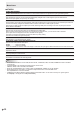


Table Of Contents
- IMPORTANT INFORMATION
- DEAR SHARP CUSTOMER
- SAFETY PRECAUTIONS
- TIPS AND SAFETY INSTRUCTIONS
- MOUNTING PRECAUTIONS
- Supplied Components
- System Requirements
- Part Names
- Connecting Peripheral Equipment
- Connecting the Power Cord
- Binding Cables
- Preparing the Remote Control Unit
- Removing the Handles
- Mounting a web camera
- Turning Power On/Off
- Touch Panel / Touch Pen Preparations
- Touch action
- Basic Operation
- Menu Items
- Initialization (Reset)/Functional Restriction Setting (FUNCTION)
- Controlling the Monitor with a computer (RS-232C)
- Controlling the Monitor with a computer (LAN)
- Troubleshooting
- Specifications
- Mounting Precautions (For SHARP dealers and service engineers)

40
E
TIPS
• You might infringe on a copyright of the author which is
protected by copyright law when you display the images of
the computer screen and television/VCR simultaneously for
prot-making or to show the image to the public.
• When quad-screen display is selected, screen size cannot
be changed.
The screen size for quad-screen display is the same as
the screen size for single-screen display. The Dot by Dot
screen is displayed in NORMAL size.
• When quad-screen display is selected, the CONNECT
AUTO INPUT SELECT function and NO SIGNAL AUTO
INPUT SEL. function are disabled.
• When quad-screen display is selected, D-SUB of INPUT
SELECT cannot be set.
• When quad-screen display is selected, SCREEN menu and
AUDIO menu cannot be set.
• When quad-screen display is selected, the DISPLAY
COLOR PATTERN cannot be set.
• When the screen size is set to ZOOM2 and ZOOM2
SPECIAL SETTING is set to ON, that display state is held.
• When quad-screen display is selected, DisplayPort2 of
DisplayPort STREAM cannot be set.
• When quad-screen display is selected, the monitor will
not enter the input signal waiting mode even if POWER
MANAGEMENT is set to ON.
• When quad-screen display is selected, HDMI CEC LINK
does not operate.
• When quad-screen display is selected, the FREEZE, DP
(DisplayPort), HDMI, and OPTION buttons cannot be used.
• When quad-screen display is selected, the position 1
screen is output from the DisplayPort output terminal.
• When quad-screen display is selected, the connected
computer cannot be operated by touch.
n
ZOOM2 SPECIAL SETTING
If you connect a laptop computer with any of the following
screen resolutions and black bands appear around the screen,
set ZOOM2 SPECIAL SETTING of INPUT SIGNAL on the
SCREEN menu to ON and then select ZOOM2 in the SIZE
setting.
This displays the area inside the black band.
Laptop computer
resolution
Corresponding signal*
1
1280x800 1280x1024, 1280x960, 1400x1050*
2
1280x600 1280x720
1024x600 1024x768
*1: This setting is effective only when the screen resolution,
including the black band, is one of the resolutions listed
above.
*2: Use the automatic screen adjustment.
Menu Items
n
SCHEDULE
You can set the time to switch the monitor on and off.
Set this function with “SCHEDULE” in the SETUP menu. (See
page 34.)
-
:
– –– –– –– ––
––
––
SCHEDULE
No.
POWER DAY OF THE WEEK
TIME INPUT BRIGHT
– –
/
– –
/
– – – – – – –
– –
:
– –
:
– –
D-SUB[RGB]
(1)
–
-
:
– –– –– –– ––
––
–––
-
:
– –– –– –– ––
––
–––
-
:
– –– –– –– ––
––
–––
-
:
– –– –– –– ––
––
–––
-
:
– –– –– –– ––
––
–––
-
:
– –– –– –– ––
––
–––
-
:
– –– –– –– –
– –
– –
– –
– –
– –
– –
– –
– ––
––
–––
(5)(2) (3) (4) (6)
OK:[ENTER] CANCEL:[RETURN]
1. Press the or button to select the SCHEDULE
number, and press the
button.
2. Set the SCHEDULE. (See the description below.)
Press the
or button to select items, and press the or
button to change the setting.
3. Press the ENTER button.
SCHEDULE becomes effective.
(1)
●: SCHEDULE effective
-
: SCHEDULE not effective
(2) POWER
ON : Switches the monitor on at the specied time.
OFF : Switches the monitor off at the specied time and puts
the monitor in standby mode.
(3) DAY OF THE WEEK
Species the day of the week to execute the SCHEDULE.
0:ONLY ONCE
Executes the SCHEDULE once on the specied day.
Specify the day of the week to execute the SCHEDULE.
1:EVERY WEEK
Executes the SCHEDULE on the specied day of the week
every week. Specify the day of the week to execute the
SCHEDULE.
Periodic setting such as “Monday through Friday” is also
possible.
2:EVERY DAY
Executes the SCHEDULE every day regardless of the day
of the week.
(4) TIME
Species the time to execute the SCHEDULE.
Set the time on a 24-hour basis. (Factory default)
Can be entered as 12-hour time using the TIME setting in
DATE/TIME FORMAT.
(5) INPUT
Species the input mode at power-on. If not specied, the
START INPUT MODE setting will apply. By factory default,
the input that was active when the power was last turned off
will appear.
Input modes displayed on D-SUB will depend upon the
INPUT SELECT settings.