
MX-FX13 Operation-Manual GB
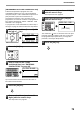
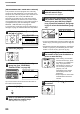
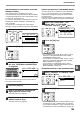
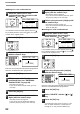
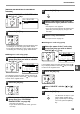
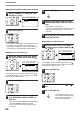
Table Of Contents
- INTRODUCTION
- CONNECTING AN EXTENSION PHONE
- CONTENTS
- TO USE THIS PRODUCT CORRECTLY ASA FACSIMILE
- 1. BEFORE USING THE FAXFUNCTION
- 2. BASIC OPERATIONS
- 3. ADVANCED TRANSMISSIONMETHODS
- SENDING THE SAME DOCUMENT TO MULTIPLE DESTINATIONS IN A SINGLE OPERATION (BROADCAST TRANSMISSION)
- AUTOMATIC TRANSMISSION AT A SPECIFIED TIME (TIMER TRANSMISSION)
- TRANSMISSION AND RECEPTION USING THE POLLING FUNCTION
- INCLUDING SENDER INFORMATION ON FAXES
- FAXING A DIVIDED ORIGINAL (DUAL PAGE SCAN)
- ADDING A COVER SHEET/MESSAGE TO A FAX TRANSMISSION
- USING SETTINGS STORED AS A PROGRAM
- FORWARDING RECEIVED DATA TO A NETWORK ADDRESS (INBOUND ROUTING SETTINGS)
- FORWARDING RECEIVED FAXES TO ANOTHER MACHINE WHEN PRINTING IS NOT POSSIBLE (FORWARDING FUNCTION)
- SENDING A FAX DIRECTLY FROM A COMPUTER (PC-Fax)
- 4. TRANSMISSION USINGF-CODES
- 5. CONVENIENT METHODS OFUSE
- 6. PROGRAMMING
- 7. TROUBLESHOOTING
- 8. SYSTEM SETTINGS
- 9. APPENDIX

82
PROGRAMMING
● Editing an F-code confidential box
11
Select the name of the F-code
confidential box that you wish to edit
with the [ ] or [ ] key.
If not all letters of the box name appear, press the
key to display all letters. Press the key once again
to return to the original screen.
12
Press the [OK] key.
13
Enter the print passcode (4 digits)
with the numeric keys.
Enter the correct print passcode that was programmed
when the confidential box was programmed.
14
Press the [OK] key.
15
Edit the name of the F-code
confidential box (see "ENTERING
CHARACTERS" on page 86).
• See step 9 on page 79.
• If you do not wish to edit the name, go to the
next step.
16
Press the [OK] key.
17
Edit the sub-address (maximum 20
digits) with the numeric keys.
• See steps 3 and 4 on page 69.
• If you do not need to edit the sub-address,
press the [OK] key and go to the next step.
18
Edit the passcode (maximum 20
digits) with the numeric keys.
• See steps 5 and 6 on page 69.
• If you do not need to edit the passcode, press
the [OK] key and go to the next step.
19
Edit the print passcode (4 digits) with
the numeric keys.
• See steps 13 and 14 on page 79.
• If you do not need to edit the print passcode,
press the [OK] key.
● Deleting an F-code confidential box
11
Select the name of the F-code
confidential box that you wish to
delete with the [ ] or [ ] key.
If not all letters of the box name appear, press the
key to display all letters. Press the key once again
to return to the original screen.
12
Press the [OK] key.
13
Enter the print passcode (4 digits)
with the numeric keys.
Enter the correct print passcode that was programmed
when the confidential box was programmed.
14
Press the [OK] key.
15
Select "DELETE" with the [ ] or [ ]
key.
16
Press the [OK] key.
You will return to the screen of step 11. If you
wish to delete another box, repeat steps 11
through 14. To exit, press the [BACK] key.
PQ
ACC
LEX SCAN
LEX SCAN
DED COPY
S.A. CONF. BOX
SBC CO.
— — — — — —
— — — — — —
[#]:LIST DETAIL
GHI
PQRS
BACK
OK
ABC DEF
JKLGHI MNO
TUVPQRS WXYZ
@.-
_
READ-END
ACC. #-C
OK
ENTER CONF. CODE
____
(0000-9999)
PQ
ACC
LEX SCAN
LEX SCAN
DED COPY
S.A. CONF. BOX
SBC CO.
— — — — — —
— — — — — —
[#]:LIST DETAIL
GHI
PQRS
BACK
OK
ABC DEF
JKLGHI MNO
TUVPQRS WXYZ
@.-
_
READ-END
ACC. #-C
OK
ENTER CONF. CODE
____
(0000-9999)