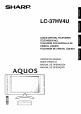
SHARP, LC-37HV4U LIQUID CRYSTAL TELEVISION TELEVISEUR ACL TELEVISOR CON PANTALLA DE CRISTAL LIQUIDO TELEVISOR DE CRISTAL OPERATION MANUAL MODE D'EMPLOI MANUAL DE OPERACION MANUAL DE OPERA(_,_,O Aquos _L ', }z_, , tJ:f_ L ', "_[I I 1 ,i i, i , ' ,II ',,,: _E_ ', l'= L i[%'tl • I: IE, I:: EI, i - _h-I L|QUIDO
LC-37HV4U LIQUID CRYSTAL TELEVISION ENGLISH OPERATION IMPORTANT: To aid reporting in case of loss or theft, please record the TV's model and serial numbers in the space provided. The numbers are located at the rear of the TV. MANUAL I Model No.: Serial No.: IMPORTANT INFORMATION WARNING:TONOTREDUCE EXPOSE THE THISRISK PRODUCT OF FIRETOORRAIN ELECTRIC OR MOISTURE. SHOCK, DO AI RISK OF ELECTRIC SHOCK DO NOT OPEN CAUTION: TO REDUCE THE RISK OF ELECTRIC SHOCK, DO NOT REMOVE COVER (OR BACK).
IMPORTANT INFORMATION I CAUTION: TO PREVENT WIDE SLOT, FULLY ELECTRIC INSERT. SHOCK, I MATCH WIDE BLADE OF PLUG TO I CAUTION: DO NOT PLACE THIS PRODUCT ON AN UNSTABLE CART, STAND, TRIPOD, BRACKET, OR TABLE. THE PRODUCT MAY FALL CAUSING SERIOUS PERSONAL INJURY AND SERIOUS DAMAGE TO THE PRODUCT. USE ONLY WITH A CART, STAND, TRIPOD, BRACKET, OR TABLE RECOMMENDED BY THE MANUFACTURER OR SOLD WITH THE PRODUCT.
DEAR SHARP CUSTOMER Thank you for your purchase of the Sharp Liquid Crystal Television. To ensure safety and many years of trouble-free operation of your product, please read the important Safety Precautions carefully before using this product. IMPORTANT SAFETY PRECAUTIONS r Electricity is used to perform many useful functions, but it can also cause personal injuries and property damage if improperly handled. This product has been engineered and manufactured with the highest priority on safety.
IMPORTANT SAFETY PRECAUTIONS or aerosol cleaners. Use a damp cloth for cleaning. wash bowl, kitchen sink, or laundry tub; in a wet basement; or near a swimming pool; and the like. [oWaterandMoisture Donotusethisproduotnearwater forexample, nearabathtub, injuries as well as damage to the product. Use only a cart, stand, tripod, bracket or table recommended by the manufacturer or sold with the product. When mounting the product on annotunstable base can cause product fall, intable.
IMPORTANT SAFETY PRECAUTIONS • Outdoor Antenna Grounding If an outside antenna is connected to the television equipment, be sure the antenna system is grounded so as to provide some protection against voltage surges and built-up static charges.
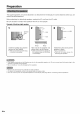
Contents IMPORTANT INFORMATION ........................... DEAR SHARP CUSTOMER .............................. IMPORTANT SAFETY PRECAUTIONS ............... Contents ...................................................... Supplied accessories .................................... Preparation ................................................... Attaching the speakers .............................. Where to place the System ........................... Setting the System .................................
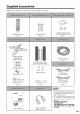
Supplied accessories Make sure the following accessories RRMCGA037WJSA Page 13 are provided with the product.
Preparation The supplied speaker unit can be attached to or detached from the Display. It must be attached unless you use external amplifier/speakers. Before attaching (or detaching) speakers, unplug the AC cord from the AC outlet. Be sure to attach or detach the speakers with two or more people. Example: Attaching right speaker. 3 2 1 Speaker plug Bulge Insert the speaker plug into the terminal on the Display. ,, Make sure that the speaker plug is inserted completely.
Preparation "System" means the Display and AVC System. First select the location where to place the System. Selecting the location of the System • Select a place with no direct sunlight and good ventilation. • The Display and the AVC System are connected (See page 10 for details.) Display Setting the System by the system cable. System cable If you want to keep a longer distance between the Display and AVC System, please purchase the optional system cable AN-07SC1 (about 23 feet/7 meters).
Preparation After putting the Display and the AVC System in place, connect the system cables and AC cords. Use the cable clamps for bundling the cables. Removing the terminal cover Display (rear view) _J _J 1D [] IIIII | f| / toward the center of the Press tworemove hooks the Displaythe and cover toward you. upper down hooks the to remove L Press two the cover toward you.
Preparation Attaching the clamps and bundling the cables with the clamp f Cable clamp (Large) Cable Insert the cable clamp in the hole on the Display leg as shown. Peel off the seal on the back and attach as shown. Display clamp (Small) (rear view) • The small clamp on the right is used for bundling external speakers. (See page 56.) Closing the terminal cover [] [] IIIIIIIIIIIIIIIIII IIIIIIIIIIIIIIIIII Cables come out from the small opening.
Preparation Using an optional bracket to mount the Display • You can ask a qualified service personnel about using an optional AN-37AG1 bracket to mount the Display to the wall. • Carefully read the instructions that come with the bracket before beginning work. f Hanging on the wall AN_37AG1 waft mount bracket. (See the bracket instructions for details.
Preparation If the remote control fails to operate Liquid Crystal Television functions, control unit. 10penthebatterycever. 2 Insert two "AA" size Alkaline batteries (supplied with the product). replace the batteries in the remote :3 CIose the battery cover. ,, Place the batteries with their terminals corresponding to the (+) and (-) indications in the battery compartment. Improper use of batteries can result in chemical leakage or explosion. Be sure to follow the instructions below.
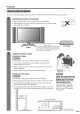
Part names INPUT J VOLUME buttons (VOL-/+) CHANNEL buttons (CHV//_) MAIN POWER button / button POWER button ______ ",d POWER OPC m m Remote control sensor OPC sensor OPC indicator* POWER indicator I_ -14 *(::)PC: Optical Picture Control (See pages 38 and 40.
Part names Headphone PC iNPUTterminal(AUDIO) (Whenconnectingheadphones,the soundfrom the PC iNPUTterminal(ANALOGRGB) speakersis muted.) How to open the door. * If the AVC System is switched on but it does not appear to be operating correctly, it may need resetting. In this case, press CLEAR, shown in the diagram, lightly with the end of a ballpoint pen or other pointed object. This will reset the System as shown below.
Part names 1 2 TV POWER: Switch the Liquid Crystal Television power on or off. (See page 21 .) FRONT SURROUND: Set SRS* and FOCUS* Sound System mode. (See page 25.) 3 AV MODE: Select an audio or video setting. (See page 52.) (AV mode: STANDARD, DYNAMIC, MOVIE, GAME, USER. PC mode: STANDARD, USER.) 4 5 VIEW MODE: Select the screen size. (See pages 52 and 53.) DISPLAY: Display the channel information. 6 SLEEP: Set the sleep timer. (See page 55.
Watching TV Simple operations for watching a TV program To enjoy a clearer picture, use an outdoor antenna. The following is a brief explanation of the types of connections that are used for a coaxial cable. If your outdoor antenna uses a 75-ohm coaxial cable with an F-type connector, plug it into the antenna terminal at the rear of the AVC System. * The antenna and the cable converter cannot be connected at the same time. f F-type connector 1.
Watching TV f A-2. Connecting with cable converter using AUX terminals for audio and video output. (If your cable TV converter has both RF OUTPUT and AUX terminals, it is recommended shown in example A-1.) to connect it as RF Cable (Supp+ied) I _L, I ........ _:__!__£ .£_['_.1_!__!". _[2!__!+y. S'________=_)_ ........ 4• Be sure to remember what kind of connection is made with your System.
Watching TV f C. Connecting Antenna Cable with VCR RF Cable Coaxiai Antenna (Supptied) Cable (commercially avaiiabSe) _Cab_e leaddn Coaxia_ Antenna (commercially ___[_ Video Cab4e (commercially Audio Cable (commercially Cable available) available) available) .............................._:_Ld _.£_[_.{_._t_££!_!_z _J_#[_}........................ I, Be sure to remember what kind of connection is made with your System.
Watching TV Connect the AC cords after all component connections have been completed. Display (rear view) AC cord AVC System (rear view) (( )) AC cord ,, Always turn off the main power of the Display and AVC System when connecting the AC cords. ', Disconnect the AC cords from the AC outlet, Display and AVC System when the System is not going to be used for a long period of time.
Watching TV Display _ Press MAIN POWER on the Display. • The POWERindicator on the Display flashes red. 0 POWER button Press MAIN POWER on the AVC System. MAIN POWER • The System turns the power on.
Watching TV When you turn on the System for the first time, it will automatically memorize the broadcasting channels where you live. Perform the following steps before you press TV POWER on the remote control unit. 1. Insert the batteries into the remote control unit. (See page 13.) 2. Connect the antenna cable to the AVC System. (See pages 17 to 19.) 3. Plug in the AC cord to the AC outlet. (See page 20.) Language setting Select from among 3 languages: English, French and Spanish.
Watching TV Using FLASHBACK unit You can change channels in several ways. • While watching a broadcast, press ANT-A/B to view the image received from the other tuner. on the remote control Press FLASHBACK to switch the currently tuned channel to the previously tuned channel. Press FLASHBACK again to switch back to the currently tuned channel. • FLASHBACK will not work if no channel changed after the System is turned on.
Watching TV Using MUTE on the remote control unit Mutes the current sound output. Changing the volume You can change the volume on the Display or on the remote control unit. T Display Av , Fr_ON r VOL -/+ _E_u IVSAIIOVD DW_VD rot, Using VOL +/on the remote control • To increase the volume, press VOL +. • To decrease the volume, press VOL -. unit Volume adjustment Press MUTE. • "E_" has been displayed on the screen for 30 minutes, and the sound is silenced.
Watching TV (0) produces SRS and FOCUS effects from the speakers. Each time you press FRONT SURROUND, the mode changes among SRS, FOCUS, FOCUS + SRS and Off. SRS sound options • SRS (Sound Retrieval System): Creates more a natural sound retrieving the spatial information from any stereo recording and restoring the original threedimensional sound field. • FOCUS: Repositions a sound image from two speakers to a more optimal listening position or height without moving them.
Basic adjustment settings List of AV menu items to help you with operations Contrast ......................................... Brightness ..................................... Page 32 Page 32 Color ............................................... Page 32 Tint ................................................. Page 32 Sharpness ...................................... Advanced Page 32 C.M.S .................................... Color Temp .......................... Page 33 Page 34 Black ...............
Basic adjustment settings Antenna You can run EZ Setup again, even after setting up the preset channels. @@@ @@® @®@ Language setting Select from among 3 languages: English, French and Spanish. setting • Make sure what kind of connection is made with your System when selecting "Air" or "Cable" for both ANTRA and B. Press <1/1_to select "Air" or "Cable" for ANTA, then press A/T to move down. Press
Basic adjustment settings If initial setup does not memorize all the channels in your region, follow the instructions below to manually memorize the channels. r_Nu TV;SA_;DVD _rV_W_O_ Channel search Channel auto search makes the System look for all channels viewable in the set area. Press MENU displays. and the TV MENU screen Press <1/1_ to select "Setup". • Setup menu displays. Antenna setting Press MENU displays. and the TV MENU screen Press <1/1_ to select "Setup". • Setup menu displays.
Basic adjustment settings Press A/T to select "Skip", and press
Basic adjustment settings Press A/V to select "Favorites(ANT-A)" or "Favorites(ANT-B)", and then press SET/ ENTER. Favorite channel (Omscreen selected.) display when "Favorites(ANT-A)" is (Omscreen selected.) display when "Favorites(ANT-B)" is setting This function allows you to program 4 favorite channels, in 4 different categories. (A total of 32 channels with ANT-A and B combined.) By setting the favorite channels in advance, you can select your favorite channels easily.
Basic adjustment settings You can also select a language from the setup menu. Select from among 3 languages: English, French and Spanish. *z_N_ TWSA_bVD _rV_W _0_' AV input mode Press MENU displays. PC input mode and the TV MENU screen Press <1/1_ to select "Setup". Press A/V to select "Language", press SET/ENTER Press MENU and the PC MENU screen displays. Press <1/1_ to select "Setup". and then Setup Press A/V to select the desired language listed on the screen, and then press SET/ ENTER.
Basic adjustment settings Press MENU and the TV MENU (PC MENU) screen displays. Adjust the picture to your preference with the following picture settings. Press <1/1_ to select "Picture". • Picture menu displays. _EXd TW_ATID k/D Press A/V item. DTV_DVD r_r, to select a specific adjustment Press
Basic adjustment settings Color tone is managed using the six-color adjustment setting. _,_E_U TW_ATIbVD r_Ec DTV_VDr0r' _E_ • For resetting all adjustment items to the factory preset values, press A/V to select "Reset", and then press SET/ ENTER. AV input mode Press MENU displays. Press A/, to select a specific adjustment item. Press <1/1_ to adjust the item to your desired position. and the TV MENU screen PC input mode Press <1/1_ to select "Picture".
Basic adjustment settings Adjusts the color temperature balance. _E_u TW_ATIbVD to give a better white Select a level for automatically adjusting blackish tone to suit viewing conditions. DW_VDr¢_' Press MENU displays. and the TV MENU screen Press <1/1_ to select "Picture". _E_ Press A/T" to select "Advanced", press SET/ENTER r_Ec and then Picture Press MENU displays. and the TV MENU screen Press <1/1_ to select "Picture".
Basic adjustment settings Provides high quality images with minimal dot crawl and cross color noise. TWSAT/OVD DTV_VDrot, For viewing a video in monochrome. Press MENU displays. and the TV MENU screen Press
Basic adjustment settings Automatically detects a film-based source (originally encoded at 24 frames/second), analyses it then recreates each still film frame for high-definition picture quality. TW_ATIb VD Adjusting the image and input signal can give you a more beautiful picture. _E'_b TWSAT/OVD DTV_VL_r0r, Press MENU displays. Press MENU displays. DW_VD r0r, and the TV MENU screen Press
Basic adjustment settings You can adjust the sound quality to your preference with the following settings. _L_ v£ _-- Press MENU and the TV MENU (PC MENU) screen displays. Press <1/1_ to select "Audio". Audio Press A/V item. to select a specific adjustment Press
Basic adjustment settings Power control setting allows you to save energy. _E,_u TWSAT/OVD DTV_VL_ r0r, Power save When set to "Manual" or "Auto", power consumption is reduced by decreasing backlight brightness. Press MENU displays. and the TV MENU screen Press <1/1_ to select "Power control".
Basic adjustment settings No signal off No operation off When set to "Enable", the power will automatically shut down if no signal inputs for 15 minutes. When set to "Enable", the power will automatically shut down if there is no operation for 3 hours. _E,_u TWSAT/OVD Press MENU displays. DTV_VDrot, _E'_U and the TV MENU screen TWSAT/OVD Press MENU displays. DW_VD rot, and the TV MENU screen Press <1/1_ to select "Power control". Press <1/1_ to select "Power control".
Basic adjustment settings Power management Power control setting allows you to save energy. r_F,u TV;SA_;DVD When set, the power will automatically _rV_VE__r _ Press MENU displays. shut down. and the PC MENU screen Press
Using external equipment You can connect many types of external equipment to your System, like a DVD player, VCR, Digital TV tuner, PC, game console and camcorder. To view external source images, select the input source from INPUT on the remote control unit or on the Display.
Using external equipment You can use the INPUT 1 terminal when connecting AVC System (rear view) to a DVD player and other audiovisual equipment. Component video cable (commercially available) When using component video cable, select "COMPONENT" for "Input Select" in the menu. S-video cable (commercially available) @@@@ @@@ DVD player Av _raosr S S To watch a DVD image, select "INPUT1" from "INPUT SOURCE" menu using INPUT on the remote control unit or on the Display. (See page 50.
Using external equipment You can use the INPUT 2 terminal when connecting a VCR and other audiovisual equipment. AVC System (rear view) AV cable (commercially available) S-VIDEO cable (commercially available) @@@@ VCR Av TO watch a VCR image, select "INPUT2" from the "INPUT SOURCE" menu using INPUT on the remote control unit or on the Display. (See page 50.) H_o_r sum i_1_ CH When connecting "INPUT2".
Using external equipment You can use the INPUT 3 terminal when connecting a Digital TV tuner and other audiovisual equipment. AVC System (rear view) Component video cable (commercially available) When using component video cable, select "COMPONENT" for "Input Select" in the menu. S_video cable (commercially available) i AV cable (commercially available) I I DVl cable (commercially available) When using DVl cable, select "DVI" for "Input Select" in the menu.
Using external equipment A game console, camcorder INPUT 4 terminals. and some other audiovisual equipment are conveniently connected using the • The S_video terminal has priority over the video terminals.
Using external equipment Use the PC terminals to connect a PC. • The PC input terminals are DDC1/2B_compatible. • Refer to page 77 for a list of PC signals compatible with the System. AVC System (front view) --o q m RGB cable commercially available) PC 3.5 mm stereo minijack cable sommercially available) Signal names for 15-pin mini D-sub connecter Pin No. (_ Signal name Pin No.
Useful adjustment settings Press MENU displays. For adjusting position. a picture's horizontal and the TV MENU screen and vertical Press <1/1_ to select "Setup". Press A/V to select "Position", press SET/ENTER and then Setup ....... 31 Press A/V to select "H-Pos/' or "V-Pos.". Press
Useful adjustment settings You can move the picture around on the screen. Press A/T/
Useful adjustment For automatically _E_u settings adjusting the PC image. TWSAT/OVE) Press MENU displays. Ordinarily you can easily adjust the picture as necessary to change image position using Auto Sync. In some cases, however, manual adjustment is needed to optimize the image. DTV_VDr_r, and the PC MENU screen Press MENU and the PC MENU screen displays. Press <1/1_ to select "Setup". • Setup menu displays. Press <1/1_ to select "Setup". • Setup menu displays. Press A/V to select "Auto Sync.
Useful adjustment settings DVI input signal setting Selecting the image resolution of the DVI-DIGITAL input signal. The DVI-DIGITAL terminal of this System supports the HDCP* standard. Press INPUT on the remote control unit or on the Display and select "INPUT3", as explained in Input selection. Select "Auto" or "DVI" from the "Input Select" menu for INPUT 3 signals, as explained in Input signal setting. Input selection Can use for selecting the input source.
Useful adjustment settings r_ErJu TV,_,t T;DVD Dr,_D,_ _C_ You can set the orientation of the picture. AV input mode PC input mode Press MENU and the TV MENU screen displays. Press MENU and the PC MENU screen displays. Press <1/1_ to select "Setup". Press <1/1_ to select "Setup".
Useful adjustment settings AV MODE gives you five viewing options to choose from to best match environment of the System, which can vary due to factors like room brightness, type of program watched or the type of image input from external equipment. iv TV Av O_L v¢_ ISA7 ,• Press VIEW MODE. • The View mode menu displays. • The menu lists the view mode options selectable for the type of video signal currently received. DV_ _LO Press VIEW MODE or A/V while the View mode menu is still on the screen.
Useful adjustment settings IEXAMPLE rv _ _• 4;, _,_ _ Input signal (640 x 480) You can select the screen size. • Connect the PC before making adjustments. (See page 46.) • Seleotable screen size may vary with input signal type. Press VIEW MODE. • The View mode menu displays. Input signal (1024 x 768) Press VIEW MODE or A/V desired item on the menu. to select a [EXAMPLE Screen size images. Input signal Normal Stretch Dot by Dot Zoom Keeps the original aspect ratio in a full screen display.
Useful adjustment settings • Some input signals may have to be registered manually to display properly. • The pairs of input signals (resolutions) in the list below are not distinguishable when received. In such case, you have to set the correct signal manually. After setting once, it will display when the same signal (resolution) is input again. Produces a clearer r,'ENU video image.
Useful adjustment settings Allows you to set a time when the TV automatically switches to standby. Allows you to select _/r_ what controls TV_SA_bVD UV the audio output. ,'U 0 Press MENU and the TV MENU (PC MENU) screen displays. Press SLEEP. • Remaining time displays when sleep timer has been set. Press <1/1_ to select "Option". Sleep Timer: Remaining 30 I I Press A/V to select "Audio Out", and then press SET/ENTER Each time you press SLEEP, the remaining time switches as shown below.
Useful adjustment settings EXT. SPEAKER [] 8g lOW [] 8g lOW + + RED BLACKBLACK RED ,, Bundle the cables of the external speakers with clamps as shown above. When using external speakers ,, Change the speaker setting to external speakers. page 57.) Make sure to connect the speaker (See jack and cable polarity ( +, - ) properly ', ', ,, ', The speaker jacks have plus (+) and minus (-) polarity. Plus is red and minus is black. The cables are also divided into plus and minus.
Useful adjustment settings You can output audio using the supplied (internal) or other external speakers. _,_E'_b TWSAT/OVD Press MENU displays. speakers DTV_VDr0r, and the TV MENU screen Press <1/1_ to select "Audio".
Useful adjustment settings r_ErJu TV/S,t T;DVD Dr,_D,_ _0_ Improves the response of Liquid Crystal Panel when viewing fast-moving images. The effect is greater at low room temperatures (at or below 59°F/15°C). AV input mode PC input mode Press MENU and the TV MENU screen displays. Press MENU and the PC MENU screen displays. Press <1/1_ to select "Option". Press <1/1_ to select "Option".
Useful adjustment settings • Your System is equipped with an internal closed caption decoder. Closed caption is the System which allows you to view conversations, narration, and sound effects in TV programs and home videos as subtitles on your Display. • Not all programs and videos offer closed caption. Please look for the "[r{_]" symbol to ensure that captions will be shown. • "CCI" or "CC2" displays subtitles of TV dramas and news programs while allowing a full view of the picture.
Useful adjustment settings Select "New Secret No.", and then press SET/ENTER Input the new 4-digit secret number by using 0-9. Allows you to use a secret number to protect certain settings from being accidentally changed. IMPORTANT: Three conditions must be met to enable V-Chip (see pages 62 to 66): (_ Secret No. is registered. _ V-Chip settings have been made. "Status" is set to "On". Input the same 4-digit number on the "Reconfirm" screen as in step 5 to confirm. ........
Useful adjustment settings Clearing @®® ®®® ®®® Changing the secret the secret number Allows you to clear your secret number. Repeat steps 1 to 3 in Setting a Secret Number. • Secret number setting menu displays. number Input the 4-digit secret number by using 09. Allows you to change your current secret number. Repeat steps 1 to 3 in Setting a secret number. • Secret number setting menu displays. Input the 4-digit secret number by using 09. Press A/V to select "Secret No.
Useful adjustment settings V-CHIP is an electronic filtering device built into your System. This tool gives parents a great degree of control over broadcasts accessed by their children. It allows parents to select programs judged suitable for child viewing while blocking ones judged not suitable. It does so automatically once you activate the V-CHIP feature in your Liquid Crystal Television. "V-Chip" and "Status" will not be selectable from the menu if you do not first configure your secret number.
Useful adjustment settings TV Parental @®® ®®® ®®® Guidelines (TV Guidelines) Repeat steps 1 to 5 in Voluntary rating system (MPAA). movie Press A/V to select "TV Guidelines", then press SET/ENTER. Voluntary movie rating system (MPAA) Press MENU and the TV MENU screen displays. and Press _I,/Y to adjust the item to your desired position. "lh" indicates the item is blocked. • The setting automatically enters "Block" for any ratings below your selection. Example Press <1/1_ to select "Setup".
Useful adjustment settings Canadian Rating Systems • The TV rating systems in Canada are based on the Canadian Radio-Television and Telecommunications Commission (CRTC) policy on violence in television programming. • While violence is the most important content element to be rated, the structure developed takes into consideration other program content like language, nudity, sexuality and mature themes.
Useful adjustment settings @®® ®®® ®®® Press A/Y to adjust the item to your desired position. "_" indicates the item is blocked. • The setting automatically enters "Block" for any ratings below your selection. • If Status is not set to "On" the configuration settings will not work. (See page 60.) Example Canadian English ratings Press MENU and the TV MENU screen displays. Press <1/1_ to select "Setup". Press A/V to select "Parental then press SET/ENTER • Secret number setting menu when "Secret No.
Useful adjustment settings IV AV _ PI!ON • The V-CHIP BLOCK is working and censors a broadcast, "V-CHIP HAS BEEN ACTIVATED." displays. I Press SET/ENTER while the V-CHIP is working and then the secret number setting menu displays. Enter your 4-digit secret number with 0 - 9 and then press SET/ENTER At this time VCHIP BLOCK temporarily releases. • You can reactivate the temporarily BLOCK as shown below.
Other viewing options Picture Allows you to display two pictures on the screen at one time. Twin picture in all cases You can display two same-sized pictures except when inputting from a PC INPUT terminal. and still image You can display two same-sized pictures - one moving and one still - when inputting from an AV source. Iv • voR Press TWIN PICTURE. • Twin picture displays and a selected source image displays. input r_ENU TV SApL, VD Dr,4DV__Op ! Press FREEZE.
Other viewing options Presetting You can operate the connected AV products (AV Receiver, Cable Box, SAT tuner, DTV, VCR, DVD, LD) using the learning function for your remote control unit. This remote control unit has the function that can memorize each remote control code. manufacturer Slide the Mode switch to match the device to which you want to preset the remote control signal. Press EDIT/LEARN rv IV _ CBL _ VC_ codes _IJUUL DV,_ and 1 at the same time. • LED flashes continuously.
Other viewing Manufacturer options codes CATV/SAT/ DTV VCR DVD/LD CATV/SAT/ DTV 0O PIONEER1 (CATV) SHARP1 SHARP (DVD) 24 01 PIONEER2 (CATV) SHARP2 PIONEER (DVD) 25 02 JERROLD1 (CATV) SHARP3 PANASONIC (DVD) 26 03 JERROLD2(CATV) PIONEER SAMSUNG (DVD) 27 04 JERROLD3 (CATV) FISHER SONY (DVD) 28 05 JERROLD4 (CATV) FISHER TOSHIBA (DVD) 29 _ _ _ _ _ _ VCR DVD/LD SANYO1 PHILIPS (LD) SANYO2 RCA (LD) SANYO3 SONY (MDP) SONY (BETA) SONY (LD) SONY (VHS) SONY (8ram) f 0
Other viewing options F_ON_ Receiver control buttons When a SHARP receiver is connected to the Display, the receiver can operate using buttons 1 to 3. When another non-SHARP receiver is connected to the display, the signals for 1 to 3 must first be learned before operating. (See page 68.) 1 RECEIVER POWER (STANDBY/ON) Turns receiver power on and off. 2 RECEIVER INPUT Selects the input source connected 3 _NU _V_SAT bVb RECEIVERVOL +/Adjusts receiver volume level.
Other viewing options Cable control buttons When the Mode switch is set to CBL/SAT/DTV the cable converter connected to the Display can operate using 1 to 5. Cable converters made by other manufacturers and not preset can also operate using the remote control unit if 1 to 5 have learned the functions. (See page 681) 1 2 0 9 Press a button (or buttons) that corresponds channel that you wish to watch. CH &/• Press CH • channel.
Other viewing options SAT control switch When the SAT is preset by the learning remote control function, the remote control unit buttons will function as shown below. • When the Mode switch is set to CBL/SAT/DTV, satellite broadcast tuners made by other manufacturers and not preset can also operate with the remote control unit if t to 7 have learned the functions. (See page 68.) 1 2 4 3 0 9 Press a button (or buttons) that corresponds channel that you wish to watch.
Other viewing options DTV control switch buttons For viewing DTV broadcasts, a digital TV tuner (commercially available) is necessary. _ROf_T When the Mode switch is set to CBL!SAT/DTV, the remote control unit buttons will function as shown below. • Operate the tuner using t to 10. 2 7 1 0 9 Press a button (or buttons) that corresponds to the channel that you wish to watch. 2 * (DOT) Used for channel selection. 3 CH &/V Press CH • or CHY to tune in a higher or lower channel.
Other viewing options VCR control -- Mode switch buttons When the VCR is preset by the learning remote control function, the remote control unit button will function as follows when the Mode switch of the remote control unit is set to VCR. • When the input selector button having the same number as the input terminal connecting the VCR is pressed, the VCR can operate using 1 to 8.
Other viewing options DVD/LD w _ r CBL r WR _SAT r_ DVD _ _ i -- Mode switch control buttons When the DVD/LD is preset by the learning remote control function, the remote control unit button will function as follows when the Mode switch of the remote control unit is set to DVD/LD. • When the input selector button having the same number as the input terminal connecting a DVD player or LD player is pressed, these players can operate using 1 to 11. (7 to 9 are for DVD players only.
Appendix Problem Possible • No power Solution • Make sure the Display and the AVC System are connected 10.) correctly. (See page • Check if you pressed TV POWER on the remote control unit. (See page 21 .) If the indicator on the Display lights up red, press POWER on the Display. • Is the AC cord disconnected? (See page 20.) • Has the main power been turned on? (See page 21.) • Unit cannot be operated. • Remote operate.
Appendix Resolution Frequency 640 x 400 85 Hz 720 x 400 70 Hz Remarks 85 Hz 640 x 480 60 Hz 65 Hz Macintosh 13" (67 Hz) Macintosh 16" Macintosh 19" 72 Hz 75 Hz 85 Hz 848 x 480 60 Hz 800 x 600 56 Hz 60 Hz 72 Hz 75 Hz 85 Hz 832 x 624 74.5 Hz 1024 x 768 60 Hz 70 Hz 75 Hz 85 Hz 1280x 768 60 Hz 1280x1024 60 Hz Apple and Macintosh are registered trademarks of Apple Computer, Inc. DDC is a registered trademark of Video Electronics Standards Association.
Appendix PC Control of the System • When a program is set, the Display can be controlled from the PC using the RS-232C terminal. The input signal (PC/AV) can be selected, the volume can be adjusted and various other adjustments and settings can be made, enabling automatic programmed playing. • Attach an RS-232C cable cross-type (commerciall available) to the supplied Din/D-Sub RS-232C for the connections. • This operation system should be used by a person who accustomed to using computers.
Appendix Response code format Normal response IolKI I Return code (0DH) Problem response (communication error or incorrect command) Return code (0DH) Command table • About the command except being indicated here, it is outside the guarantee range of operation.
Appendix Item 37" LIQUID CRYSTALTELEVISION, LCD panel 37" Advanced Humber of dots 3,147,264 dots (1366 x 768 x 3dots) TV Standard HTSC System TV Function TWstandard (CCIR) American Receiving Channel VHF/UHF VHF 2q3ch, CATV 1q25ch Audio multi 3iex Super View & BLACK TFT LCD UHF 14_69ch BTSC System Brightness 430 cd/m 2 Backlight 60,000 hours (at Manual Standard Viewing angles H:170 ° V:170 ° Audio amplifier lOW x 2 Speakers Terminals O 8cm AVC Rear System Model: LC-37HV4U posi
Dimensional drawings Unit: inch/(mm) _''''''''''''''''''''''''''''''''''''''''''''''''''''''''''''''''''''''''''''''''''''_'''''''_ I_I_ _/8(1175_ !!i]iii]iiiii!!!! !!i]iii]iiiiii!!! !!iiiii]iiiiii!!! iii]iii]iii]iii!i iii]iii]iii]iiiii iii]iii]iii]iiiii iii]iii]iii]iiiii iiiiiiiiiiiiiiiii 37/_ 372_4(948} (875) 32_ z/_4 (8196) iiiiiiiiiiiiiiiii !!i]iii]iiiiii!!! !!iiiii]iiiiii!!! 12(305) 2129/64 (545) 463_/6_ {1184) i 8" © IIIIIIIIIII1!1111 _ 1111111 f (_) -81
Dimensional drawings Unit: inch/(mm) _¢'."?,"t_'?,'." .,.,,.,....,.., _¢',"?,"t_'?,'." .,.°,.,.°,.°,., ,..,.°..,.,..,.. _v.,'.?.'.v+ ,..,.°..,.°,.,.. _,.v.,',7,.',,v+ ,.,,.°..,.°,.,.° "1 0 927/32{250) o _,,-i I 142%4(365) 165e/_4(430) _).
HOW TO SET THE FACTORY PRESETS Press and hold down CLEAR on the AVC System while it is in standby mode. Then press POWER button on the Display or TV POWER on the remote control unit to turn the System on. All setting items (except TV channel) return to the factory presetting. • Running the factory presetting operation also clears the secret number. You can run the EZ Setup again by using the following steps. 1 Turn on the power of the Display and the AVC System. 2 Press MENU.
Calling for Service For location of the nearest Sharp Authorized Service, or to obtain product literature, accessories, customer assistance, please call 1-800-BE-SHARR supplies, or LIMITED WARRANTY CONSUMER LIMITED WARRANTY SHARP ELECTRONICS CORPORATION warrants "Product"), when shipped in its original container, will will, at its option, either repair the defect or replace equivalent at no charge to the purchaser for parts or to the first consumer be free from defective the defective Product labor for
--SHARR VALID IN CANADA ONLY LIMITED WARRANTY Gonsumer Electronics Products Congratulations on your purchase[ Sharp Electronics of Canada Ltd.
SHARR SHARP ELECTRONICS CORPORATION Sharp Plaza, Mahwah, New Jersey 07430-2135 SHARP Printed on post-consumer recycled psper.