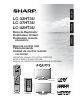
ENGLISH FRANÇAIS LC-32HT3U LC-37HT3U LC-42HT3U ESPAÑOL Remote Replicator Duplicateur distant Duplicador remoto AN-H06RCU Remote control unit Télécommande Unidad de control remoto AN-32HTRC OPERATION MANUAL FOR HOTEL OPERATOR MODE D'EMPLOI POUR HOTELIER MANUAL DE OPERACIÓN PARA EMPRESAS HOTELERAS LC-32HT3U LC-37HT3U AN-32HTRC AN-H06RCU LC-42HT3U
ENGLISH Remote Replicator (AN-H06RCU) Remote control unit (AN-32HTRC) ENGLISH OPERATION MANUAL FOR HOTEL OPERATOR • This operation manual is for LODGENET, ONCOMMAND, NXTV, nSTREAMS and SeaChange users. • This operation manual explains how to set or adjust the TV settings with the Remote Replicator (AN-H06RCU) and the remote control unit (AN-32HTRC), the optional accessories of the LCD TV (LC-32HT3U/LC-37HT3U/LC-42HT3U) designed for hotel guest rooms.
IMPORTANT INFORMATION CAUTION: TO PREVENT ELECTRIC SHOCK, MATCH WIDE BLADE OF PLUG TO WIDE SLOT, FULLY INSERT. CAUTION: DO NOT PLACE THIS PRODUCT ON AN UNSTABLE CART, STAND, TRIPOD, BRACKET, OR TABLE. THE PRODUCT MAY FALL CAUSING SERIOUS PERSONAL INJURY AND SERIOUS DAMAGE TO THE PRODUCT. USE ONLY WITH A CART, STAND, TRIPOD, BRACKET, OR TABLE RECOMMENDED BY THE MANUFACTURER OR SOLD WITH THE PRODUCT.
IMPORTANT SAFETY INSTRUCTIONS Electricity is used to perform many useful functions, but it can also cause personal injuries and property damage if improperly handled. This product has been engineered and manufactured with the highest priority on safety. However, improper use can result in electric shock and/or fire. In order to prevent potential danger, please observe the following instructions when installing, operating and cleaning the product.
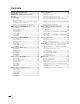
Contents IMPORTANT INFORMATION ..................................1 Trademarks ..............................................................2 IMPORTANT SAFETY INSTRUCTIONS ..................3 Contents ..................................................................4 General notes...........................................................6 Accessories ........................................................6 TV modes index ..................................................
Contents Basic adjustment settings ....................................40 Menu operation buttons.....................................40 On-Screen Display .............................................40 PPV TV mode menu items (for TV/INPUT 1/INPUT 2/INPUT 3) ..................41 PPV TV mode menu items (for HDMI/PC-IN) ......42 NORMAL TV mode menu items .........................43 EZ Setup ...........................................................44 Channel Setup .............................................
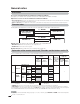
General notes Accessories Accessories included with the LC-32HT3U/LC-37HT3U/LC-42HT3U See pages 8, 12 and 13 of the operation manual of LC-32HT3U/LC-37HT3U/LC-42HT3U. Optional accessories for the LC-32HT3U/LC-37HT3U/LC-42HT3U • Remote Replicator: Stores the TV settings from one TV (LC-32HT3U/LC-37HT3U/LC-42HT3U) and transfers the TV settings to other TVs (LC-32HT3U/LC-37HT3U/LC-42HT3U). • Remote control unit: Sets or adjusts the TV.
General notes Quick TV cloning guide (for the PPV TV) The steps below show the process of setting TVs for hotel guest rooms. 1 Press MASTER on the Remote Replicator to turn on the TV. (See page 26.) 2 Use the remote control unit to set or adjust the TV (TV with the master settings). (LODGENET users: See pages 9 to 12. ONCOMMAND users: See pages 13 to 16. NXTV users: See pages 17 to 19. nSTREAMS users: See pages 20 to 22. SeaChange users: See pages 23 to 25.
General notes Quick TV cloning guide (for the Normal TV) If already in Normal TV mode, begin from step 6. 1 Press MASTER on the Remote Replicator to turn on the TV. (See page 26.) 2 Press MENU and the MENU screen displays. 3 Press c/d to select “PPV TV”. PPV TV [PPV TV] TV Mode PPV System [LODGENET] Function Menu Setup Default Channel [2] Default Volume [20] Room Mode CH Re-Map Reset 4 5 Press a/b to select “TV Mode”, and then press ENTER.
Quick setup for LODGENET users For quick setup, use the remote control unit to perform the following operations. Before the setup, press MASTER on the Remote Replicator to turn on the TV in the MASTER mode. PPV TV [PPV TV] TV Mode PPV System [LODGENET] Function Menu Setup You can select the menu items to display on the Function menu. (See page 30.) The Function menu can be displayed by pressing the TV FUNCTION button on the LODGENET remote control unit. 1 Repeat steps 1 and 2 in PPV System.
Quick setup for LODGENET users Default Channel Sets the default channel. 1 2 1 Repeat steps 1 and 2 in Default Channel. 2 Press a/b to select “Default Volume”, and then press ENTER. 3 Press a/b to select “Volume” or “Auto adjustment”. 4 For “Volume”, press c/d to set the default volume. For “Auto adjustment”, press c/d to select “On” or “Off”. 5 Press MENU to exit. Press c/d to select “PPV TV”. Press a/b to select “Default Channel”, and then press ENTER.
Quick setup for LODGENET users Room Mode CH Re-Map You can set “Maximum Volume”, “R/C Buttons”, “TV Buttons” and “TV INPUT Button” for the ROOM mode. 1 Press MENU and the MENU screen displays. 2 Press c/d to select “PPV TV”. 3 Press a/b to select “Room Mode”, and then press ENTER. 1 Press MENU and the MENU screen displays. 4 Press a/b to select the desired item, and then press ENTER. 2 Press c/d to select “PPV TV”. 5 For “Maximum Volume”, press c/d to set the volume.
Quick setup for LODGENET users View Mode You can set the picture size for when the TV is turned on. 1 Press VIEW MODE. 2 Press VIEW MODE or a/b while the View Mode menu is still on the screen. • The View Mode menu displays. • You can sequentially select a View Mode that has its own aspect ratio. View Mode Side Bar S. Stretch Zoom Stretch Side Bar: Suitable for viewing conventional 4:3 programs in their normal format. S.
Quick setup for ONCOMMAND users For quick setup, use the remote control unit to perform the following operations. Before the setup, press MASTER on the Remote Replicator to turn on the TV in the MASTER mode. PPV TV TV Mode PPV System Default Channel Sets the default channel. 1 Repeat steps 1 and 2 in PPV System. 2 Press a/b to select “Default Channel”, and then press ENTER. 3 Press a/b to select “Analog/Digital”, and then press ENTER.
Quick setup for ONCOMMAND users Default Volume Sets the default volume or turns the Auto adjustment on or off for when the TV is turned on. The Auto adjustment sets the volume to a suitable level depending on the previously used volume setting. 1 Press MENU and the MENU screen displays. 2 Press c/d to select “PPV TV”. 3 Press a/b to select “Default Volume”, and then press ENTER. 4 Press a/b to select “Volume” or “Auto adjustment”. 5 For “Volume”, press c/d to set the default volume.
Quick setup for ONCOMMAND users Label Input You can assign a label to each input source and channel. 1 Press MENU and the MENU screen displays. 2 Press c/d to select “PPV TV”. 3 Press a/b to select “Label Input”, and then press ENTER. 4 5 Press a/b to select the desired input source, and then press ENTER For “INPUT 1” to “INPUT 6”: 1 Press a/b/c/d and ENTER to select each character of the new name for the input source. 2 Press a/b/c/d to select “END”, and then press ENTER to complete the labeling.
Quick setup for ONCOMMAND users View Mode You can set the picture size for when the TV is turned on. 1 Press VIEW MODE. 2 Press VIEW MODE or a/b while the View Mode menu is still on the screen. • The View Mode menu displays. • You can sequentially select a View Mode that has its own aspect ratio. View Mode Side Bar S. Stretch Zoom Stretch Side Bar: Suitable for viewing conventional 4:3 programs in their normal format. S.
Quick setup for NXTV users For quick setup, use the remote control unit to perform the following operations. Before the setup, press MASTER on the Remote Replicator to turn on the TV in the MASTER mode. PPV TV TV Mode PPV System Default Channel Sets the default channel. 1 Repeat steps 1 and 2 in PPV System. 2 Press a/b to select “Default Channel”, and then press ENTER. 3 Press a/b to select “Analog/Digital”, and then press ENTER. 4 Press c/d to select “Analog” or “Digital”, and then press ENTER.
Quick setup for NXTV users Default Volume Sets the default volume or turns the Auto adjustment on or off for when the TV is turned on. The Auto adjustment sets the volume to a suitable level depending on the previously used volume setting. Room Mode You can set “Maximum Volume”, “R/C Buttons”, “TV Buttons” and “TV INPUT Button” for the ROOM mode. 1 Repeat steps 1 and 2 in Default Volume. 2 Press a/b to select “Room Mode”, and then press ENTER.
Quick setup for NXTV users CH Re-Map Sets the channel order (logical channel) to your preferred order. View Mode You can set the picture size for when the TV is turned on. 1 Press VIEW MODE. 2 Press VIEW MODE or a/b while the View Mode menu is still on the screen. • The View Mode menu displays. • You can sequentially select a View Mode that has its own aspect ratio. 1 Press MENU and the MENU screen displays. 2 Press c/d to select “PPV TV”.
Quick setup for nSTREAMS users For quick setup, use the remote control unit to perform the following operations. Before the setup, press MASTER on the Remote Replicator to turn on the TV in the MASTER mode. Selected item Description Language You can select a language from English, French and Spanish for On Screen Display. (See page 30.) View Mode You can select the screen size. (See page 30.) Input Select You can select the input source. (See page 30.) Parental CTRL You can set the secret number.
Quick setup for nSTREAMS users Default Volume Sets the default volume or turns the Auto adjustment on or off for when the TV is turned on. The Auto adjustment sets the volume to a suitable level depending on the previously used volume setting. 1 Press MENU and the MENU screen displays. 2 Press c/d to select “PPV TV”. 3 Press a/b to select “Default Volume”, and then press ENTER. 4 Room Mode You can set “Maximum Volume”, “R/C Buttons”, “TV Buttons” and “TV INPUT Button” for the ROOM mode.
Quick setup for nSTREAMS users CH Re-Map Sets the channel order (logical channel) to your preferred order. View Mode You can set the picture size for when the TV is turned on. 1 Press VIEW MODE. 2 Press VIEW MODE or a/b while the View Mode menu is still on the screen. • The View Mode menu displays. • You can sequentially select a View Mode that has its own aspect ratio. 1 Press MENU and the MENU screen displays. View Mode 2 Press c/d to select “PPV TV”. Side Bar S.
Quick setup for SeaChange users For quick setup, use the remote control unit to perform the following operations. Before the setup, press MASTER on the Remote Replicator to turn on the TV in the MASTER mode. PPV TV TV Mode PPV System Default Channel Sets the default channel. 1 Repeat steps 1 and 2 in PPV System. 2 Press a/b to select “Default Channel”, and then press ENTER. 3 Press a/b to select “Analog/Digital”, and then press ENTER.
Quick setup for SeaChange users Default Volume Sets the default volume or turns the Auto adjustment on or off for when the TV is turned on. The Auto adjustment sets the volume to a suitable level depending on the previously used volume setting. Room Mode You can set “Maximum Volume”, “R/C Buttons”, “TV Buttons” and “TV INPUT Button” for the ROOM mode. 1 Repeat steps 1 and 2 in Default Volume. 2 Press a/b to select “Room Mode”, and then press ENTER.
Quick setup for SeaChange users CH Re-Map Sets the channel order (logical channel) to your preferred order. View Mode You can set the picture size for when the TV is turned on. 1 Press VIEW MODE. 2 Press VIEW MODE or a/b while the View Mode menu is still on the screen. • The View Mode menu displays. • You can sequentially select a View Mode that has its own aspect ratio. 1 Press MENU and the MENU screen displays. View Mode 2 Press c/d to select “PPV TV”. Side Bar S.
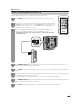
Remote Replicator Part names 1 LEARN indicator: Lights up while storing the TV settings from the TV to the Remote Replicator. 2 DONE indicator: Lights up when storing or transferring is finished. 3 TEACH indicator: Lights up while transferring the TV settings from the Remote Replicator to the TV. 4 MEMORY SELECT indicator: Indicates which memory bank is selected. 5 LEARN button: Store the TV settings from the TV to the Remote Replicator.
Remote Replicator Storing the settings from the TV 1 Connect the TRANSPORT (RJ-11) connector of the Remote Replicator to the TRANSPORT terminal of the TV (TV with the master settings) with the supplied RJ-11 cable. 2 Press MEMORY SELECT to select the memory bank. 3 Press LEARN. 4 The data transfer process is displayed on the screen. 5 The DONE indicator lights up and a message is displayed on the screen after the data storage is complete.
Remote Replicator NOTE Notes on using the Remote Replicator while in Normal TV Mode • The data from performing LEARN while in Normal TV Mode cannot be used when performing TEACH while in PPV TV Mode. Perform TEACH after switching to Normal TV Mode. (Also, data in the Remote Replicator from performing LEARN while in PPV TV Mode cannot be used when performing TEACH while in Normal TV Mode. Perform TEACH after switching to PPV TV Mode.
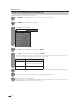
Other settings for the PPV TV mode Reset PPV TV menu The PPV TV menu displays when MENU on the remote control unit is pressed, and the TV is in the PPV TV mode. See below for “TV Mode”, and see page 9 to 25 for the other menu items. TV Mode Sets the TV to the Normal TV mode. 1 Press MENU and the MENU screen displays. 2 Press c/d to select “PPV TV”. All of the TV settings such as “Picture”, “Audio” and “Input Label” will return to the factory presets after performing “Reset” in the PPV TV mode.
Other settings for the PPV TV mode Function menu (for LODGENET and nSTREAMS users only) You can display the Function menu by pressing the FUNCTION button on the LODGENET or nSTREAMS remote control unit. The Function menu items displayed such as “Parental CTRL”, “Language”, “View Mode” and “Input Select” depend on the Function Menu Setup. Use the LODGENET or nSTREAMS remote control unit for the following operations. 1 2 Press FUNCTION to display the Function menu. Press c/d to select “Function”.
Remote control unit 1 Part names 1 2 3 14 4 2 3 15 4 16 5 6 7 8 9 10 11 12 13 5 14 6 17 7 18 8 19 9 20 10 21 16 22 17 23 24 18 11 25 15 19 20 21 22 26 23 24 12 13 27 25 26 27 TV POWER: Switches the TV power on or enters standby. (See page 35.) DISPLAY: Displays the channel information. SOURCE POWER: Turns the power of the external equipment on and off. External equipment operational buttons: Operates the external equipment. 0 – 9: Sets the channel. (See page 37.
Remote control unit Inserting the batteries If the remote control unit fails to operate TV functions, replace the batteries in the remote control unit. Open the battery cover. 1 2 Insert two “AAA” size batteries (supplied with the product). 3 Close the battery cover. • Place the batteries with their terminals corresponding to the (e) and (f) indications in the battery compartment. CAUTION Improper use of batteries can result in chemical leakage or explosion. Be sure to follow the instructions below.
Preparation You can connect many types of external equipment to your TV like a Blu-ray disc player, HD-DVD player, DVD player, VCR, Digital TV tuner, HDMI equipment, game console or camcorder. To view external source images, select the input source from INPUT on the remote control unit or on the TV. (See pages 51 and 52.) CAUTION • To protect equipment, always turn off the TV before connecting any external equipment. • Please read the relevant operation manual (Blu-ray disc player, etc.
Preparation Connecting HDMI equipment You can use the INPUT 4 or INPUT 5 terminal when connecting HDMI equipment. HDMI cable (commercially available) HDMI equipment NOTE • When using an HDMI-DVI conversion cable, input the audio signal to AUDIO terminal of INPUT 5. • When receiving an incompatible signal, such as 1080p, the message below appears without the image on the screen. For an incompatible video signal: “An incompatible video signal has been received. Check the output device settings.
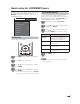
Watching TV See page 29 to switch the TV to the Normal TV mode. Simple operations for watching a TV program Turning on the power Press POWER on the TV, or TV POWER on the remote control unit. • POWER indicator (Green): The TV is on. (After a few seconds, a window appears with sound.) NOTE • The initial setup starts after the TV is switched from the PPV TV mode to the Normal TV mode. See page 44 for performing EZ Setup from the Setup menu.
Watching TV Initial setup When you turn on the TV for the first time, it will automatically memorize the broadcasting channels where you live. Perform the following steps before you press TV POWER on the remote control unit. 1. Insert the batteries into the remote control unit. (See page 32.) 2. Connect the antenna cable to the TV. (See page 15 of the operation manual for the LC-32HT3U/LC-37HT3U/LC-42HT3U.) Channel search Channel auto search makes the TV look for all channels viewable in the set area..
Watching TV Simple button operations for changing channels You can change channels in several ways. Method 1 Using CH r/s on the remote control unit or on the TV. Method 2 1 Press FLASHBACK to switch to the previously tuned channel. 2 Press FLASHBACK again to switch back to the currently tuned channel. NOTE • FLASHBACK will not work if no channel has been changed after the TV is turned on. Method 3 Using remote control buttons 0-9, • (DOT) to select channels for VHF/UHF/CATV/DIGITAL.
Watching TV Simple button operations for changing volume/sound ■ Using MUTE on the remote control unit Mutes the current sound output. ■ Changing the volume You can change the volume on the TV or on the remote control unit. Press MUTE. • M will be displayed on the screen for 30 minutes, and the sound is silenced. 20 Mute ■ Using VOLk/l • To increase the volume, press VOLk. • To decrease the volume, press VOLl.
Watching TV Setting MTS/SAP stereo mode The TV has a feature that allows reception of sound other than the main audio for the program. This feature is called Multi-channel Television Sound (MTS). The TV with MTS can receive mono sound, stereo sound and Secondary Audio Programs (SAP). The SAP feature allows a TV station to broadcast other information, which could be audio in another language or something completely different like weather information.
Basic adjustment settings Menu operation buttons On-Screen Display Use the following buttons on the remote control to operate the menu. Example Option 1 Audio Only Digital Noise Reduction Input Select [Off] [VIDEO] Output select [Fixed] Color System [Auto] 3 Caption Setup Program Title Display 2 [No] 4 1 Item displayed in yellow • This indicates the item currently selected. • Press ENTER to go to the adjustment screen for this item.
Basic adjustment settings Icons PPV TV Indicates the menu item can be set or adjusted in the PPV menu. NORMAL TV Indicates the menu item can be set or adjusted in the Normal TV menu. PPV TV NORMAL TV Indicates the menu item can be set or adjusted in both the PPV menu and Normal TV mode. PPV TV mode menu items (for TV/INPUT 1/INPUT2/INPUT3) Option Picture OPC .............................................................................. Page 47 Backlight ................................................
Basic adjustment settings PPV TV mode menu items (for HDMI/PC-IN) Picture OPC .............................................................................. Page 47 Backlight ..................................................................... Page 47 Contrast ...................................................................... Page 47 Brightness .................................................................. Page 47 Color ...........................................................................
Basic adjustment settings NORMAL TV mode menu items NORMAL TV For TV/INPUT 1/INPUT 2/INPUT 3 For HDMI/DVI Picture OPC .............................................................................. Page 47 Backlight ..................................................................... Page 47 Contrast ...................................................................... Page 47 Brightness .................................................................. Page 47 Color .................................
Basic adjustment settings EZ Setup PPV TV NORMAL TV You can run EZ Setup again, even after setting up the preset channels. Language setting Select from among 3 languages: English, French and Spanish. MENU to display the MENU screen, and 1 Press then press c/d to select “Setup”. 2 Press a/b to select “EZ Setup”, and then press ENTER. Channel Setup PPV TV NORMAL TV If initial setup does not memorize all the channels in your region, follow the instructions below to manually memorize the channels.
Basic adjustment settings Channel memory setting 3 1 Press MENU to display the MENU screen, and then press c/d to select “Setup”. 2 Press a/b to select “CH Setup”, and then press ENTER. Press a/b to select “Signal Strength”. • The signal strength of DIGITAL channel is displayed. The signal information is based on the current channel. Signal Strength Channel Strength • If you already set the Secret No., input the 4-digit secret number here. See page 62 for setting a secret number.
Basic adjustment settings Favorite channel setting NORMAL TV This function allows you to program 4 favorite channels, in 4 different categories. By setting the favorite channels in advance, you can select your favorite channels easily. Using FAVORITE CH on the remote control unit 1 Select the channel you want to register as a favorite channel. 2 Press FAVORITE. 3 Press a/b to select “Register”, and then press ENTER. 1 Select the channel you want to register as a favorite channel.
Basic adjustment settings PPV TV NORMAL TV Picture adjustments Adjusts the picture to your preference with the following picture settings. 1 Press MENU to display the MENU screen, and then press c/d to select “Picture”. 2 Press a/b to select a specific adjustment item. 3 4 Press c/d to adjust the item to the desired level.
Basic adjustment settings Advanced picture adjustments PPV TV NORMAL TV This TV provides various advanced functions for optimizing the picture quality. 1 Press MENU to display the MENU screen, and then press c/d to select “Picture”. 2 Press a/b to select “Advanced”, and then press ENTER. 3 Press a/b to select a specific adjustment item, and then press ENTER. • You can select “Color Temp.”, “Black”, “I/P Setting”, “Film Mode”, “3D-Y/C”, “Monochrome”, or “Range of OPC”.
Basic adjustment settings Sound adjustment PPV TV NORMAL TV You can adjust the sound quality to your preference with the following settings. PPV TV NORMAL TV Surround Surround function allows you to enjoy realistic “live” sound. 1 Press MENU to display the MENU screen, and then press c/d to select “Audio”. 2 Press a/b to select “Surround”, and then press ENTER. Audio 1 Press MENU to display the MENU screen, and then press c/d to select “Audio”.
Basic adjustment settings Power Control PPV TV NORMAL TV Power control setting allows you to save energy. No signal off When set to “Enable”, the power will automatically shut down if there is no signal for 15 minutes. 1 Press MENU to display the MENU screen, and then press c/d to select “Power Control”. 2 Press a/b to select “No Signal Off”, and then press ENTER. 3 Press c/d to select “Enable”, and then press ENTER.
Using external equipment Displaying an external equipment image PPV TV NORMAL TV To view external source images, select the input source from INPUT on the remote control unit or on the TV. Input Select NORMAL TV If the image does not come in clearly from the external equipment connected to INPUT 1 or 2 (LC-42HT3U only), you may need to change the input signal type setting on the “Input Select” menu. 1 Press MENU to display the MENU screen, and then press c/d to select “Option”.
Using external equipment Displaying an image from HDMI equipment 1 PPV TV NORMAL TV To watch an HDMI/PC-IN equipment image, select “INPUT4” or “INPUT5” from “INPUT SOURCE” menu using INPUT on the remote control unit or on the TV. INPUT SOURCE PPV TV NORMAL TV Input Skip This setting allows you to skip the HDMI/PC-IN Input on the Input Selection operation. 1 Press MENU to display the MENU screen, and then press c/d to select “Setup”. 2 Press a/b to select “Input Skip”, and then press ENTER.
Useful adjustment settings Auto Sync. adjustment (for Analog PC input mode only) PPV TV NORMAL TV 1 Press MENU to display the MENU screen, and then press c/d to select “Setup”. 2 Press a/b to select “Auto Sync.”, and then press ENTER. 1 Press MENU to display the MENU screen, and then press c/d to select “Setup”. 2 Press a/b to select “Fine Sync.”, and then press ENTER. 3 Press a/b to select the specific adjustment item. Press c/d to select “Yes”, and then press ENTER. • Auto Sync.
Useful adjustment settings Language setting PPV TV NORMAL TV You can also select a language from the Setup menu. Select from among 3 languages: English, French and Spanish. Reset NORMAL TV If complex adjustments are made and the settings cannot be restored to normal, you can reset the settings to the factory preset values. 1 Press MENU to display the MENU screen, and then press c/d to select “Setup”. 1 Press MENU to display the MENU screen, and then press c/d to select “Setup”.
Useful adjustment settings PPV TV NORMAL TV Input Label Lets you set the input terminal displayed when using the INPUT SOURCE menu or channel display. PPV TV NORMAL TV Sleep Timer For LODGENET and nSTREAMS users, set the Sleep Timer from the Function menu. Allows you to set a time when the TV automatically switches to standby. 1 1 Press INPUT to select the desired input source. 2 Press MENU to display the MENU screen, and then press c/d to select “Setup”.
Useful adjustment settings View Mode for 4:3 Programs PPV TV NORMAL TV View Mode for HD Programs PPV TV NORMAL TV Stretch mode is available for HD programs. Suitable for viewing wide-screen 1.78:1 aspect-ratio programs. When viewing 1.85:1 programs, the stretch mode will still show very thin black bands at the top and bottom of the screen. 1 Press VIEW MODE. • The View Mode menu displays. • The menu lists the View Mode options selectable for the type of video signal currently being received.
Useful adjustment settings PPV TV NORMAL TV View Mode (for PC input mode) You can select the screen size. NOTE • Connect the PC before making adjustments. (See page 34.) • Selectable screen size may vary with input signal type. 1 Press VIEW MODE. • The View Mode menu displays. Example View Mode Normal Zoom Stretch Dot by Dot 2 Press VIEW MODE or a/b while the View Mode menu is displayed to select a desired item on the menu.
Useful adjustment settings Advanced Option settings Output Select Perform the following steps to set the Option menu items on this page. 1 Press MENU to display the MENU screen, and then press c/d to select “Option”. 2 Press a/b to select a specific adjustment item, and then press ENTER. 3 Press a/b (or c/d) to select the desired setting, and then press ENTER. 4 Press MENU to exit. Allows you to select what controls the audio output.
Useful adjustment settings PPV TV NORMAL TV AV MODE AV MODE gives you 7 viewing options to choose from to best match the surrounding environment of the TV, which can vary due to factors like room brightness, type of program watched or the type of image input from external equipment. 1 Press AV MODE. 2 Press AV MODE again before the mode displayed on the screen disappears.
Useful adjustment settings Closed Captions and Digital Closed Captions PPV TV NORMAL TV For LODGENET and nSTREAMS users, set the Closed Captions from the Function menu. Your TV is equipped with an internal Closed Caption decoder. It allows you to view conversations, narration and sound effects as subtitles on your TV. Closed Captions are available on some TV programs and on some VHS home video tapes at the discretion of the program provider.
Useful adjustment settings PPV TV NORMAL TV Caption Setup This function allows you to adjust the closed caption screen appearance to suit your preference. 1 Press MENU to display the MENU screen, and then press c/d to select “Option”. 2 Press a/b to select “Caption Setup”, and then press ENTER. 3 Press a/b to select a specific adjustment item. NOTE • For resetting adjustments to the factory preset values, press a/b to select “Reset”, and then press ENTER.
Useful adjustment settings Secret number setting for parental control (AV input mode only) 5 PPV TV NORMAL TV Input the same 4-digit number on the “Reconfirm” screen as in step 4 to confirm. New Secret No. Secret No. Clear Input Secret No. PPV TV mode: Parental CTRL is only for LODGENET and nSTREAMS users. For ONCOMMAND, NXTV, SeaChange and some LODGENET and nSTREAMS (depending on the system you have) users, the hotel server controls the setting.
Useful adjustment settings Changing the secret number Allows you to change your current secret number. Clearing the secret number Allows you to clear your secret number. 1 Repeat steps 1 and 2 in Setting a secret number. • The secret number setting menu displays. 1 Repeat steps 1 and 2 in Setting a secret number. • The secret number setting menu displays. 2 3 2 Input the 4-digit secret number by using 0–9. 3 Press a/b to select “Secret No.”, and then press ENTER.
Useful adjustment settings Parental control (setting V-CHIP level) PPV TV NORMAL TV V-CHIP is an electronic filtering device built into your TV. This tool gives parents a great degree of control over broadcasts accessed by their children. It allows parents to select programs judged suitable for child viewing while blocking ones judged not suitable. It does so automatically once you activate the V-CHIP feature in your TV.
Useful adjustment settings Voluntary movie rating system (MPAA) 1 Press MENU to display the MENU screen, and then press c/d to select “Setup”. 2 Press a/b to select “Parental CTRL”, and then press ENTER. TV Parental Guidelines (TV Guidelines) 1 Repeat steps 1 to 4 in Voluntary movie rating system (MPAA). 2 Press a/b to select “TV Guidelines”, and then press ENTER. 3 Press a/b to adjust the item to your desired position. “ ” indicates the item is blocked.
Useful adjustment settings Canadian Rating Systems • The TV rating systems in Canada are based on the Canadian Radio-Television and Telecommunications Commission (CRTC) policy on violence in television programming. • While violence is the most important content element to be rated, the structure developed takes into consideration other program content like language, nudity, sexuality and mature themes.
Useful adjustment settings Canadian English ratings Canadian French ratings 1 Press MENU to display the MENU screen, and then press c/d to select “Setup”. 2 Press a/b to select “Parental CTRL”, and then press ENTER. 1 Repeat steps 1 to 4 in Canadian English ratings. 2 Press a/b to select “Can. French Ratings”, and then press ENTER. 3 Press a/b to adjust the item to your desired position. “ ” indicates the item is blocked.
Other viewing options Freezing images PPV TV NORMAL TV Allows you to capture and freeze a moving image that you are watching. 1 Press FREEZE. 2 Press FREEZE again to cancel the function. Presetting remote control function You can operate the connected AV products (AV Receiver, Cable Box, SAT tuner, DTV, VCR, DVD, LD) using the presetting manufacturer function of your remote control unit. • A moving image is captured. NOTE • When this function is not available, “No displaying still image available.
Other viewing options Manufacturer codes VCR BRAND REMOTE CONTROL CODE NUMBER DVD/LD BRAND REMOTE CONTROL CODE NUMBER CATV/SAT BRAND REMOTE CONTROL CODE NUMBER NOTE • Numbers marked with * are SAT codes, all others are CATV codes.
Other viewing options ■ Cable control buttons When the FUNCTION is set to CBL/SAT, the cable converter connected to the TV can be operated using 1 to 4. 1 1 2 2 3 3 4 4 SOURCE POWER Turns the cable converter power on and off. 0–9 Press a button (or buttons) that corresponds to the channel that you wish to watch. FLASHBACK * Press to switch between the current channel and the channel you were watching immediately before. CH r/s Press CHr or CHs to tune in a higher or lower channel.
Other viewing options ■ VCR control buttons The remote control unit button will function as follows when the FUNCTION of the remote control unit is set to VCR. 8 • Press INPUT until the input connected to the VCR is selected. The following 1 to 8 can be used to control the VCR. 1 2 4 7 3 5 6 2 3 4 5 1 6 7 8 CH r/s Press to select the channel of the TV tuner on the VCR. SOURCE POWER Turns the power of the VCR on and off. F Sets pauses and still pictures.
Appendix Troubleshooting Problem Possible Solution • No power • Check if you pressed TV POWER on the remote control unit. (See page 35.) If the indicator on the TV does not light up, press POWER on the TV. • Is the AC cord disconnected? (See page 16 of the operation manual for the LC32HT3U.) • Has the power been turned on? (See page 35.) • Depending on the Room Mode setting, you need to press MASTER or ROOM on the Remote Replicator to turn on the TV. (See pages 11, 14, 18, 21 and 24.
CLEARING THE SECRET NUMBER If you forget the secret number, clear the secret number using the following procedure. 1 Press MENU to display the MENU screen, and then press c/d to select “Setup”. 2 Press a/b to select “EZ Setup”, “CH Setup”, “Parental CTRL” or “Reset”, and the Secret number input screen displays. Setup Secret No. 3 Option a a a a Press and hold both CHr and VOLk on the TV simultaneously until the message appears on the screen. The secret number is .
SHARP ELECTRONICS CORPORATION Sharp Plaza, Mahwah, New Jersey 07430-2135 SHARP CORPORATION TINS-D140WJZZ 07P08-NA-WG