
User's Manual


UTT Technologies Appendix B FAQ
http://www.uttglobal.com Page 387
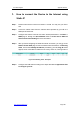
3. How to connect the Device to the Internet using
DHCP
Step 1 Please make sure the Internet connection is normal. You may use your PC to
test.
Step 2 Connect a network cable from the Cable modem to a WAN port of the Device.
Step 3
Configure the DHCP Internet connection related parameters in the
Basic >
WAN
page or through the
Quick Wizard
. Refer to
section 6.2.2.3 DHCP
Internet Connection Settings
for more information.
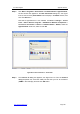
Note
For DHCP Internet connection, the Cable Modem may record the old connected
network device¶s MAC address, and only allows the network device with the
recorded MAC address to connect to it. Thus you should set the new Device¶s
MAC address to the recorded MAC address, the operation is as follows: Go to
the
Basic > WAN
page to select
DHCP
from the
Connection Type
, enter the
recorded MAC address in the
MAC Address
text box, and then click
Save
to
save the change, lastly restart the Device to make the change take effect.
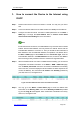
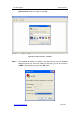
Step 4 After the DHCP Internet connection is established successfully, you can view its
configuration and status information in the Basic > WAN > WAN List page,
such as Status (Connected means the connection is established successfully,
and in this case, it will also display the left time before the lease expires for the
current IP address), the connection¶s IP address and Gateway provided by
your ISP, and so on, see Figure B-0-5.
Figure B-0-5 View DHCP Internet Connection Status Information
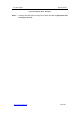
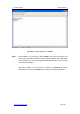
Step 5 You may go to the Status > Route Stats page to view the related route
information in the Routing Table, such as the Gateway IP Address provided
by your ISP, Flag (N should appear, which means NAT is enabled on the route),
and so on, see Figure B-0-6.