
User's Manual

UTT Technologies Chapter 8 NAT
http://www.uttglobal.com Page 222
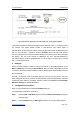
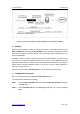
Figure 8-13 Network Topology for One2One NAT Rule Configuration Example
The business employees will share a single public IP address of 202.1.1.130/29 to access
the Internet. The LAN¶s subnet number is 192.168.16.0, and subnet mask is
255.255.255.0. And the business want to use the remaining four public IP addresses (from
202.1.1.131/29 to 202.1.1.134/29) to create a One2One rule for the four local servers,
then the outside users can use these public addresses to access the local servers through
the Device. The four local servers IP addresses are from 192.168.16.200/24 to
192.168.16.203/24, which are mapped to 202.1.1.131/29, 202.1.1.132/29, 202.1.1.133/29,
202.1.1.134/29 respectively.
2. Analysis
Firstly we need configure a static IP Internet connection on the WAN1 interface in the
Basic > WAN page or through the Quick Wizard. After you have configured the Internet
connection, the Device will automatically create a related system reserved NAT rule, and
also enable NAT.
Secondly, we need to create a One2One NAT rule for the four local servers. After you
have configured this rule, the Device will automatically create the related static route and
enable NAT proxy ARP on the WAN1 interface. Please see section 8.3.3.2 One2One
NAT Rule Settings for detailed description.
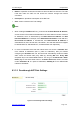
3. Configuration Procedure
Here we only describe how to create the One2One NAT rule.
The configuration steps are the following:
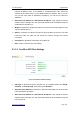
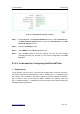
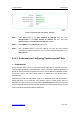
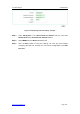
Step 1 Go to the NAT > NAT Rule page, and select the NAT Rule Settings tab to go to
the setup page.
Step 2 Select One2One from the NAT Type drop-down list, see the following figure.