
User's Manual

UTT Technologies Chapter 7 Advanced Setup
http://www.uttglobal.com Page 136
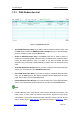
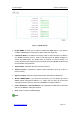
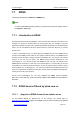
7.3.3 DNS Redirection List
Figure 7-12 DNS Redirection List
¾
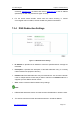
Add a DNS Redirection Entry: If you want to add a new DNS redirection entry, click
the New button or select the DNS Redirection Settings tab to go to the setup page,
and then configure it, lastly click the Save button.
¾ Enable a DNS Redirection Entry: The Enable check box is used to enable or
disable the corresponding DNS redirection entry. The default value is selected, which
means the DNS redirection entry is in effect. If you want to disable the DNS
redirection entry temporarily instead of deleting it, please click it to remove the check
mark.
¾ View DNS Redirection Entry(s): When you have configured some DNS redirection
entries, you can view them in the DNS Redirection List.
¾ Edit a DNS Redirection Entry: If you want to modify a configured DNS redirection
entry, click its Edit hyperlink, the related information will be displayed in the setup
page. Then modify it, and click the Save button.
¾ Delete DNS Redirection Entry(s): If you want to delete one or more DNS redirection
entries, select the leftmost check boxes of them, and then click the Delete button.
Note
1. A DNS redirection entry whose domain name contains the wildcard character * has
lower priority, in other words, the domain name has the highest accuracy will be
matched first. For example, there are two DNS redirection entries in the list, the first
entry¶VGRPDLQQDPHLVwww.sina.com
, and the second entry¶VLVwww.sina.*. When