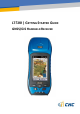
il LT500 | GETTING STARTED GUIDE GNSS/GIS HANDHELD RECEIVER
Copyright Copyright 2014 CHC Shanghai HuaCe Navigation Technology Ltd. All rights reserved. The CHC is trademark of Shanghai Huace Navigation Technology Limited. All other trademarks are the property of their respective owners. Trademarks All product and brand names mentioned in this publication are trademarks of their respective holders. Safety Warnings The Global Positioning System (GPS) is operated by the U.S. Government, which is solely responsible for the accuracy and maintenance of the GPS network.
Changes or modifications made to this equipment not expressly approved by Shanghai Huace Navigation Technology Ltd. may void the FCC authorization to operate this equipment. NOTE: This equipment has been tested and found to comply with the limits for a Class B digital device, pursuant to Part 15 of the FCC Rules. These limits are designed to provide reasonable protection against harmful interference in a residential installation.
Table of Contents 1. 2. Introduction ..................................................................................................................................... 1 1.1. Technical Assistance ........................................................................................................... 1 1.2. Your Comments .................................................................................................................. 1 Overview ....................................................
1. INTRODUCTION Thank you for choosing LT500 GNSS Handheld Receiver. This Getting Started Guide will provide useful information about your receiver. It will also guide you through your first steps of using LT500 in the field. 1.1. TECHNICAL ASSISTANCE If you have a problem and cannot find the information you need in the product documentation, contact your local dealer from which you purchased the LT500. Alternatively, please request technical support using the CHC Website at (www.chcnav.
2. OVERVIEW 2.1. FEATURES LT500 is a handheld GNSS RTK receiver and a precision GIS data collector that incorporate a survey-grade professional L1/L2 GNSS core engine as well as Microsoft Windows Mobile® WEHH operating system. LT500 comes in a rugged design suitable for all your demanding survey and construction environment as well as numerous mapping applications. LT500 is optimized to run with Carlson SurvCE® 3 field survey software and/or DigiTerra Explorer 7 GIS data collection software. 2.2.
- GSM/GPRS (850/900/1800/1900 MHz) phone and data transmission - Bluetooth V2.1 Class 3 - 802.11 b/g/n wireless LAN - Built-in 4G modem microphone and speaker - RTCM and NMEA 0183 protocol support Physical - Size (L x W x H): 236 mm x 97 mm x 77mm - Weight: 0.897 Kg with battery - Working Temperature: -30 °C to +70 °C - Storage Temperature: -40 °C to +80°C - Dust proof: IP67 - Shock : survive a 1.
3.
Rear view Camera Laser alignment Touch pen Battery SD card slot Data cable Connector Page 5
4. FIRST-TIME USE 4.1. INSERTING THE BATTERY, STORAGE CARD AND SIM CARD Use two finger pressing on the buttom and detach the battery from the device. See Figure 1. Figure 1 SIM card slots are located at the battery compartment. Please insert the SIM card and SD card. Insert the Li-Ion battery onto the battery compartment. Note: When new all devices have been protected by protective film. Please remove the protecting film before the first time use. 4.2.
Note: You can also connect LT500 to your computer via power cable to charge the receiver but charging time will be longer. 4.3. TURNING THE DEVICE ON/OFF OR STANDBY Make sure that the receiver battery is charged OR that the LT500 is connected to PC via data cable (internal battery shall always be installed). Press the power button for 3-5 seconds to turn on/off the device. Note: If you need to perform soft reset, use the stylus to press the Reset key (located beside the power button).
4.5. INSTALLING S OFTWARE First, make sure LT500 is connected and synchronized with your computer. Select and click on the installation file to install, or if the installation file runs only on LT500, please copy the file to LT500, double click it to install. You can also copy files to LT500’s relevant location to save it. Choose a location to install the program, click the Install icon to start installation.
Open GNSSViewer software: o Run “My Device”-“Program Files”-“GNSSViewer”. o The symbol “GNSSViewer” will appearing at the bottom right corner of the main screen when the software is running. Double click the icon will take you come back to software interface. o Choose Com6 and 57600 for connecting GPS Port.
4.8. USING THE CAMERA Press the Camera key to enter in the picture taking mode. Press the Camera Key again to take a picture. Click the OK icon on the top right corner to exit. 4.9. ESTABLISHING WIRELESS CONNECTION (BLUETOOTH /WI -FI) Using Bluetooth 1) Go to Start-->Settings-->Connections-->Wireless Manager. 2) Click on the icon Bluetooth function. on the right side of Bluetooth to open 3) Go to Start-->Settings-->Connections-->Bluetooth.
5. GETTING STARTED WITH SURVCE 3 Configure the LT500 1. Go to Start menu --> Settings --> System 2. Select External GPS icon 3. On the Software port tab: select COM4 4. Then on the Hardware port tab: select COM3 and Baud: 57600 Start SurvCE 3: 1. Go to GPS Rover, in Current tab--> choose Manufacturer CHC, Model: LT500 2. In Comms tab, select Cable, Port COM3 and Baud 57600 automatically. 3.
6. GETTING STARTED WITH DIGITERRA EXPLORER 7 1. 2. Go to Start menu --> Settings --> System Select External GPS icon 3. On the Software port tab: select COM4 4. Then on the Hardware port tab: select COM3 and Baud: 57600 Start DigiTerra Explorer 7: 1. Go to Settings > GNSS tab Port: COM3 Baud: 57600 2. If you intend to use RTCM corrections go to the Settings > NTRIP tab and set Port: COM4 and Baud: 57600 3.
7. OUTPUTTING NMEA 0183 DATA FROM THE 9-PIN PORT The LT500 can output the default NMEA 0183 V2.2 messages at 1Hz: GPGGA, GPGSA, GPGSV, GPGST, GPRMC. 1. Go to Start menu --> Settings --> System 2. Select External GPS icon 3. On the Software port tab: select COM6 4. Then on the Hardware port tab: select COM3 and Baud: 57600 To set NTRIP Connection if required, run GNSSViewer: 1. Select BoardType-->NovAtel, GPS Port-->COM6, and BaudRate-->57600, press OK. 2.
8. FREQUENT SETTINGS Stylus Setting Go to Start-->Settings-->System-->Screen Click Align Screen to start the stylus setting. Backlight Setting Go to Start-->Settings-->System -->Backlight, Adjust settings according to your requirements. Power Setting Go to Start-->Settings-->System-->Power-->Advanced, Adjust settings according to your requirements. Remove Programs Go to Start-->Settings-->System-->Remove Programs, Choose the relevant program then click Remove.
CHC - Shanghai HuaCE Navigation Technology Ltd. Building 35, n° 680 Guiping Road 200233 Shanghai – China Tel : +86 21 542 60 273 Fax : +86 21 649 50 963 Email : sales@chcnav.com | www.chcnav.