
User's Manual


Alpha3D Operation Quick Guide
ALPHA3D USER MANUAL | 2019-06 P a g e | 87
6 Alpha3D Operation Quick Guide
6.1 Pre-Requirement for Installation
In order to install and use Alpha3D, the following requirements must be covered:
For safety, at least 2 persons to lift and mount the unit.
A vehicle with roof bar to assemble system.
A base station to post-processing data.
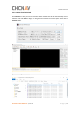
6.2 Operation Steps
First, assemble extension with roof bar which above the vehicle and then mount Alpha3D
system, detailed steps please check Part 3.6.1. Make sure all screws are tightened and then
remove the protective cap of laser scanner.
Second, use power cable to connect Alpha3D and battery box. Plug one cable side into DC24
interface and another side into battery power output interface. Press controller box button to
switch on battery.
Third, set a base station at a known point and start static mode which used to post-process
trajectory. Notice, if you use CORS data as base here, this step can ignore but the final data
accuracy is depending on the length of base line.
Fourth, park vehicle in an open sky area and long-press button to power on system. After WiFi
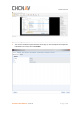
is connected, using CoCapture to start work. Detailed steps please check Part 5.1.4.
Notice: Before start scanning, the IMU system needs both static and kinematic alignments.
First is do a static alignment: Click NEW PROJECT in CoCapture to start record time. Keep both
car and system as stable for 5 minutes to make a proper static alignment. Then, take a 3
minutes figure-eight route driving to make a proper kinematic alignment. Finally, click START
to capture laser data two minutes before entering scanning area. Similarly, both static and
kinematic alignments are also needed when scanning finished, but the order is different: take
another 3 minutes figure-eight route driving first and finally keep stable for another 5 minutes.
Finally, when work is finished, mount protective cap first for safety. Then, disassemble battery
cable, unit and roof rack extension in order. Make sure all accessories are kept in container.