
Use Manual
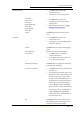


Table Of Contents
- INTRODUCTION
- GETTING STARTED WITH I70
- FRONT PANEL OPERATION
- BASE STATION SETUP AND OPERATION
- ROVER STATION SETUP AND OPERATION
- CONFIGURING THROUGH A WEB BROWSER
- POSITION SUBMENU
- ACTIVITY SUBMENU
- GOOGLE MAP SUBMENU
- TRACKING TABLE SUBMENU
- TRACKING INFO. TABLE SUBMENU
- TRACKING SKYPLOT SUBMENU
- SATELLITE ACTIVATION SUBMENU
- DESCRIPTION
- ANTENNA CONFIGURATION SUBMENU
- REFERENCE STATION SETTINGS SUBMENU
- RECEIVER RESET SUBMENU
- LANGUAGES SUBMENU
- USER MANAGEMENT SUBMENU
- USB FUNCTION SWITCH SUBMENU
- HCPPP SETTINGS SUBMENU
- 1PPS SUBMENU
- LOG SETTINGS SUBMENU
- FTP PUSH SETTINGS SUBMENU
- FTP PUSH LOG SUBMENU
- DATA DOWNLOAD SUBMENU
- IO SETTINGS SUBMENU
- DISCRIPTION SUBMENU
- MOBILE NETWORK SETTING SUBMENU
- EMAIL ALARM SUBMENU
- HTTP SUBMENU
- HTTPS SUBMENU
- FTP SERVICE SUBMENU
- DESCRIPTION SUBMENU
- WIFI SUBMENU
- BLUETOOTH SETTINGS SUBMENU
- RADIO SETTINGS SUBMENU
- BUZZER SETTING SUBMENU
- FIRMWARE INFO SUBMENU
- HARDWARE VERSION
- CONFIG FILE
- SYSTEM LOG DOWNLOAD SUBMENU
- USER LOG
- FIRMWARE UPDATE SUBMENU
- GNSS BOARD UPGRADE
- RADIO UPGRADE
- UPGRADE ONLINE
- GNSS REGISTRATION SUBMENU
- CLOUD SERVICE SETTING SUBMENU

3. Front panel operation
i70 GNSS Receiver User Guide Page 26
configuration screen.
Mode Rover APIS
The title of this configuration screen.
Current Base SN 1000456
Display the SN of corresponding base
station.
Click Enter button to enter Base SN setting
screen. In the Base SN setting screen, click
Fn button to move to the character of the
value you want to make change, and then
click Enter button to change from digital 0
to 9 (in addition, the initial character can be
changed to letter R). After the change has
been done, you can click Fn button to move
to OK field, and then click Enter button to
save the change and back to the
second-level menu; or click Fn button to
move to Cancel field and click Enter button
to cancel the change and back to the
second-level menu.
IP 211.144.118.5
Click Enter button to enter Common IP
screen.
In Common IP screen, click Fn button to
move to the line of IP address, and then
click Enter button to change to other
predefined IP address. After the IP address
has been changed, you can click Fn button
to move to OK field, and then click Enter
button to save the change and back to the
second-level menu; or click Fn button to
move to Cancel field and click Enter button
to cancel the change and back to the
second-level menu.
Port 9901
Click Enter button to change the port from 9901
to 9920.
OK
Click Enter button to save the settings and back
to the top-level menu, and then this working
mode will take effect.
Cancel
Click Enter button to cancel the settings and back
to the second-level menu.
Rover Ntrip/IP
Set up the receiver as a rover station using
Ntrip.
Click Enter button to enter the
configuration screen.