
Instructions

12
104 x 142 mm
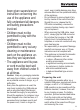
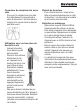
∙ Insert 2 × 1.5 V AA-type batteries,
observing correct polarity, as indicated
inside the compartment.
∙ Replace the cover; ensure it locks into
place.
∙ If the power decreases during battery
operation, replace the batteries with new
ones of the same type.
Use with zip bags
Preparing the bags
∙ Put the prepared food into a bag, ensur-
ing that its opening and the closure strip
remains absolutely clean and dry.
Hint: For easy, clean lling of the
bags, turn down the rim around the
opening a few cm. After lling, unroll
the rim again.
∙ Caution: Do not vacuum-pack any liquid
foods in the zip bags.
∙ Fill the bags only up to max. 5 cm below
the opening.
∙ If necessary, the food may be dabbed
with a kitchen towel rst to remove any
residual liquid from the outside.
∙ Close the bag and use your ngers to
press the two sides of the closure strip
rmly together.
∙
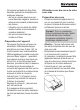
Vacuum process
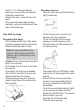
∙ Open the valve opening of the lled and
tightly closed bag.
∙ Fit the silicone suction cone into the
silicone ring on the appliance.
∙ Fit the unit vertically onto the valve
opening, so that the opening of the
silicone suction cone ts precisely into
the valve opening.
∙ Press and hold the On/Off button, while
pushing the unit lightly against the valve
opening.
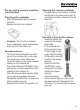
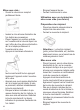
∙ Ensure that the vacuum pump does
not suck in any liquid matter. Should
this occur, release the On/Off button
immediately.
∙ Once the vacuum status indicator lights
up, the vacuum has been achieved.
Release the On/Off button. The vacuum
status indicator goes out.
∙ Separate the unit from the bag.
∙ Close the valve opening.