
Operating instructions


7
Installation Instructions
22
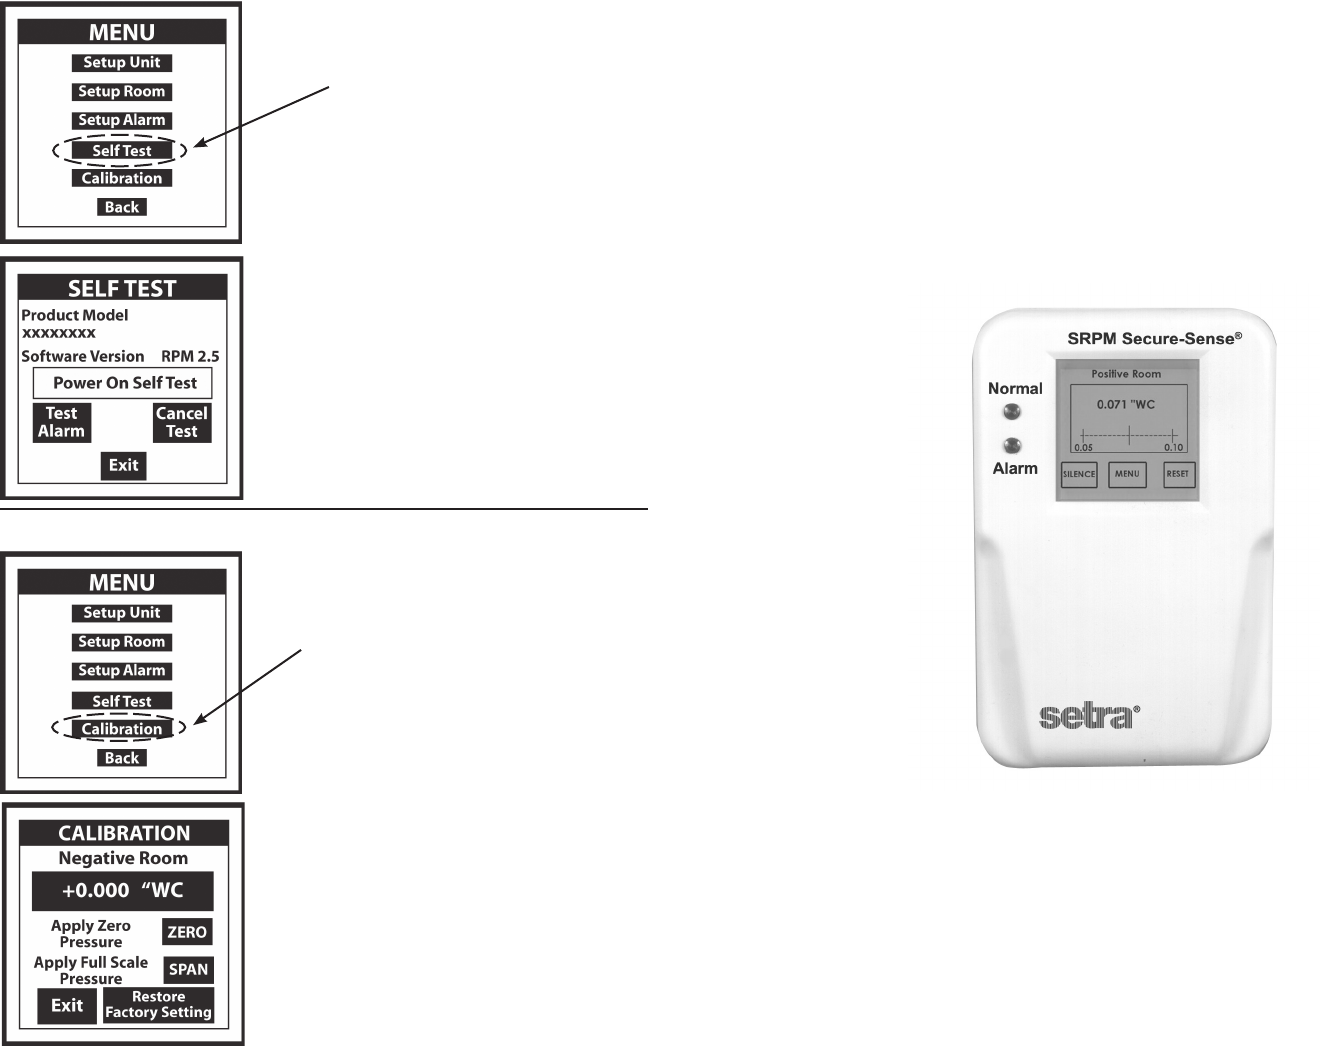
7.6.1 Self Test Operation
This screen identifies the Product Model and Soft-
ware Version. User can also perform a Self Test of
the SRPM to verify that the data in memory hasn’t
been corrupted and also test the alarm to verify the
sound level and alarm setup.
Press “Power On Self Test” button to initiate test
sequence.
Press “Test Alarm” to test buzzer and visual Red LED
Alarm.
Press “Exit” to return to Main Menu.
7.7.1 Calibration
Perform a simple two-step, key tap calibration
process. To re-zero the device, disconnect the “room
pressure” tube and lightly press (or tap) the “Zero”
button. Then apply a steady full scale pressure signal
to the “+” or “room pressure” tube or fitting and
press (or tap) the “Span” button. Reconnect the room
pressure tube and calibration is complete. Calibration
must be within + or - 5% of original calibration. The
original factory pressure calibration can be restored,
if desired, by pushing the “Restore Factory Setting”
button.
Note: The SRPM pressure header plugs into the Setra Model 869
Expert System Calibrator for quick and secure automatic calibra-
tion. Exit to return to main menu, then press the “back key” to
enter normal monitor mode.
7.6 SELF TEST SCREEN
Press to Access Screen
7.7. CALIBRATION SCREEN
Press to Access Screen