QOS 8-Bay RAID Quick Setup Guide Not for Redistribution Copyright Ocean Tides Productions 2012 1
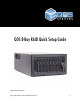
Introduction The QOS is a standalone storage array, part of a file-‐based workflow involving one or more users and one centralized storage system. The extraordinary power and versatility of the QOS is one of the key features of this product.
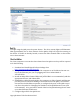
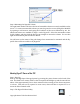
In the Create Exports page use the directory browse button to select or create a folder on the server named as you wish the drive to appear (ex “HyperFS/VIDEO/”). Keep in mind the volumes on the QOS are folders in a directory on the Server that are shared out.
Boot Up To begin using the QOS press the power button. The drive activity lights will illuminate. Wait approximately two to three minutes for the QOS to fully boot up before turning on the clients. If clients are already booted, re-‐insert the Fibre Channel cable or reboot after two or three minutes.
Download and Install HyperFS Client Package from support.rorke.com/hyperfs Using the computer’s Internet connection, go to http://support.rorke.com/hyperfs and choose the client install package for your operating system. Double-‐click the installer file and follow the on-‐screen instructions.
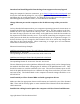
There are two Fibre Channel ports on the QOS and two Ethernet Ports. In order to con-‐ nect and mount the storage, both a Fibre Channel and an Ethernet connection are re-‐ quired.
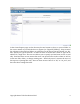
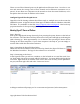
Step 4: Mounting the HyperFS Volume The right hand window will show the list of mountable volumes currently available on the server. To create an mountable volume you must log into the server through the WebGUI by opening a web browser and typing the IP address of the server followed by :82.
In the Mac dock, select the HyperFS icon or launch from Applications>Utilities The HyperFS application will display the list of available server IP addresses (the High-‐ Speed Storage System’s Port 1 and Port 2 IP is written on a sticker attached to the case).
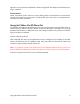
Open the server and select individual volumes in HyperFS and change the automount set-‐ ting to ‘enabled.