
Operation Manual


258 Adding Dynamic Content
Creating forms
Several methods exist for creating forms dependent on whether you wish to be
helped with a Form Wizard, use standard forms (i.e. pre-defined ready-to-go
forms supplied with WebPlus), or create a form from scratch. Whichever
method is chosen will depend on the level of customization you want to go
to—as a rule of thumb, it's always best to familiarize yourself with WebPlus's
standard forms that could be used first. This may save you time, and allow
you to create your form more easily.
To create a form (via Form Wizard):
1. Click the Form Wizard on the Web Objects toolbar's Form flyout.
2. In the dialog, click the Create a new form with the wizard icon and then
Next>.
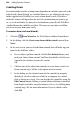
3. In the next screen, you need to add
form controls that will make up your
form. In the Add box, either:
• For a ready-to-go form control, click the Pre-defined button, and
pick your chosen form control. You'll need to double-click the new
control in the window to name the control.
OR
1. Click on one of the other form controls to create from scratch. See
Form controls on p. 260 for a description of each control.
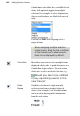
2. In the dialog, use the internal name for the control (to uniquely
identify it), or edit it and enter a label to accompany the control
(this is shown on-screen). You can also edit the control by using the
Edit Control button. Editing a control allows validation, control of
form length, and other control attributes to be set. See Editing form
controls on p.
263 for more information. If you've edited a value,
click OK.