
Operation Manual


226 Adding Hyperlinks and Interactivity
To add a hyperlink:
1. Use the Pointer Tool to select the single or grouped object or highlight
the region of text to be hyperlinked.
You can also simply click for an insertion point in text. If you select
in—or immediately before/after—a word, then the whole word will
be hyperlinked. If your selection point has a space on both sides,
WebPlus inserts helpful text (for example, the name of the target
page).
2. Click the
Hyperlink button on the Tools toolbar.
The Hyperlinks dialog appears.
3. Click to select the link destination type, and enter the specific hyperlink
target, i.e. a page, Uniform Resource Locator (URL), Smart object, email
address, etc.
4. Depending on the link type, choose type-specific options.
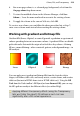
5. A range of target windows or frames can be chosen depending on how
you want the link destination to be displayed. The types (along with
expected results) are:
• Same Window: the link destination is shown in the same window
from which the hyperlink was clicked.
• New Window: A new window is used to display the link destination
whose properties (dimensions, position, or navigation bar usage)
can be defined via the Settings... button. The original window will
remain open.
• Top of Current Window: the link destination is shown in the top
level window. Use for hyperlinks created within a frame on a page
(or for frames within frames).
• Parent Frame: the link destination is shown in the Parent Frame or
Parent Window of the frame from which the hyperlink was clicked.
Use for hyperlinks created within a frame on a page (or for frames
within frames). (See
Working in frames on p. 41).