
Operation Manual


220 Colour, Fills, and Transparency
Applying a gradient or bitmap fill
The easiest way to apply a gradient or bitmap fill is to use one of a range of
pre-supplied swatch thumbnails in the Swatches tab's Gradient or Bitmap
palettes. The Fill Tool and a Fill dialog are alternative methods for creating
gradient fills (these are covered in online Help).
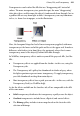
To apply a gradient or bitmap fill using the Swatches tab:
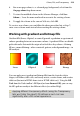
1. Click the Swatches tab and ensure the
Fill button is selected.
NOTE: The colour of the underline reflects the colour of your selected
object (or selected node).
2. For gradient fills, select Linear, Elliptical or Conical as the
gradient type from the Gradient button's drop-down menu.
OR
For bitmap fills, select a drop-down menu category from the
Bitmap button.
3. Select the object(s), and click the appropriate gallery swatch for the fill
you want to apply.
OR
Drag from the gallery swatch onto any object and release the mouse
button.
4. If needed, adjust the fill's Tint at the bottom of the tab with the tab slider
or set a percentage value in the input box.
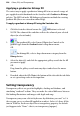
Setting transparency
Transparency effects are great for highlights, shading and shadows, and
simulating "rendered" realism. They can make the critical difference between
flat-looking illustrations and images with depth and snap.
Transparency may seem a bit tricky because by definition, you can't "see" it
the way you can see a colour fill applied to an object. In fact, it's there all the
time in WebPlus. Each new object has a transparency property: the default
just happens to be "None"—that is, no transparency (opaque).