
Operation Manual


Web Site Design and Construction 37
In using WebPlus to design your site, take advantage of the master
page/page distinction. Think of the background as a sheet of preprinted
stationery with its own elements. For example, you can design a
colorful background header—perhaps incorporating a main logo—on
the master page, which will then repeat on each Web page. Individual
pages can add “local” information such as a section name or page title,
which will be visually merged with the background when the page is
published. For more graphic design tips, see Chapter 5.
Note that a navigation element on a master page is programmed to
behave as if it’s on each page: its buttons and menus are relative to
where each page sits in the overall site structure. So you can save a
great deal of time by placing just one navbar on the master page layer
rather than separate navbars on each individual page.
Another tip to keep in mind is that the pasteboard region around the
working area is a common area shared by all pages and master pages,
so it’s useful for copying or moving objects between the two layers.
Simply drag an object (or Ctrl-drag a copy) off to the pasteboard,
switch to the other page, and drag the object onto it.
Manipulating pages
Even if you decide to construct a site without navigation elements, and
with only a single master page, the Studio’s Site tab is going to prove
useful. Not only does it provide an overview of every page in your site,
but it serves as a control center for basic operations like adding,
removing, and rearranging pages. Earlier, you used the tab to move the
“Services” page to a different place in the hierarchy. Let’s return now
to the template site and make a few other changes...
Display the Site tab and double-click the Services page entry
(which should now be third in the sequence) to select and view the
page.
Notice that the Services page includes placeholder text describing two
“service options.” We’re going to add a couple of child pages in the
Services section of the site to describe these options.
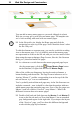
Right-click the Services entry and choose Insert Page.... In the
dialog, type “Option 1” as the Page name (instead of “Page 6”)
and select Child of (instead of After). Leave the other settings the
same, and click OK.