
Operation Manual


Getting Started 19
Our brief foray into the browser proved that the site has five pages;
now let’s visit them in WebPlus. There are lots of ways to get around,
and the Page Locator is perhaps the most convenient. Of course, the
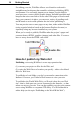
first task is to locate the Page Locator! You’ll find it on the left side of
the HintLine—assuming the Home page is displayed it will be showing
the word “Home.”
Click the arrow on the Page Locator to pop up a “tree” depicting
the site’s pages (and master pages, which we’ll get to in the next
chapter). Click “About Us” and you’ll see the screen content
update as WebPlus displays the page with this name.
TIP: As long as the Page Locator is selected, you can press the
left/right arrow keys on the keyboard to step between pages. Try it!
On the right side of the screen, click the Site tab to display another
tree showing the pages in your site. As you change pages, notice
that the
“eye” icon in the Site Structure tree jumps between the
various page entries to indicate which one is currently on view and
ready for editing.
The Site tab is just one of seven special-purpose tab windows
collectively known as the WebPlus Studio. Let’s preview them in
order. Click each tab’s name to display it...
Start by clicking the Attributes tab, which includes five separate
panels (see illustration) that let you customize properties of on-
screen elements. Click each panel’s name in turn:
— The Color panel, for applying solid color and/or shading
— The Fill panel, for applying a gradient or Bitmap fill
— The Transparency panel, for applying a transparency effect
— The Font panel, for changing the font of existing text objects
— The Line panel, for setting the weight and type of lines and
shapes