
User Manual


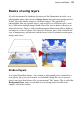

Layers and Masks 29
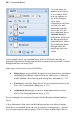
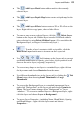
• The Add Layer Mask button adds a mask to the currently
selected layer.
• The Add Layer Depth Map button creates a depth map for the
selected layer.
• The Add Layer Effects button creates a 2D or 3D effect on the
layer. Right-click to copy/paste, clear or hide effects.
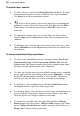
• To remove one or more selected layers, click the Delete Layer
button on the Layers tab. Hidden layers can also be deleted without
prior selection by using Delete>Hidden Layers. (You can delete the
Background layer, as long as it's not the only layer.)
• To make a layer's contents visible or invisible, click the
Hide/Show Layer button next to its name on the Layers tab.
• Use lock buttons on the Layers tab to prevent
accidental modification of opacity, pixel color, object positions or all
three on the active layer (or group), respectively.
• To convert any shape or text layer to a standard layer, right-click on
the layer name and choose Rasterize from the menu.
• Use different thumbnail sizes in the Layers tab by clicking the Tab
Menu button, then choosing Small Thumbnails or Large
Thumbnails.
• To convert the Background layer to a standard (transparent) layer,
right-click "Background" on the Layers tab and choose Promote to
Layer. The layer's name changes from "Background" to "Layer
<number>." To convert a standard layer to a Background layer, right-
click the layer and choose Layer to Background. .
• To access Layer Properties—including Name, Blend Mode, Opacity,
and Blend Ranges—right-click the layer name and choose
Properties....