
User Manual


Printing and Exporting 177
4. Depending on print mode, decide on which image(s) are to be used for
printing, i.e.
• For Single Image templates, you can select a different image
from the lower image gallery.
• For Print Layout templates, right-click a gallery thumbnail and
select Fill Layout with Image. All occupied or empty cells in
your layout are replaced. Alternatively, to fill an individual cell,
drag a replacement image from the lower image gallery onto the
"target" cell. A print layout’s cells need to be manually
populated; other modes will auto-populate cells.
• For Contact Sheet templates, use the Distribution option in
Image Options to control image replacement.
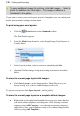
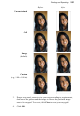
5. (Optional) From the left-hand pane, click the button to expand
Image Options for sizing and rotating images in cells:
• Enable Fit image to cell to make the image fit within the cell
boundaries.
• Enable Fill cell with image to scale the image to fit all of the
cell.
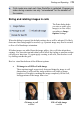
• Check Rotate for best fit to make portrait images fit cells of
landscape orientation (and vice versa) to make maximum use of
cell space.
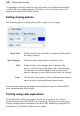
6. (Optional) Check Border to add a border of a configurable width (use
input box) and Color (click the swatch to select color from a dialog).
7. (Optional) To caption your images, check Label to add a Date, image
Filename, or Sequence number under each image; select from the
drop-down menu. For a combination of label formats, click Modify...,
add tokens to assemble a sample name, then click OK; the drop-down
menu changes to Custom. See Changing file names for more
information.
8. Click Print... or Close to save settings (but not print).