
User Manual


160 Macros and Batch Processing
for doing this—your macro can’t record selections or operations that are
particular to each photo so manual selection is essential in some instances, or
maybe you want to add a helpful note (e.g., "perform a brush stroke") or
warning in advance of a required action or dialog.
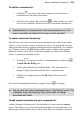
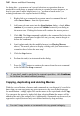
1. Right-click on a command in a custom macro's command list and
select Insert Pause... from the flyout menu.
2. Add some relevant notes into the Stop Options dialog—check Allow
continue if you want to present a Continue button in your dialog as
the macro runs. Clicking the button will continue the macro process.
3. Click OK. The Stop command is added to the command list below the
command you performed a right-click on (you may want to drag it to
before the command).
4. Load a photo and play the modified macro (see Playing Macros
above). The macro pauses to display a dialog with your instructions—
remember these before the next step!
5. Click the Stop button.
6. Perform the task(s) as instructed in the dialog.
7. Press the button to continue the macro from the next command
in the list after the Stop command.
If you don’t need to perform the manual operation, click Continue
to continue the macro without pausing.
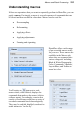
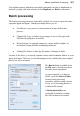
Copying, duplicating and deleting Macros
With the vast collection of macros and commands at your disposal, it’s useful to
know that you can copy/paste any preset macros to any user-defined category
for modification—simply right-click on the macro to be copied and select Copy.
You can paste the macro by right-click then selecting Paste (the macro will be
added to the end of the category list). Additionally, commands can be moved (as
opposed to copied) between any user-defined macros by drag and drop.
You can't copy macros or commands into any preset category.