
User Manual


150 Making Images for the Web
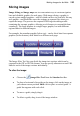
To specify the alternate text and/or link:
• Right-click an image slice (any area enclosed by horizontal and
vertical slice guides) and enter the alternate Text and URL (link)
information in the dialog.
Once you've sliced up your image you have to export it to make the image slices
understandable to a web visitor's browser.
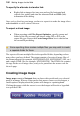
To export a sliced image:
• When exporting with File>Export Optimizer, specify a name and
folder for the files as usual, and choose either GIF or JPG as the
export file type. Ensure the Create Image Slices box is checked on
the second Export dialog.
Since exporting slices creates multiple files, you may wish to create
a separate folder for them.
The export will create multiple files in the specified folder, depending on how
many slices you have defined. The output consists of a series of image files of
the format selected (for example, MYFILEH0V0.GIF, MYFILEH0V1.GIF, etc.)
and a single HTML file (for example, MYFILE.HTM). The HTML file contains
the tags for the set of image slices, ready to be pasted into the source code for
the web page.
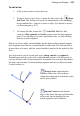
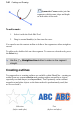
Creating image maps
Image maps consist of hotspots that you draw with special tools over selected
parts of an image. When a visitor passes their mouse cursor over the hotspot, a
small caption is displayed and the pointer will change to a pointing hand.
Clicking the mouse while the cursor is over the hotspot will invoke a hyperlink
to a specified URL.