
User Manual


Painting and Drawing 139
Assuming you’re working on a non-shape layer when you create a shape, the
new shape appears on a new shape layer. But what about the next shape you
create? Shape layers can store more than one shape, and it’s up to you where the
next one will go.
This decision is made easy by use of the Context toolbar when the QuickShape
or line tool is selected. The toolbar displays a series of combination buttons
which determine the layer on which the shape will be placed and the relationship
the new shape will have on any existing shapes on the same layer.
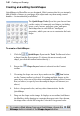
New—Adds the shape to a new shape layer.
Add—Adds the shape to the currently selected layer.
Subtract—removes overlap region when a new shape is added
over existing shapes on the currently selected layer. The new shape
itself is not included.
Intersect—includes the intersection area only when a new shape
is added onto existing selected shapes on the currently selected layer.
Exclude—excludes the intersection area when a new shape is
added onto existing selected shapes on the currently selected layer.
To change the fill type, or edit its color(s):
• Double-click the shape layer.
OR
Choose the Gradient Fill Tool and use the Context toolbar.
Either approach lets you add a spectrum fill, a solid color fill, and/or a
transparency gradient to a shape or text object.
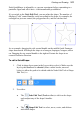
• A single fill is shared by all the shapes on a particular layer.
(Technically the fill is a property of the layer, and the shape(s) act like
a "window" that lets you see the fill.) So if you want to draw a red box
and a yellow box, for example, you'll need two shape layers.
You can also alter a shape layer's Opacity using the Layers tab.