
User Manual


132 Painting and Drawing
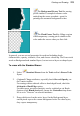
To apply a gradient fill:
1. Select Gradient Fill Tool from the Tools toolbar's Fill Tools
flyout.
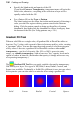
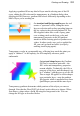
2. Select a fill type from the Context toolbar. Choose Linear, Radial,
Conical or Square.
3. To choose a preset or to edit the fill's colors and/or transparency
values, click the color sample on the Context toolbar.
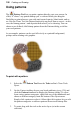
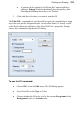
The Gradient dialog appears, where you can select a preset fill from
the default gallery or right-click and choose a fill from different pre-
defined categories (e.g., Blues, Greens, etc.). The right-click menu
also lets you add, edit or delete categories; items can also be added (or
deleted) when a custom fill is created in the fill spectrum. See
PhotoPlus Help for details on how to edit gradient fills.
4. (Optional) Check Reverse to swap the direction of your chosen fill.
5. (Optional) Uncheck Transparency if you don't want transparency (if
present) in your chosen gradient fill to be preserved; otherwise, the
fill's transparency is maintained when the fill is applied.
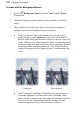
6. Once you've defined the fill, click with the tool where you want to
start the fill and drag to the point where you want it to end.
To change a text or shape layer’s fill type, or edit its color(s):
• Double-click the text/shape layer (or right-click and choose Edit
Fill...).
OR
Choose the Gradient Fill Tool and use the Context toolbar.