
User Manual


Painting and Drawing 127
The Aligned check box in the Context toolbar determines what
happens each time you begin brushing in a new place. If checked,
the pattern extends itself seamlessly with each new brush stroke; if
unchecked, it begins again each time you click the mouse.
Creating your own patterns
The built-in selection of patterns in the Patterns dialog provides a useful starting
point, but you can also create your own patterns from any selection, or even the
whole image. And take a look at the Tile Maker effect if you have a relatively
small sample region (like a patch of grass) and want to produce a pattern from it
that can be tiled seamlessly over a broader area.
For best results, you'll need to scale your image, or size your
selection, so that the pattern is of a suitable size from which to tile
from.
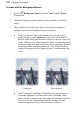
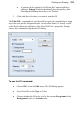
To create a new pattern:
1. Define a selection if you wish, and choose Create Pattern... from the
Edit menu.
2. To store the pattern, select a user-defined category from the dialog's
Category drop-down menu (or keep with the default My Patterns
category).
3. Click OK.
A thumbnail appears in the category gallery, ready to brush on (or use as a brush
tip texture or fill) at any time. Right-clicking any pattern lets you rename the
pattern categories or add new patterns from stored bitmap files.
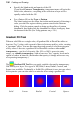
Filling a region
Filling regions or layers is an alternative to brushing on colors or patterns.
Making a selection prior to applying a fill, and setting appropriate options, can
spell the difference between a humdrum effect and a spectacular one.