
User Manual


120 Painting and Drawing
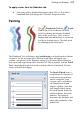
You can also create your own brush from within the tab.
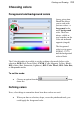
If you scroll down the gallery, you’ll note that some brushes have hard edges,
while others appear fuzzy, with soft edges. The hardness of a brush is expressed
as a percentage of its full diameter. If less than 100%, the brush has a soft edge
region within which the opacity of applied color falls off gradually.
Brush attributes (blend mode, opacity, size, and flow) can be modified via a
context toolbar (along with more advanced Brush Options).
If a more bespoke brush tip is required, you can also customize your own brush
tip and save it in its own user-defined category. (See PhotoPlus Help for details.)
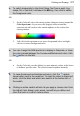
An important factor when applying brush strokes is the level of opacity applied
to the brush. This attribute affects brush strokes significantly when the stroke is
applied onto already transparent standard layers. The greater the opacity the
more opaque the brush stroke, and vice versa. Experiment to achieve the right
combination of opacity and color for your brush strokes.
To use the Paintbrush or Pencil tool:
1. From the Tools toolbar's Brush Tools flyout, select
the Paintbrush Tool or Pencil Tool.
2. Choose a brush tip preset on the Brush Tip tab. If you've picked a
Basic brush, set a brush color (i.e. the foreground color) from the
Color tab before painting.
3. (Optional) Change brush tip's attributes, if necessary, on the Context
toolbar. These changes do not affect the brush presets present in the
Brush Tip tab.
4. Drag the cursor on the active layer, holding the left mouse button
down to paint in the foreground color.
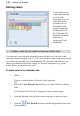
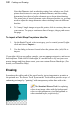
Brush options
The Brush Options dialog, accessible from the Context toolbar's Brush option,
lets you customize a brush or define properties for a new one. As you vary the
settings, you can see the effect of each change in the preview window.