
User Manual


Manipulating Images 103
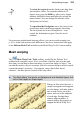
To rotate the region
about the fixed point, drag from
just outside a corner. To constrain rotation in 15-
degree steps, press the Shift key after you've begun
rotation, and hold it down until after you release the
mouse button. You can change the location of the
fixed point (see below).
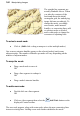
To reposition the fixed point, move the cursor to the
exact center until a small target appears, then drag.
The fixed point can be moved anywhere—even
outside the deformation region. Great for arced
rotations.
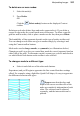
For even more sophisticated warping effects, you can use mesh warping (see
p. 103). Aside from minor cursor differences, the above instructions also apply
to the Deform Mesh Tool included on the Mesh Warp Tool's Context toolbar.
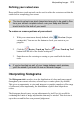
Mesh warping
The Mesh Warp Tool (Tools toolbar) works like the Deform Tool
outfitted with complex curves. It lets you define a flexible grid of points and
lines that you can drag to distort an image, or part of an image (or layer). You
can edit the mesh to vary its curvature, and even custom-design a mesh to match
a particular image's geometry—for example, curves that follow facial
contours—for more precise control of the warp effect.
The Mesh Warp Tool works on Background and standard layers, but
not on text layers or shape layers.
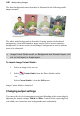
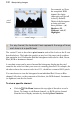
When you first select the tool, a
simple rectangular mesh appears
over the image, with nine nodes:
one at each corner, one at the
center, and one at the midpoint
of each edge. Straight lines
connect adjacent nodes. A
context toolbar also appears to
support the Mesh Warp Tool.