
Operation Manual


242 Colour, Fills, and Transparency
Editing a gradient transparency path is similar to editing a comparable fill
path. Adding a level of transparency means varying the transparency gradient;
this is done by introducing a new node and assigning it a particular value. For
transparencies with multiple nodes, each node has its own value, comparable to
a key colour in a gradient fill. Note that you cannot alter the values in a bitmap
transparency.
To edit a gradient transparency directly:
1. Select the object and set the Transparency tab’s Fill/Line swatch as
before.
2. Click Transparency Tool on the Attributes toolbar. The
object's transparency path appears on the fill or line, with start and end
nodes.
3. To add a transparency node, drag from any solid transparency
sample in the Transparency tab to the point on the path where you
want to add the node.
The higher the percentage value assigned to a transparency node, the
more transparent the effect at that point. Note: The hue of the colour
doesn't matter, only its percentage value—so it's much easier just to
choose from the set of gallery thumbnails.
4. To change the transparency value of any existing node, including the
start and end nodes, select the node and click on a new thumbnail in
the Transparency tab's Solid transparency gallery (you can also drag
your chosen thumbnail onto the selected node)
5. To move a node you've added, simply drag it to a new position along
the transparency path.
6. To delete a node you've added, select it and press Delete.
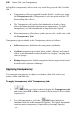
Setting the default transparency
The default transparency means the transparency that will be applied to the
next new object you create. Local defaults only affect objects in the current
project. For information on setting defaults in PagePlus, see Updating and
saving defaults on p. 29.