
Operation Manual


240 Colour, Fills, and Transparency
In PagePlus, transparency effects work very much like greyscale fills. Just like
fills...
• Transparency effects are applied from the Studio—in this case, using
the Transparency tab. (Transparency is also an option with the 3D
Pattern Map filter effect.)
• The Transparency tab's gallery has thumbnails in shades of grey,
where the lighter portions represent more transparency. To apply
transparency, you click thumbnails or drag them onto objects.
• Most transparency effects have a path you can edit—in this case, with
the Transparency Tool.
Transparency types available in the Transparency tab are as follows:
• Solid transparency distributes the transparency uniformly.
• Gradient transparencies include linear, radial, elliptical, and conical
effects (each thumbnail's tooltip identifies its category), ranging from
clear to opaque.
• Bitmap transparencies include categorized texture maps based on the
Swatches tab's selection of bitmaps.
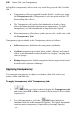
Applying transparency
You can apply transparency to shapes, text frames, table cells, and to any
artistic, frame, and table text.
To apply transparency with Transparency tab:
1. With your object selected, display the Transparency tab
and ensure either Fill or Line is selected (for an object's fill or outline,
respectively).
2. For solid transparency, select the Solid button and pick a
thumbnail from the solid transparency gallery. The lighter thumbnails
represent more transparency (expressed as percentage Opacity).
- or -