
Operation Manual


Pictures 123
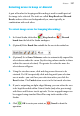
To autotrace a selected image:
1. Click the drop-down arrow on the
AutoTrace button (on context
toolbar) and select a profile from the menu.
- or -
Click
AutoTrace and choose a profile from the profile selection
screen.
2. The AutoTrace studio appears with the original artwork displayed,
along with adjustable sliders, a colour palette (logo profile only), or
a collapsible preview window (photo profiles only) showing how
your output will look once traced.
3. (Optional) Adjust the sliders at the right of the workspace (each
unique to the profile used); your profile settings will be modified.
4. Click
Trace to trace your logo, photo, or other bitmapped
artwork. It's best to keep clicking this button to update your main
window after any adjustment. If you want to abort the autotracing
process, you can click the Cancel button on the progress bar.
5. (Optional) For fine-tuning your traced output, several options are
possible:
• Click
Adjust to access Merge, Fill, and Node tools for
fine-tuning your vector output.
• For removing colours in traced logo output, right-click on the
palette colour you want to remove.