
Operation Manual


72 Lines, Curves, and Shapes
2. From the context toolbar, click the right arrow on the Smoothness
option and drag the displayed slider left to increase the number of
nodes (you can also add absolute values into the input box).
3. To make the curve less complex, i.e., smoother, drag the slider right to
decrease the number of nodes.
To add or delete a node:
• To add a node, click along a line segment with the Node Tool or Pen
Tool to add a new node at that point. The new node will be created
and will be selected (complete with attractor nodes as necessary).
• To delete a node, select the line with the Node Tool then the
node itself and click the Delete Node button on the context toolbar (or
press the Delete key). The node will be deleted, along with any
associated attractor nodes, and the line or shape will jump to its new
shape. With the Pen Tool selected, you can also delete a node by
clicking on it.
You can also use the Node Tool to reposition the nodes, and reshape the line or
shape, by dragging on the new handles.
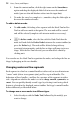
Changing nodes and line segments
Each segment in a line has a control handle at either end, so at each interior or
"corner" node (where two segments join) you'll see a pair of handles. The
behaviour of these handles—and thus the curvature of the segments to either
side—depends on whether the node is set to be sharp, smooth, symmetric, or
smart. You can quickly identify a node's type by selecting it and seeing which
button is selected in the displayed context toolbar. Each type's control handles
behave differently as illustrated below.
To change one or more nodes to a different type:
1. Select the object with the Node Tool, followed by the node(s) you
want to change.