
Operation Manual


218 Applying Special Effects
Remember to take advantage of the hover-over cursor text or hintline which
indicate the object's rotation currently or rotation while the operation is in
progress, respectively.
Transform about your 3D objects' axes instead of your pages' axes
by holding the Ctrl key down as you transform.
You can also adjust the angle and elevation of each "active" light on the page by
dragging the light pointer to a position which simulates a light source.
To add dimensionality:
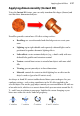
1. Select an object and click Instant 3D on the Drawing toolbar.
The object immediately adopts 3D characteristics with an orbit circle
displayed in the object's foreground. You'll also notice a 3D-specific
context toolbar appear above your drawing.
2. Click a 3D effect category from the first drop-down menu on the 3D
context toolbar (from Bevel, Lights, Lathe, Texture, Viewport,
Material); the other toolbars' options change dynamically according to
the category currently selected. See DrawPlus Help for more details.
3. Set each drop-down menu or input box for each category in turn. A
little experimentation is advisable.
4. Hover over the object's orbit circle and rotate about the X, Y or Z axis
(or X and Y axes together) by dragging about the circle's periphery
(depending on the currently displayed cursor).
To revert your Instant 3D transform:
• Click Reset Defaults on the context toolbar.
To switch off 3D effects:
• Click Remove Instant 3D on the context toolbar. You can always
select the object again then click the Drawing toolbar's Instant 3D
button to reinstate the effect.