
Operation Manual


214 Applying Special Effects
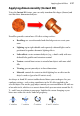
3D Bump Map
The 3D Bump Map effect creates the impression of a textured surface by
applying a mathematical function you select to add depth information, for a
peak-and-valley effect. You can use 3D Bump Map in conjunction with one or
more additional 3D filter effects—but not with a 2D Bump Map. (See DrawPlus
Help for background and technical details on these effects.)
2D Bump Map
The 2D Bump Map effect creates the impression of a textured surface by
applying a greyscale bitmap you select to add depth information, for a peak-and-
valley effect. You can use 2D Bump Map in conjunction with one or more
additional 3D filter effects—but not with a 3D Bump Map. (See DrawPlus Help
for background and technical details on these effects.)
3D Pattern Map
The 3D Pattern Map effect creates the impression of a textured surface by
applying a mathematical function you select to introduce colour variations. You
can use 3D Pattern Map in conjunction with one or more other 3D filter effects.
(See DrawPlus Help for background and technical details on these effects.)
2D Pattern Map
The 2D Pattern Map effect creates the impression of a textured surface by
applying a greyscale bitmap you select to introduce colour variations. You can
use 2D Pattern Map in conjunction with one or more other 3D filter effects.
Transparency
The uniform transparency of an object (with 3D filter effects applied) can be
controlled via the Colour tab (see first example below). However, for more
sophisticated transparency control, especially for simulating reflective lighting
effects on glass objects, transparency settings can instead be set within the 3D
filter effects dialog (check the Transparency option).