
Operation Manual


Fill, Lines, Colours, and Transparency 171
Transparency can also be applied along a custom drawn transparency path using
the Transparency Tool, in the same way as the equivalent fill path (see p. 160).
Transparency paths are easily editable.
Transparency effects are applied locally to each object. Applying
different transparency effects won't alter the object's fill settings as
such, but may significantly alter a fill's actual appearance.
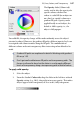
Let’s check out the Transparency
tab. As with the Swatch tab, there
are galleries for both gradient and
bitmap transparencies.
Gradient transparency galleries
include Linear (opposite), Radial,
Elliptical, Conical, Plasma,
Square, Three Points and Four
Points, ranging from clear to
opaque.
The Bitmap transparency gallery hosts texture maps based on the Swatch tab's
selection of bitmaps.
Each preset’s tooltip identifies its category.
To apply gradient or bitmap transparency effects:
1. With your object selected, go to the Transparency tab.
2. For gradient or bitmap transparency, click the drop
down arrow on the Gradient or Bitmap button, respectively. Select a
category from the flyout, then click a thumbnail in that category.
- or -
Drag the desired thumbnail from the gallery to an object.
3. The transparency is applied to the object(s).
Sometimes objects of a lighter colour will not display their
transparency clearly—ensure the transparency is applied correctly
by temporarily placing the object over a strong solid colour.