
Programming instructions


5
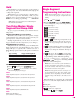
Hold
Hold maintains a steady temperature for the length of
time you specify. You can use Hold in both heating up and
cooling down segments.
When Hold is set to 99.59 hours, the controller will re
-
main at that temperature indefinitely, until you press
. To enter a 99.59 hour Hold, press the
once from 00.00 during programming.
Note: During firing, the display shows Hold tempera
-
ture and time left in Hold.
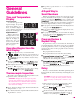
Two Firing Modes: Single
Segment and Ramp-Hold
To give you greater flexibility, your controller has two
firing modes:
Single Segment Mode (see next column)
Often times, all you will need is one segment. A single
segment includes rate (temperature change per hour), tar
-
get temperature, and (if needed) hold time.
In Single Segment mode, you can choose one of five fir
-
ing speeds. Then enter the temperature you are firing to.
Ramp-Hold Mode (see page 7)
Ramp-Hold mode offers much greater flexibility than
Single Segment mode. Use Ramp-Hold to create custom
firings with up to 8 segments. The controller can store 4
Ramp-Hold programs in memory. Programs are numbered
1 - 4.
Type of Firing Suggested Firing Mode
Enameling Single Segment
Silver Clay Single Segment
Glass Bead Annealing Ramp-Hold
Glass Fusing Ramp-Hold
Glass Slumping Ramp-Hold
Lost Wax Ramp-Hold
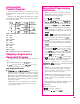
How to Select a Firing Mode
From display, press once.
Press the key several times. You will see
the following display messages:
SPd1:
Single Segment, Speed 1 / 200°F/111°C rate per hour
SPd2:
Single Segment, Speed 2 / 500°F/277°C rate per hour
SPd3:
Single Segment, Speed 3 / 1000°F/555°C rate per hour
SPd4:
Single Segment, Speed 4 / 1500°F/833°C rate per hour
SPd5:
Single Segment, Speed 5 / Maximum rate
PrO1:
Ramp-Hold, Program 1
(List continues on next page.)
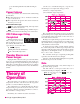
Single Segment
Programming Instructions
Note: Single Segment firing is all you will ever
need if you are only going to a temperature and
holding.
From , press .
Use the key (not the )to
select a firing rate (temperature rise per hour)
from 1 through 5:
/ (200°F or 111°C)
/ (500°F or 277°C)
/ (1000°F or 555°C)
/ (1500°F or 833°C)
/ (Full Power)
Then press .
or and the target temperature from
the last firing will appear. Use the arrow keys to
change the target temperature. Then press
.
and the hold time from the last firing will
appear(e.g. 1 hour 10 minutes = 01.10). Use the
arrow keys to change the hold time. Then press
.
will appear. Press to begin firing.
will appear, the Run indicator light with
begin blinking, and the kiln will begin firing.
To stop a firing before completion, press
. will appear, alternating with kiln
temperature and total firing time.
Note: Do not be concerned if your kiln makes a
clicking sound during firing. Kilns use relays to
power the elements. The relays click each time
their electrical contacts come together.
Note: The firing speed you select (see step 2) is a
pre-programmed speed. The kiln’s actual firing
speed may be less, depending on the kiln model,
available voltage, and density of the load you are
firing.
When the kiln fires to completion, the controller will
beep for 30 seconds. The display will show the follow
-
ing:
I
Firing time
I
Present temperature
I
= Fired to completion
To return to , press .