
Instruction manual


/ 11
power for the controller. To
find out the cause of low volt
-
age, continue below:
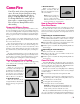
Controller Input Test #2
The back of the board is
still facing you and the kiln is
plugged in. Remove the IN
-
PUT plug, which is the
white, orange, and blue
wires, from the back of the
controller. Touch a voltmeter probe to the white wire and the
other probe to the orange wire.
Input Test #2 Result: Less than 20 Volts AC
There are two possible reasons: 1) Low voltage at the wall
receptacle; 2) defective transformer. If wall receptacle volt
-
age is correct, replace the transformer.
Input Test #2 Result: 20 - 24 Volts AC
The transformer is sending correct voltage to the control
-
ler. Yet when the INPUT plug was connected to the control
-
ler, voltage was less than 20. This means the controller is
draining the voltage and is defective. Return the controller
for repair or replacement.
Problem: Controller display turns on.
No heat in kiln.
I
Is the relay making its normal clicking sound?
Yes, the relay is clicking.
Test the elements with an ohmmeter:
Element Resistance Test
1 UNPLUG kiln/disconnect the power. Open the
kiln’s switch box. Make sure the wires connecting the
relay to the elements are secure. If connections are
okay, continue to step 2:
2 Touch the ohmmeter leads to the two element con
-
nectors of each element. A no-needle-movement
reading on an analog meter, or OPEN on a digital me
-
ter, indicates a broken element.
If the elements check out okay, replace the relay.
Note: To replace relay, see your kiln’s instruction
and service manual.
No, the relay is not clicking.
We know the controller is receiving voltage, because the
display is lit. But the voltage from the transformer may be too
low to power the relays. Perform the “Controller Power In
-
put Test,” page 10. If your controller passes the input test,
perform the “Controller Power Output Test”:
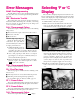
Controller Power Output Test
Is the controller sending voltage to the relay? Test OUT
-
PUT with a voltmeter:
1 UNPLUG the kiln/disconnect the power. Remove
the 4 screws holding the controller faceplate to the
switch box. Lift faceplate out of box and let the con
-
troller hang on the outside of the box with the back of
the board facing you. Then plug the kiln back in. Pro
-
gram the controller to fire to 1000EF at FULL rate in
Ramp-Hold mode. Press START.
2 Put the voltmeter in DC mode. (It must be in DC
mode when testing OUTPUT voltage.) Touch
probes to the red wire and black wire connections.
Measure voltage when the relay clicks on.
Output Test Result: No voltage at red and black wires
The controller is not sending power to the relay. Return
the controller for repair or replacement.
Output Test Result: 10 - 14 v. at red and black wires
The controller is sending correct power to the relay. Un
-
plug kiln/disconnect power. Remove the kiln switch box.
Look for disconnected wires between the controller, relay
and elements. Check the wiring diagram to be sure wires are
connected to the correct terminals. Be sure connections are
tight. If the wiring is okay, replace the relay.
Note: To replace relay, see your kiln’s instruction
and service manual.
Problem: Kiln switch box ½ amp
fuses keep blowing.
I
What size fuse are you using? Correct fuse:
AGC ½ A 250V AC.
If the fuse is the correct size, perform the following test:
Kiln Switch Box ½ Amp Fuse Power Test
1 UNPLUG the kiln/disconnect the power. Remove
the 4 screws holding the controller board faceplate to
the switch box. Lift faceplate out of box and let the
board hang on the outside of the box with the back of
the board facing you. Then plug the kiln back in. Dis-
connect both wire plugs
from the back of the con
-
troller. Apply power to
kiln. If fuse blows, re
-
place the transformer. (If
the fuse does not blow,
the problem is a board or
relay. Go to step 2.)
2 Connect the INPUT plug (orange, blue, and white
wires) to the board again. Leave off the OUTPUT
wire plug (the one with the red, green and black
wires). Program the controller to fire to 1000EFat
FULL rate in Ramp-Hold mode. Press START.Ifthe
fuse blows, replace or service the board. (If the fuse
does not blow, the problem is caused by a short in the
coil of a relay. Go to step 3.)
3 UNPLUG kiln/disconnect power. Reconnect the
OUTPUT wire plug. Reinstall the board in the
switch box. Replace the relay.
Note: To replace relay, see your kiln’s instruction
and service manual.