
User guide


Click below to proceed:
Step 2: Complete the Setup Wizard
7.2 Step 2: The Setup Wizard
LAUNCH THE SQL SENTRY CLIENT
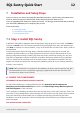
The first time you launch the SQL Sentry Client, you will see the “License Not Found” message box.
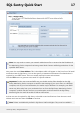
Click OK and you will be prompted to enter your license key. At the License Entry screen, you can
either paste your license key or drag-and-drop the license file into the large text box. Click Save to
continue.
Once the license has been validated the SQL Sentry Client will launch.
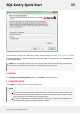
RUN THE SETUP WIZARD
With a new install, the first time the Client is started, the Setup Wizard is automatically launched. The
wizard will quickly walk you through the initial configuration steps. You can run the wizard again at
any time from the Help menu of the Client to add new users or adjust certain global settings.
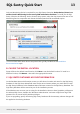
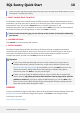
1. ALERTING SETTINGS
In the SMTP Server field enter the domain name or IP address of the SMTP server to be used for
routing SQL Sentry email notifications. If using localhost, keep in mind this will be the local SMTP
server on the machine where the SQL Sentry Monitoring Service is installed since it is responsible for
sending all notifications. The SQL Sentry Client does not send any notifications.
Note: This step can be skipped and configured later by unchecking the Enable Email Alerts box.
SQL Sentry Quick Start 16
©2015 SQL Sentry. All Rights Reserved.