
Operating instructions


Chapter 1
Getting Started
Room Temperature
and Humidity
It is okay to store the Sentry at sub-zero
temperatures. But before operating, raise the
room temperature to at least 32°F / 0°C.
Note: The Sentry will register sub-zero °F / °C
temperatures. However, 32°F / 0°C is the low
-
est recommended operating temperature.
The circuit board is rated for 176°F / 80°C
maximum operating temperature. However,
the maximum recommended temperature is
158°F / 70°C, measured at the controller inside
the kiln switch box. To lower the temperature,
open windows and use a fan to blow air across
the kiln’s switch box louvers. (See page 18 to check circuit
board temperature.)
High humidity willnot adversely affect the Sentry unless
water condenses on the circuit board. In this case, do not
firethekilnuntilthemoisturehasevaporatedfromthe
board.
Thunder Storms and
Power Surges
Unplug the kiln when not in use, especially during thun-
der storms and in areas with frequent power surges. If the
kiln is part way through a firing when a storm begins, it may
be okay to continue the firing. When the kiln shuts off, dis
-
connect the power.
CAUTION: When firing the kiln during a storm, do
not leave the kiln unattended!
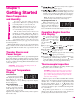
Time and Temperature
Display
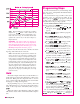
Center Dot: Time
A center dot appears during
time display. It separates hours
from minutes (i.e. 1 hour, 30
minutes displays as 01.30). During temperature display,
the dot disappears.
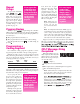
Three-Light Display
The Sentry turns on the
heating elements intermit
-
tently through relays. Power
output lights appear in the
right side of the display when the Sentry sends a signal to
turn on the relays.
I
When the Sentry sends a signal to
the relays, all three lights appear.
I
The top light indicates power to
the top section of the kiln, the middle light power to the
middle section, and the bottom light power to the bot
-
tomsection. (Two-zone kilns: Ignore the center light.)
Note: Though power output lights are on, mechanical
problems can prevent the relays from turning on.
Single Right-Hand Dot: °C
When temperature is dis
-
played in °C, a dot appears in
the lower right. In °F display, it
disappears. You can choose
between Fahrenheit and Celsius display. See page 15.
Operation Begins from the
IdLE Display
The controller displays
when you first apply
power to the kiln. Operation
begins from .Youcan’t
fire the kiln until ap
-
pears.
I
If you press during a firing, will appear.
To get back to ,press .
I
If the display shows an error message such as in-
stead of , see pages 19 - 21.
I
(firing completed) appears at the end of a firing.
To make appear, press any key.
I
If you do not touch the keys for one minute during pro-
gramming, the controller will go back to .The
controller will also discard the program you were enter
-
ing and retain the previous program in memory.
Thermocouple Inspection
The small rod protruding into the firing chamber is the
temperature sensor, or thermocouple.
CAUTION: Bumping the thermocouple can push it
out of the firing chamber. This could cause an overfire!
The controller does not contain an alarm to detect this
type of failure. Bumping the thermocouple could also
cause inaccurate readings.
Thermocouples come in different widths. The wider the
thermocouple, the farther it should extend into the firing
chamber. A ½” - ¼” diameter thermocouple should extend
into the firing chamber about 1”. A
1
8
” thermocouple
should extend into the chamber ½” -
5
8
”. (Do not be con
-
cerned if your thermocouple extends into the firing cham
-
ber even farther.)
Keep shelves, posts and ware 1” - 1 ½” away from the
thermocouple. Keep an extra thermocouple on hand, es
-
pecially if you fire hotter than 2000°F / 1093°C.
5