
Operating instructions


brating controllers. Thus, it remains a reliable calibration
standard.
Note: The temperature at which you calibrated your
digital pyrometer should be the same temperature you
use to check the controller’s temperature readout. Ex
-
ample: If you took a reading from a reliable source at
2000°F, you should check your controller reading at
around 2000°F.
Mount the thermocouple of the calibrated pyrometer in
the firing chamber near the Sentry’s thermocouple. With
the Sentry on hold, compare readings between the Sentry
and the calibrated pyrometer. Adjust Thermocouple Off
-
set to compensate for any temperature difference between
them.
Note: You can also return your controller to the fac
-
tory to have it calibrated on certified test equipment.
Setting Thermocouple Offset
You can enter a temperature change up to 45°F / 25°C
higher or lower than the zero factory setting.
From ,press repeatedly until
appears.
Press . , or a thermocouple offset
number, will appear.
Using the and keys, enter the new offset. (See
chart below.) Press . will appear. To
return to , press .
Thermocouple Offset Settings
°F Setting °C Setting Result
C 0 C 0 No adjustment
H 1-45 H 1-25 Kiln will fire hotter
C 1-45 C 1-25 Kiln will fire cooler
Thermocouple Offset Examples
Setting Result
H 1 Kiln will fire 1° hotter
H 17 Kiln will fire 17° hotter
C 12 Kiln will fire 12° cooler
Multiple-Zone Thermocouple Offset
From ,press repeatedly until
appears.
Press . (top thermocouple) will ap
-
pear.
While displays, press . The other
thermocouple(s), then , will appear with
each press of the
key:
Three-zone kilns:
Two-zone kilns:
When the correct thermocouple appears, press
.
Using the and keys, enter the new offset. (See
charts above.) Press
. The thermocouple you
adjusted (i.e. ) will appear. Select another
thermocouple by pressing
or return to
by pressing .
CHG- / Selecting °F or °C
The controller operates in your choice of Fahrenheit or
Celsius temperature. In °C display, a lighted dot appears in
the lower right. In °F, it disappears. To switch from °F to °C
or vice versa:
From ,press repeatedly until
appears.
Press . Use the and keysto select or
.
After selecting one of the above, press . Press
to return to .
°F/°C Temperature Conversion Formula
Below are formulas for converting temperature be
-
tween °F and °C. Converting a firing rate requires a differ
-
ent formula than converting a firing temperature:
Firing Temperature
(Example: “Fire to 1600°F.” 1600°F = 871°C)
(°C x 1.8) +32 = °F
(°F-32) ÷1.8=°C
Firing Rate and Temperature Change
(Example: “Fire at 200°F per hour” or “Fire 200°F hotter.”
200°F = 111°C)
°C x 1.8 = °F
°F÷1.8=°C
TC / Thermocouple Type
Select Type-K, -S or -R Thermocouple
The Sentry can use Type-K, -S or -R thermocouples. If
you specialize in firings above 2200°F / 1204°C, you should
use the Type-S or -R. Type-K is best suited for tempera
-
tures below 2200°F /
1204°C.
The controller cannot
detect the type of thermo
-
couple installed in your
kiln. So if you change the
thermocouple to a differ
-
ent type, be sure to select
the new thermocouple
type in TC option.
Note: Ask your kiln supplier if you are not sure about
the type of thermocouple in your kiln.
CAUTION:
If you select Type-S or -R,
but your kiln is wired with a Type-K, your kiln will
underfire. If you select Type-K and your kiln is wired
with a Type-S or -R, your kiln will OVERFIRE. After
15
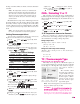
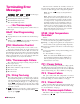
The S-Type thermocouple has a ce
-
ramic sheath. Most K-Type
thermocoupleshave a metalsheath.
S-Type
K-Type