
Operating instructions


Note: After the kilnfires to completion, disconnectthe
power. It is okay to turn off the power to the controller
while the kiln cools to room temperature.
Note:
(See page 25 to find version) If appears
immediately after you press , it is because all
programmed temperatures are lower than the current
kiln temperature. If the alarm sounds (see page 12),
and then the kiln fires to completion, you will see
instead of . Press . will
appear.
Repeat Firings
To repeat the last firing, press from . The
kiln will begin firing. This works in both Cone-Fire and
Ramp-Hold. But first, make sure you are repeating the cor
-
rect firing by using Program Review (see page 7). For re
-
peat firings that you don’twant toinadvertently change, see
Program Lock, page 24.
Thermocouple Inspection
The small rod protruding into the firing chamber is the
temperature sensor, or thermocouple.
CAUTION: Bumping the thermocouple can push it
out of the firing chamber. This could cause an overfire!
The controller does not contain an alarm to detect this
type of failure. Bumping the thermocouple could also
cause inaccurate readings.
Thermocouples come in different widths. The wider the
thermocouple, the farther it should extend into the firing
chamber. A ½” - ¼” diameter thermocouple should extend
into the firing chamber about 1”. A
1
8
” thermocouple
should extend into the chamber ½” -
5
8
”. (Do not be con-
cerned if your thermocouple extends into the firing cham-
ber even farther.)
Keep shelves, posts and ware 1” - 1 ½” away from the
thermocouple. Keep an extra thermocouple on hand, espe
-
cially if you fire hotter than 2000°F / 1093°C.
If you are using a portable, separate controller, you will
need to install the thermocouple onto the kiln. See the sep
-
arate TnF 2 installation instructions.
Preventing an Overfire
Even though a digital controller turns off the kiln auto
-
matically, you should monitor the kiln during firing. This is
to prevent a possible overfire.
Remain nearby while the kiln is firing. Check the
kiln occasionally.
Set the temperature alarm (page 7) to remind
yourself to check the kiln. If you are too far awayto
hearthe alarm, you might try using ababy monitor.
After the kiln fires to completion, disconnect the
power. It is okay to turn off the power to the con
-
troller while the kiln cools to room temperature.
Chapter 2
The Keys
Correcting Entries
If you enter the wrong temperature, cone, time, etc.,
while programming, enter 0000. Then enter the correct
numbers before pressing . See also the Stop/Back
Key, page 9.
Canceling a New Program
If you do not touch the keys for one minute during pro
-
gramming, the controller will go back to the display.
The controller will also discard the program you were en
-
tering and will retain the previous program in memory.
This is useful if you change your mind during program
-
ming and decide to keep the previous program. Instead of
completing the new program, wait a minute and let the con
-
troller return to .
1/Cone-Fire
Cone-Fire is a method of firing ceramics to a pyrometric
cone. See Chapter 3, page 10, for details. To find out if your
Sentry includes Cone-Fire:
From display, press .If appears,
you have Cone-Fire mode. If the key does not re-
spond, you have Ramp-Hold mode only.
Press to bring thecontroller back to .
2/AddTime
This key adds five min
-
utes to a Hold. It is designed
for ceramists who watch wit
-
ness cones and for glass art
-
ists who inspect the glass
near the end of firing.
During a firing, press
. , and time in
hold, will appear.
Press again.The time
shown will increase by 5 minutes.
To return to the temperature display, press
or wait 1 minute.
Note: Add Time will add 5 minutes to hold even if no
hold had been programmed.After hold time displays, 5
minutes are added with each press of the key.
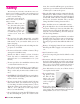
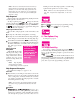
6 Cone-Fire / Ramp-Hold
With the Add
Time (2) button,
you can add time
to a hold. With
the editing fea
-
ture (4), you can
change both
target tempera
-
ture and hold.