Sentry 2.0 Digital Temperature Controller Cone-Fire / Ramp-Hold Operating Instructions Cone-Fire (pg 10-13) See pages 34 - 35 for instructions on upgrading your DTC From IdLE, press 1. Enter cone number, speed, pre-heat, hold, and slow cool. 100, 600, 800 or 1000 series board to the Sentry. From IdLE, press 3. Enter time in hours:minutes. Delays the start of firing. Ramp-Hold (pg 14-18) From IdLE, press 4. Add Time (pg 6) Select stored program (1 - 4).
Introduction Thank you for purchasing the Sentry micro processor, our most advanced generation of digital temperature controllers. As you read the manual, have your controller in front of you so that you can try out the keys. Do not worry if you hear a clicking noise during operation. Mechanical relays click as they turn the heating elements on and off. The controller display messages are limited to four characters.
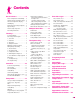
Contents Basic Pointers . . . . . . . . . . 5 Room Temperature and Humidity. . . 5 Thunder Storms and Power Surges . 5 Time and Temperature Display . . . . . 5 IdLE Display. . . . . . . . . . . . . . . . . . . . 5 CPLT Message: Firing Completed . . 5 Repeat Firings . . . . . . . . . . . . . . . . . . 6 Thermocouple Inspection . . . . . . . . . 6 Preventing an Overfire . . . . . . . . . . . . 6 The Keys . . . . . . . . . . . . . . . 6 Correcting Entries . . . . . . . . . . . . . . .
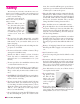
Safety tions, the controller will interpret a power interruption as a power failure and turn the kiln back on when you reconnect the power. Follow these safety rules in addition to the ones in your kiln or furnace manual: Place the kiln on the stand recommended by the manufacturer. When a kiln is safety tested by UL, the lab fires the kiln on the stand designed for the kiln. Cinder blocks or bricks can inhibit the flow of air under the kiln. They can also change the kiln’s heating characteristics.
Time and Temperature Display Chapter 1 Basic Pointers Two Firing Modes The Sentry fires in two modes: I , based on pyrometric cones (page 10). Quickly program a firing by selecting a cone number and firing speed. I with custom firing rates and target temperatures is for ceramists who want to design their own firing schedules (page 14). Ceramic kilns use both Cone-Fire and Ramp-Hold. Heat treating, glass fusing, and enameling furnaces and kilns come with Ramp-Hold only. From display, press .
Note: After the kiln fires to completion, disconnect the power. It is okay to turn off the power to the controller while the kiln cools to room temperature. Chapter 2 The Keys Note: (See page 25 to find version) If appears immediately after you press , it is because all programmed temperatures are lower than the current kiln temperature. If the alarm sounds (see page 12), and then the kiln fires to completion, you will see instead of . Press . will appear.
perature at the original rate. (You cannot edit the rate, however.) During firing, press . 3 / Delay Fire This delays the start of the firing by the amount of time entered. Use it to fit a firing into your schedule or to take advantage of lower electric rates at night. Delay zeroes out after each firing. Therefore, it must be programmed again for each firing. The maximum delay is 99 hours and 59 minutes. The display will show the target temperature of the current segment.
When the alarm sounds, shut it off by pressing any key except . (Pressing while an alarm sounds will shut off the kiln.) 7 / Temperature Alarm The alarm sounds and flashes when the kiln reaches the alarm temperature that you enter. Use the alarm to alert you to— I Lower the lid from venting position. I Check the witness cone near shut-off time. I Check the fusing or slumping of glass. Use the alarm to remind yourself that the kiln is getting close to the shut-off temperature.
Note: Do not be concerned if the actual cone shut-off temperature does not match the Cone Table. The temperature of a cone varies with firing speed. The cone temperatures in Cone Table are for self-supporting cones fired at a rate of 108°F / 60°C per hour during the last hour of firing. bending at 2150°F. Use Skip Segment to end the firing segment and begin the one for slow cooling. Note: Make a note of the temperature at which the cone bent. Program that temperature for the next firing.
seeing the cones, you will know how the firing is actually progressing. Chapter 3 Cone-Fire Cone-Fire mode is based on pyrometric cones. It is not designed for heat treating, glass fusing and enameling. For these firings, see “Ramp-Hold,” page 14. Use Ramp-Hold to fire ceramic pieces that require a custom firing schedule, such as some types of stoneware sculpture or crystalline glaze.
Firing time in each segment is approximate and depends on the age of elements, voltage, size of load, and the firing speed you have chosen. CAUTION: Cone numbers beginning with 0 are lower in temperature than those without the 0. When programing a Cone-Fire, be sure you know the difference between an 05 and 5. See “Temperature Equivalents Chart for Orton Self-Supporting Pyrometric Cones,” Appendix D, page 36. Low Fire Cones 022 - 011 This range includes decals, over-decorations, lusters, and golds.
High Fire Cones 1 -10 This is the firing range for porcelain and stoneware. These bodies fire nearly to vitrification and can shrink up to 16%. Water, carbon and sulfur burn out during the early stages and must be vented. The amount of oxygen in the kiln affects the color of the fired clay. The high fire schedule below slows down during the last 210°F/100°C to produce better density in the ware. Typical porcelain clays are formulated from kaolin, feldspars, silica and ball clays.
Hold (HOLd) Cone-Fire Hold heat-soaks the ware at the cone temperature at the end of the firing. Without Hold, the kiln shuts off after it reaches the cone temperature. Hold maintains the cone temperature for the period you specify. Hold helps even out the temperature throughout the kiln. It also helps the heat to penetrate completely into the clay. (Rapid firing is like cooking: the turkey will be done on the outside Do not leave the but not on the inside.
Chapter 4 Ramp-Hold Before using Ramp-Hold, read all of this chapter. Have your controller in front of you so that you can try out the keys as you read. Theory of Ramp-Hold Operation The temperature you are firing to in Ramp-Hold is called the target temperature. After the Sentry reaches the target temperature, it can also hold that temperature. The Sentry fires at a controlled heating rate. The rate is figured in degrees per hour.
Each time you store another program, select the next available number, such as 2, at the prompt. Selecting a number for a new program over-writes (erases) any program stored there. Write down your user programs for quick reference. (Make copies of the blank form on page 37.) Note: For repeat firings that you don’t want to inadvertently change, see Program Lock, page 24. Firing a Stored User Program After you enter a new program and the display shows , the new program is in memory and ready to fire.
Note: In Program Review, a heating rate of 9999 is displayed as . When a kiln is heated at full power, it may overshoot the target temperature, especially in the lower range. To avoid this, add an extra segment with a slower rate for the last 50 degrees of temperature rise. CAUTION: The Sentry includes error messages to warn you when the kiln is at the wrong temperature. Firing the kiln at full rate turns off some of these warnings.
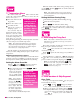
Using the programming instructions on page 15, enter this firing schedule. Then use Program Review to check for accuracy. Sculptured Stoneware Bisque Firing Schedule, Cone 04 Rate °F/°C Temp. °F/°C Hold 1 60/33 200/93 03.00 2 80/44 700/371 02.00 3 80/44 1100/593 00.00 4 108/60 1945/1062 00.00 5 150/83 1400/760 00.00 Segment This slow firing is for thick stoneware. Change the target temperature in segment 4 when firing to a different pyrometric cone. The ware should be bone dry.
Glass Slumping Firing Schedule Segment Rate °F / °C Temp. °F / °C Hold 1 250 / 138 750 / 398 00.00 2 900 / 500 1250 / 676 00.30 3 9999 / 9999 1050 / 565 00.00 4 150 / 83 750 / 398 00.00 Stained glass, 1 8", 2 fused layers, 12" circular pieces, slumped into a bowl. Set the alarm to 500° F. When the alarm sounds, close the lid from venting position and insert peephole plugs. Set the alarm again, this time to 1150° F. When it sounds, check the glass through the peephole.
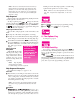
I When the Sentry sends a signal to the relays, all three lights appear. I The top light indicates power to the top section of the kiln. The bottom light indicates power to the bottom section. Ignore the center light. I The top light indicates power to the top section, the middle light is power to the middle section, and the bottom light is power to the bottom section. When a zone temperature is too low, its indicator light will flash rapidly.
First, program a Cone-Fire. I Keep shelves 1” - 1 ½” away from the thermocouple. After programming a Cone-Fire, will appear. From , press until appears. I Keep witness cones at least 2” away from heating elements. I Place witness cones in several locations in the kiln. Press . Use the or this selection: How to Use Cone Offset Cone Offset changes the shut-off point of the cone by the degrees of temperature shown in the chart below.
Note: The thermocouple must protrude into the firing chamber the correct distance: 1” for ¼”wide thermocouples, 1 2" - 5 8" for 1/8” wide thermocouples. The cone bent too far: Use a negative Cone Offset for a cooler firing, such as -10 (°F). Note: Do not be overly concerned with achieving an exact 6 o’clock bend. The difference between a 3 o’clock and a 6 o’clock bend is only a few degrees.
Thermocouple Offset Settings °F Setting °C Setting C 0 C 0 H 1-45 H 1-25 C 1-45 C 1-25 °C x 1.8 = °F Result No adjustment Kiln will fire hotter Kiln will fire cooler °F ÷ 1.8 = °C TC / Thermocouple Type Select Type-K, -S or -R Thermocouple The Sentry can use Type-K, -S or -R thermocouples. If you specialize in firings above 2200°F / 1204°C, you should use the Type-S or -R. Type-K is best suited for temperatures below 2200°F S-Type / 1204°C.
pre-20A software: Select appears.) From Press or or or , press appears. —whichever repeatedly until . Use the and keys to select . After selecting one of the above, press to return to . . Press RATE / Types of Rates Note: This feature is included on controllers with software version 18D or newer. To look up your software version, see the SOFT option, page 25. The standard method of programming firing rate is degrees of temperature change per HOUR.
Id / Computer ID Enter an ID Number for Connection to a Computer This feature is for assigning an identification number, from 1 to 15, to the controller. It is used only for hookup to a personal computer, which requires an optional kit. From , press appears. repeatedly until Press . Use the and keys to select an ID number from 1 to 15. Press . Press to return to .
Note: Program Lock does not save a Delay setting. While a program is locked, you can enter a new Delay. From , press appears. Press . will appear. repeatedly until (locked) or To change the setting, press Press . Press (unlocked) 3 times. to return to CFG / Configuration Code . From , press repeatedly until appears. Press . The factory configuration code will appear. Press . Press to return to . The configuration code can be changed only at the factory.
Chapter 7 Error Messages I I I Press to silence the alarm. (Do not press to silence the alarm.) The error message will remain but the kiln will continue firing. Even though the following error messages appear, the kiln will continue its normal operation. The messages are only to alert you that the kiln could not cool or heat as fast as you had programmed. But they will not shut off the kiln or affect the firing in any way.
Terminating Error Messages and turn off the kiln and flash the following: I Total firing time in hours and minutes I The kiln shutoff temperature I The current kiln temperature Note: To avoid slower rate. After the controller was plugged in, it could not detect a thermocouple. BAdP / Bad Programming Causes: I A program has been entered with 0 rate in the first segment of a Ramp-Hold firing.
TCdE / Uneven Multiple-Zone Temperatures The zones of a multiple-zone kiln are firing unevenly. Causes: I A burned out element or relay I The thermocouples and elements are improperly wired. A thermocouple is turning on the elements to the wrong zone. For instance, if the top thermocouple turns on the bottom elements, the kiln will fire out of balance. When zones are out of balance by 180°F / 100°C, will appear in the display.
Frequently Asked Questions Does the increase in Ramp-Hold temperature assume a one hour time period? Yes. When you program the rate, you are telling the controller how much the temperature needs to go up or down per hour. A car’s speedometer measures speed in miles or kilometers per hour. To understand temperature rate, think of a speedometer that measures temperature change per hour instead of miles. This applies to both heating and cooling rate.
Appendix A: Display Messages Message Definition Page Reference Abort 5 Alarm 8, 11, 15, 29 The firing was stopped. ALAR appears either when you are entering an alarm temperature or when the alarm is sounding during a firing. To stop an alarm, press any key except STOP. If the alarm goes off when you first begin firing, it is because it was set for a lower temperature than the present temperature.
Message Definition Page Reference Message Definition Page Reference Kilowatts 8, 23 Missing Pin 27 In Cone-Fire programming, if you press ENTER when SLOW appears, the kiln will program to fire at slow speed. Program Lock 24 This option gives the version of software loaded into your Sentry. The controller can figure the cost to fire your kiln if you supply your kiln’s wattage. (See the data plate on the switch box.) Divide wattage by 1000 to get kilowatts.
Appendix B: Preset Standard Cone-Fire Schedules - °F These are the firing schedules programmed in Cone-Fire mode. To customize a schedule, write down your changes. Then load your new schedule into Ramp-Hold. Low Fire Cones °F Cone 022 021 020 019 018 017 016 015 014 013 012 011 Segment 1 Rate 1 Temp. 1 396 979 396 1004 396 1051 396 1144 396 1211 396 1252 396 1314 396 1348 396 1377 396 1431 396 1474 396 1499 Medium Fire Cones °F Cone 010 09 08 07 06 05 04 03 02 01 Segment 1 Rate 1 Temp.
Appendix B: Preset Standard Cone-Fire Schedules - °C These are the firing schedules programmed in Cone-Fire mode. To customize a schedule, write down your changes. Then load your new schedule into Ramp-Hold. Low Fire Cones °C Cone 022 021 020 019 018 017 016 015 014 013 012 011 Segment 1 Rate 1 Temp. 1 220 526 220 540 220 566 220 618 220 655 220 678 220 712 220 731 220 747 220 777 220 801 220 815 Medium Fire Cones °C Cone 010 09 08 07 06 05 04 03 02 01 Segment 1 Rate 1 Temp.
Appendix C: Upgrading Instructions Upgrading the DTC 100, 600, 800 & 1000 Series to the Sentry Unplug the kiln or disconnect the power. Remove the 4 screws holding the controller faceplate to the switch box. Gently remove the old controller. Disconnect the wires from the old controller. I f you r k i l n i s top-loading and originally came with a DTC 100 or 600, the heat shield inside the switch box may need to be moved to give more clearance for the new Sentry controller.
Appendix D: Temperature Equivalents For Orton Self-Supporting Pyrometric Cones °F Cone Number Heated at: 022 021 020 °C Self-Supporting Cones 27° F 108° F 270° F Per Hour* Per Hour* Per Hour* — 1087 1094 — 1159 1180 — 019 1213 017 1301 018 016 015 014 013 012 011 010 09 08 07 06 05 1/2 1267 1368 1382 1395 1485 1549 1575 1636 1665 1692 1764 1798 1839 1112 1252 1319 1360 1422 1456 1485 1539 1582 1607 1657 1688 1728 1789 1828 1859 Pre-Fire Color Cone Number Green 022 Orange 020 114
Appendix E: User Program Records Date_______________________________ User Program 1 Rate °/Hour Target Temperature Date_______________________________ Hold Time Hours.Mins Optional Fan On / Off User Program __ Rate °/Hour Target Temperature Hold Time Hours.Mins rA1 1 Hd1 . rA1 1 Hd1 . rA2 2 Hd2 . rA2 2 Hd2 . rA3 3 Hd3 . rA3 3 Hd3 . rA4 4 Hd4 . rA4 4 Hd4 . rA5 5 Hd5 . rA5 5 Hd5 . rA6 6 Hd6 . rA6 6 Hd6 . rA7 7 Hd7 . rA7 7 Hd7 . rA8 8 Hd8 .
Index A AbRT, 5 Add Time, 6 ALAR, 11, 15 Alarm, 6, 8, 15, 17, 22, 24, 29 AOP, 1, 13, 15 - 16, 22, 25 Auxiliary Output, 22 B baby monitor, 6, 8 BAdP, 27 C Celsius, 5, 22 CFG, 1, 25 CHG-, 1, 22 clicking, 2, 8 Cone Offset, 20 Cone Table, 8 Cone-Fire, 6, 10 - 11 controlled cooling, 15 - 16 COOL, 7, 11, 13 COST, 1, 8, 23 CPLT, 5, 23 D DELA, 11, 15 Delay, 7 DIFF, 25 E ELEC, 1, 24 electrical cost, 2, 8, 23 Element Test, 1, 25 Enter/Start, 9 ETH, 27 F Fahrenheit, 5, 22 FAIL, 5, 18, 27 FAN, 21 firing schedule,
Appendix F: Sentry Ramp-Hold Shorthand Instructions After you press the keys in the left column, the message to the right will appear. (See also page 15.) KEYS TO PRESS DISPLAY COMMENTS PROGRAM AND FIRE THE KILN. Apply power to kiln Press Enter if IdLE does not appear. 4 Enter program number. A number from 1 to 9 Program number appears. ENTER Enter rate of segment 1. Rate Rate appears. ENTER Enter temperature of segment 1. Temperature Temperature appears. ENTER Next, enter hold time.
Appendix G: Sentry Cone-Fire Shorthand Programming After you press the key(s) in the left column, the message to the right will appear. Press from respond, your controller does not have Cone-Fire. (See also page 11.) KEYS TO PRESS DISPLAY . If the key does not COMMENTS Apply power to kiln Press Enter if IdLE doesn’t appear. 1 Enter the cone number. Cone # (i.e. 05) ENTER Enter the firing speed. 1(Fast), 2 (Med.), or 3 (Slow) The firing speed appears. ENTER Enter Pre-heat time.