
Operating instructions

Page 16 of 34
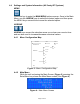
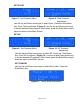
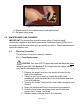
Figure 14C
IMPORTANT! The CPR pull is designed to attach to the controller
with a specific orientation. Make sure you align the CPR pull key
with the CPR receptacle on the controller and that the CPR label is
visible from the front:
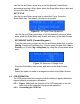
1. ALWAYS align the CPR “key” with the key on CPR receptacle.
2. Completely insert the CPR pull until a “click” is heard. (See
Figures 14A, 14B, 14C).
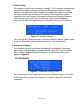
4.5.3 To release the CPR pull, place your thumb and opposing finger on
the release tabs located on the TOP and BOTTOM of the CPR pull
and completely depress both tabs simultaneously as shown in
Figure 14B.
4.5.4 With both tabs depressed, pull the CPR pull away from the
controller to deflate the mattress. The rate of deflation is dependent
on the weight of the patient. (See Figure 14C).
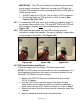
4.5.5 CPR Hose Replacement/Repair
Follow the steps below for proper CPR hose replacement:
NOTE: The CPR hoses are color coded for ease of replacement. It is
very important to reconnect the hoses in the proper location for the
Sentry/ST SYSTEM to function correctly.
1. Remove the CPR Pull from the controller according to Step
4.5.3-4.5.4 above.
2. Hold the CPR Pull in one hand and pull the hose needing
replacement until the white connector and hose separate and
come loose from the CPR. Retain connector to re-use in Step 7.
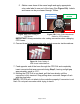
3. Remove the other end of the hose from the connector inside the
mattress.
4. Remove tubing wrap and discard unwanted hose.
Figure 14A
Figure 14B