
User's Manual


Rev S-00001-20051010-1 Page 11 of 15
4 Using the SmartStud Adhesive
There are three major points or requirements that must be accounted for when using the
SmartStud adhesive. Verify that the following criteria can be met before proceeding with the
installation.
• WORK QUICKLY: After the first application, do not let it sit static for more then 30
seconds before the next application.
• NO MOISTURE: There must be absolutely no moisture on the applied surface.
• TEMPERATURE: For a 24 hour period after the installation, the temperature CANNOT
drop below freezing.
Required Material
If items ii., iii, and iv, did not come with the SmartStud Adhesive package, contact customer
service at
support@sensysnetworks.com.
i. Safety glasses and gloves.
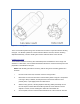
ii. Tube of SmartStud Adhesive (PN EPX100)
iii. Mixing Nozzle
iv. Small “D” shaped metering Nozzle
v. Adhesive applicator (PN EPX101)
vi. Bag or box for the initial dispensing of adhesive material.
Adhesive Tube Integrity Check
i. Remove adhesive from the packaging
ii. Rotate Adhesive tube back and forth, and verify that moving air bubbles signifying
free flowing material
iii. Let adhesive stand upright for 5 to 10 minutes, to allow air bubbles to rise to the top.
Attach Mixing Nozzle and Flow Meter
i. Remove and retain black screw cap.
ii. Some versions have a steel seal washer, which should be discarded.
iii. Remove the two “D” shaped black plugs, and clean any debris from the exposed
outlets.
iv. Insert the “D” shaped metering plug into the smaller of the two tubes (The tube that
contains the brownish/yellowish solution). Verify that the metering plug is secure.
v. Take the mixing nozzle, and fit it over the end of the adhesive tube. (It will not stay
without the black screw cap from step i.)
vi. Thread the black cap (from step i) though the mixing nozzle, and screw it back on.